

One Room Challenge Week 3 – Demoing and Rebuilding my Banisters
We’ve reached the halfway point of the One Room Challenge! I’m seriously trying to figure out if I am more in the weeds than last year, or if I just completely blocked all of that out and only remember the feeling of accomplishment. I think I severely under-estimated the amount of finishing work and painting I have taken on this time, but I keep trying to remind myself that I can always paint into the wee hours of the morning as long as I have everything installed – and that’s what week 3 was all about! If you missed my first two posts you can check them out below:
Week 1 / Week 2 / Week 3 / Week 4 / Week 5 / Week 6
(Some of the links included in this post are affiliate links, meaning, at no additional cost to you, I will earn a commission if you click through and make a purchase)
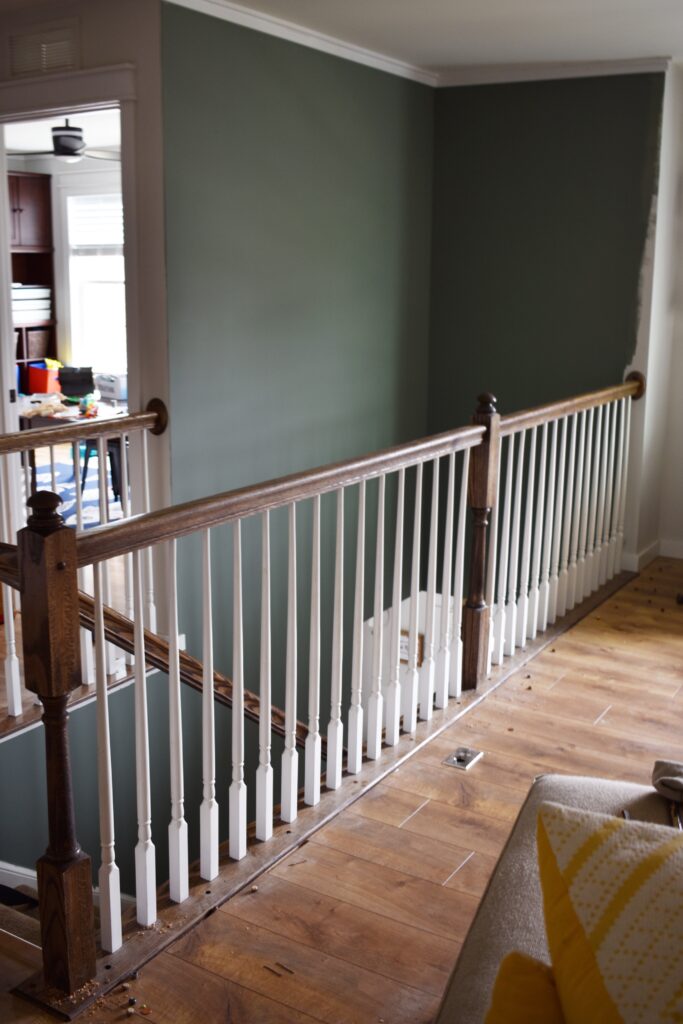
Going into this challenge the most never-wracking aspect was replacing the builder grade banisters along the staircases and the edge of the loft. I always like to tackle the scariest part of a project first just in case I have to come up with a plan B or call in some extra help – and unfortunately with this step I wouldn’t know what I was getting into until I started taking things apart. I always try to do as much research as possible before I start something I’m unfamiliar with, but I quickly learned that there are lots of variables that come along with staircases and that the prep I could do was going to be pretty limited without knowing how the puzzle I was dealt was put together.
I’m going to break down the process that I used in the interest of sharing some of what I learned, but if you’re going to tackle a similar project just be aware that this isn’t a one size fits all solution and that as happy I am with the aesthetic I achieved, making these rails safer was my number one priority! I also captured as much as I could in some time lapse videos – hope you enjoy my dogs busting in at the end of Video 1 LOL
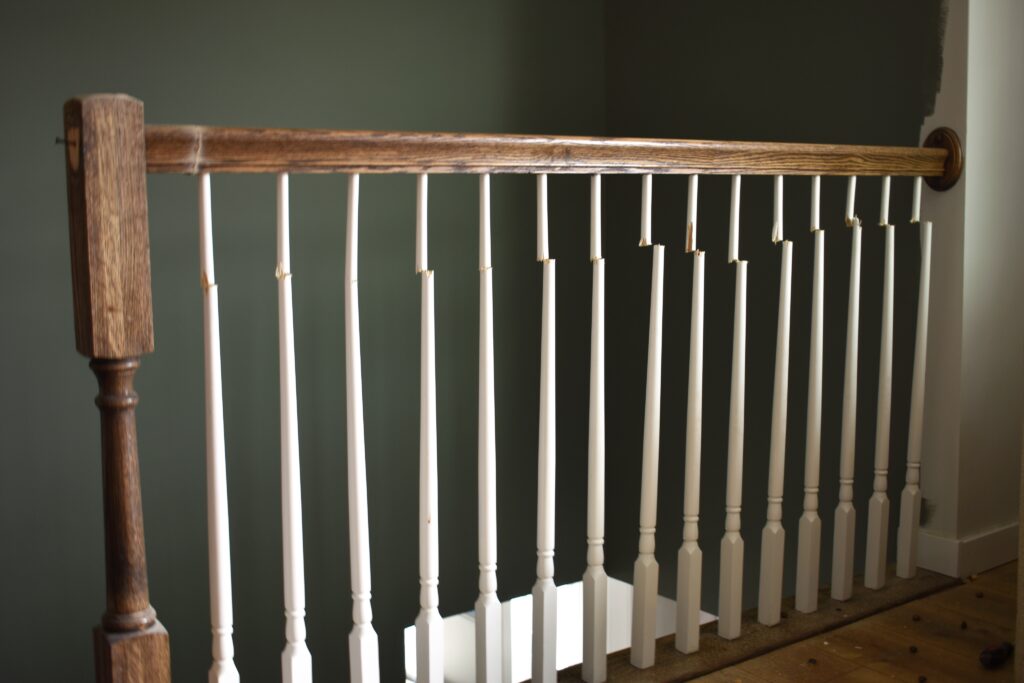
Step 1 – Demo the Existing Rails – I treated myself to a new tool for this step, a Ryobi Sawzill, and used that to remove the banister, balustrades, and the top of the newel post. I originally had planned on ripping out the whole post and using a 4×4 in place, but the bottom thread was too narrow for that so I decided to save myself some work and just wrap the original post instead. The balustrades also ended up being attached differently than I had planned and were held in place by screws that were so soft I could rip them out with just my hands (arrgggg); I ended up just knocking the screws out and hammering down any remnants as the new balustrades were going to go on top of them anyway.
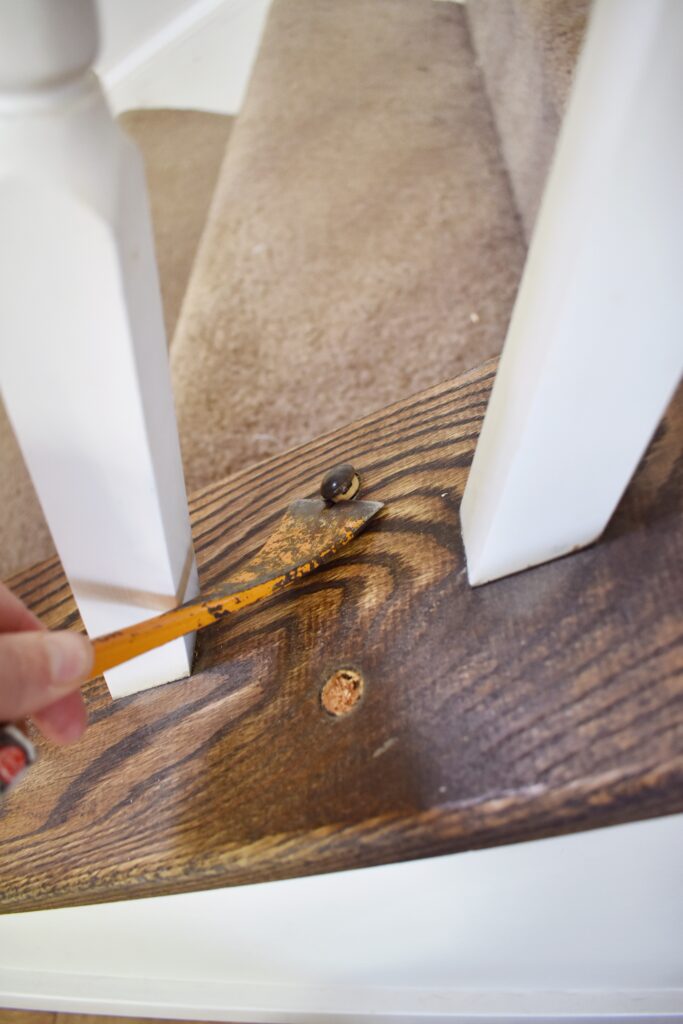
Step 2 – Prep for Install – I drilled some additional screws into the threads to tighten them up. I really hated the little wooden plugs that were there so I used wood filler instead and then sanded everything (including the wall hands rails which were staying) down lightly before 2 coats of SW Extreme Bond Primer and 2 coats of SW Emerald Urethane Trim paint.
Step 3 – Wrapping the Newel Posts – The end goal was to square off all of the railings so I started by building a box to go around the Newel post using a mix of MDF and 2x2s. I built three sides of each box and then added the 4th side after it was attached. Once in place I built up the upper and lower sections of the the box with some 1x2s, and then added a routed edge along the top to break things up. I built a similar box for the tops, but tweaked each depending on where the hand rails fell. Next up was my “favorite” cycle of sand – fill – sand – caulk – prime – paint (I am loving this 3m Prime and Patch for this project)
Step 4- Installing the Hand Rails – I chose this pretty poplar handrail from Lowes to compliment the straight lines of the new posts and then stained it to match our floors using one coat of Varathane Golden Oak and One coat of Miniwax Special Walnut. to attach them I was able to use the existing bolts that were on the banisters; I kept the end of the old handrails to use as a template to drill my holes in the side and bottom of the new handrail. Once I had the holes drilled I loosely installed them to figure out how high I needed to make my posts to get the handrails level and temporarily attached supports to the walls to keep everything in place. Lastly, I attached the handrails to the wall I using my Kreg Jig to make pocket-holes for a really tight grip.
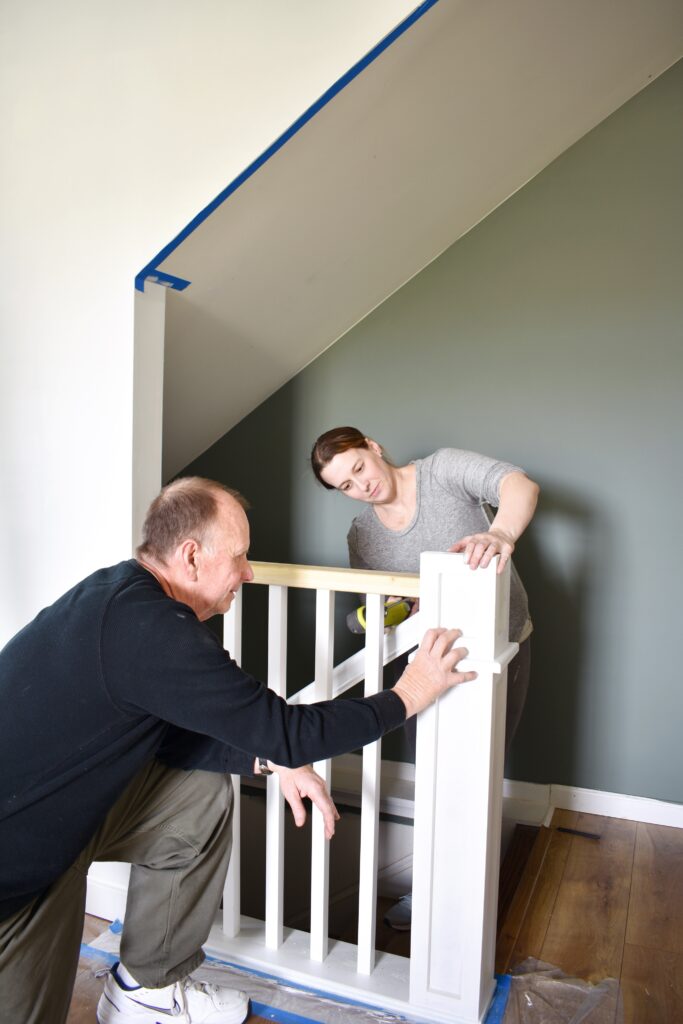
Step 5 – Installing the New Balustrades – This was a two man job so I called the best helper I know – my dad – to lend a hand. To make the install as easy as possible I cut the posts to length and drilled pocket holes in the top and bottom; since my pieces were square and will ultimately be painted white I felt this was the best way to get a really strong fit. I also cut some scrap wood to use as spacers and help keep things plum and even. After that, we were able to move down the line super quick. Afterwards I finished each off by filling the holes and then painting them to match the rest of the trim.
Step 6 – Installing the Newel Post Caps – For the tops of each post I used some pre-made wooden fence post caps from Home Depot. I attached a scrap piece of wood to the top of the newel post and the cap sits right on top of it, attached with some liquid nails and a few brad nails, followed by a quick sanding them primer and paint.
NOTE – How to deal with the Staircase Railing – To figure out the angle to cut your newel posts and balustrades on all you need is a really simple protractor like this one. Once you have that figured out just follow the same steps as above.
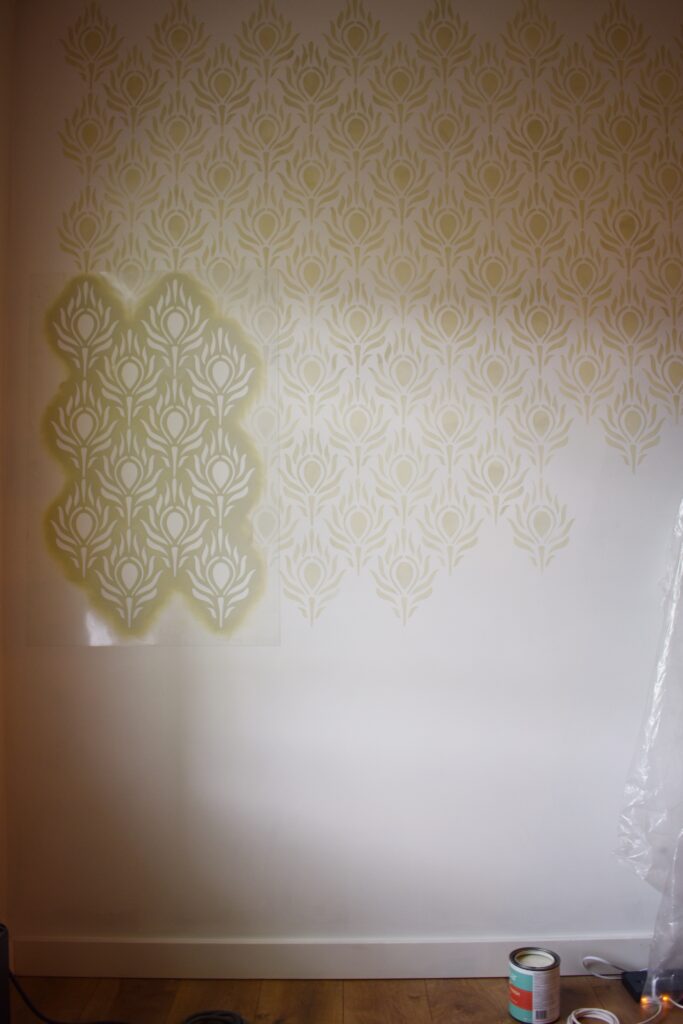
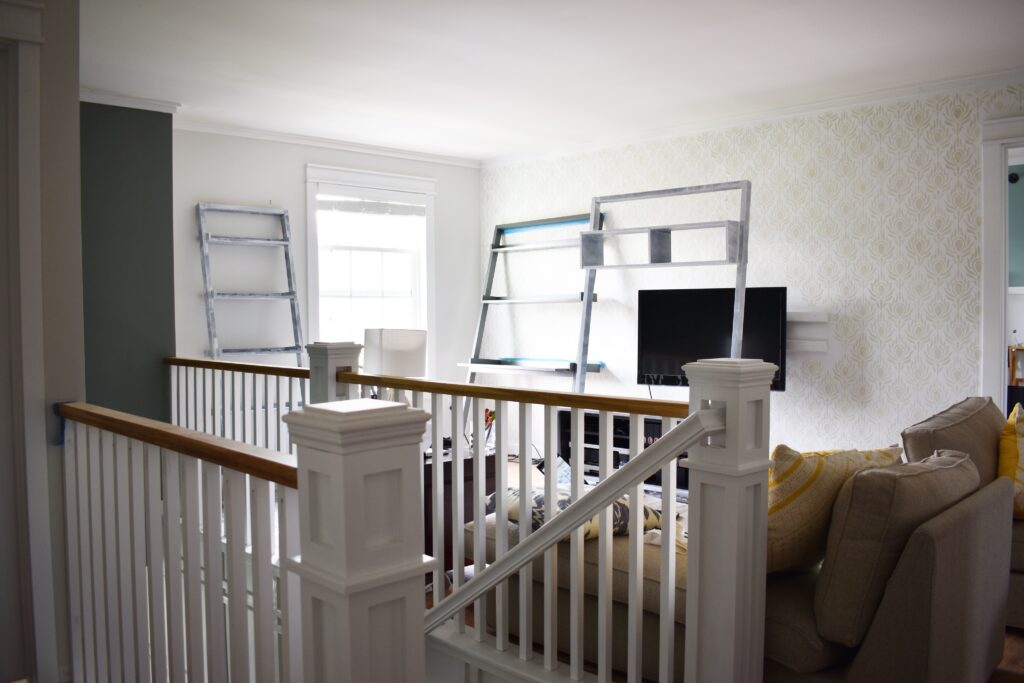
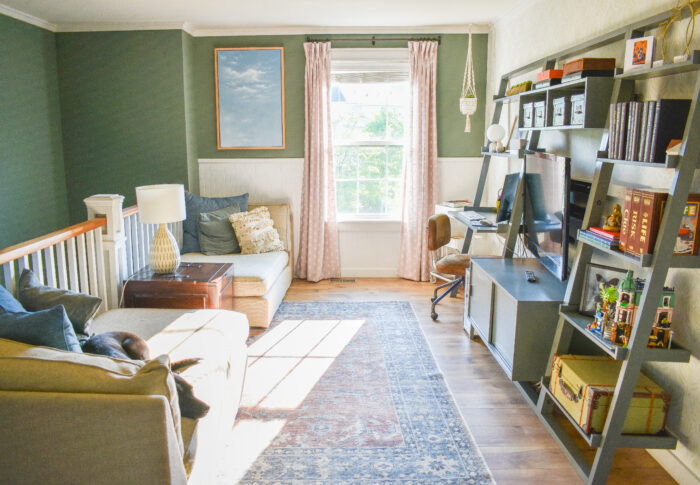
From start to finish the banisters alone have taken me these first three weeks and I just finished wrapping them up this Tuesday. Along the way I’ve also installed my grid walls downstairs and up the staircase (I’ll share more of them next week!), stenciled the wall in the loft with peacock feathers with this Royal Design Studio stencil, installed all of the crown and window trim, and built the leaning desk for the loft. I’ve still got two big projects left – the shiplap ceiling in the hallway and replacing the stairs – and the grid walls still have a ton of finishing to do, not to mention all of the final design details. I’m not going to say I feel great about where I’m at, but each day I’m feeling a little bit better.
Until next week, make sure you’re following my fellow guest participants to see what they’re up to this week, and come back next week to see if I’m sinking or swimming into the final push!

BETTER HOMES & GARDENS IS THE OFFICIAL MEDIA PARTNER OF THE ORC!

Comments
Very nice! Your DIY skills far surpass mine! Looking forward to my reveal!
Thank you Lauren! I tend to take on more and more DIY risks each time and am always happily surprised when they actually turn out : )
This is looking sooooo good! And I love to see a fellow DIYer really getting stuff done. Bravo! LOVE the stencil, too. So pretty!
Thank you so much for those kind words Angela! I always bite off a lot on the DIY front but I love to challenge myself each time with things I’ve never done before. I can’t wait to show more of that stencil next week!
WOW! Amazing job, it looks so good!! I definitely need to save this tutorial, I would love to replace our railing!
Thank you so much Meredith!!! I really appreciate it. It was definitely super intimidating when I started – a big puzzle that I didn’t know how to put back together until I took it apart! But really happy I took it on because it’s exactly what I wanted : )
Wow, Lindsey, you’ve done so much work this week! Every detail looks AMAZING! I can’t even get over the banister honestly it looks like a completely different space and don’t even get me started with that grid on the wall either – it’s stunning!
Isn’t it crazy how different it looks?? I didn’t really how that dark railing completely cut the height in half until I took it down!! I can’t wait to share more of the grid wall next week – finally onto the last coats of paint : )
Every week I get more and more excited to see your finally reveal!! Great job!
That is so wonderful to hear Christin! Knowing that there are others out there who are looking forward to seeing the final product other than me is the encouragement that keeps me going : )
Wow! What a difference that railing makes! Looks incredible! I look forward to seeing it all come together!
Thank you so much Allison! That dark railing was cutting the room in half so now it looks extra tall : )