

One Room Challenge Week 5 – A Modern Gallery Wall and DIY PB Inspired Mirror
One more week friends and it’s finally reveal time! Now’s the time of the One Room Challenge where I am basically running on fumes – but at the end of each day the finish line for each space is coming closer and closer into view. I’m holding back showing you how all of the pieces are coming together, but I really think it’s gonna be worth the wait when you see the final reveal next week!
Week 1 / Week 2 / Week 3 / Week 4 / Week 5 / Week 6
(Some of the links included in this post are affiliate links, meaning, at no additional cost to you, I will earn a commission if you click through and make a purchase)
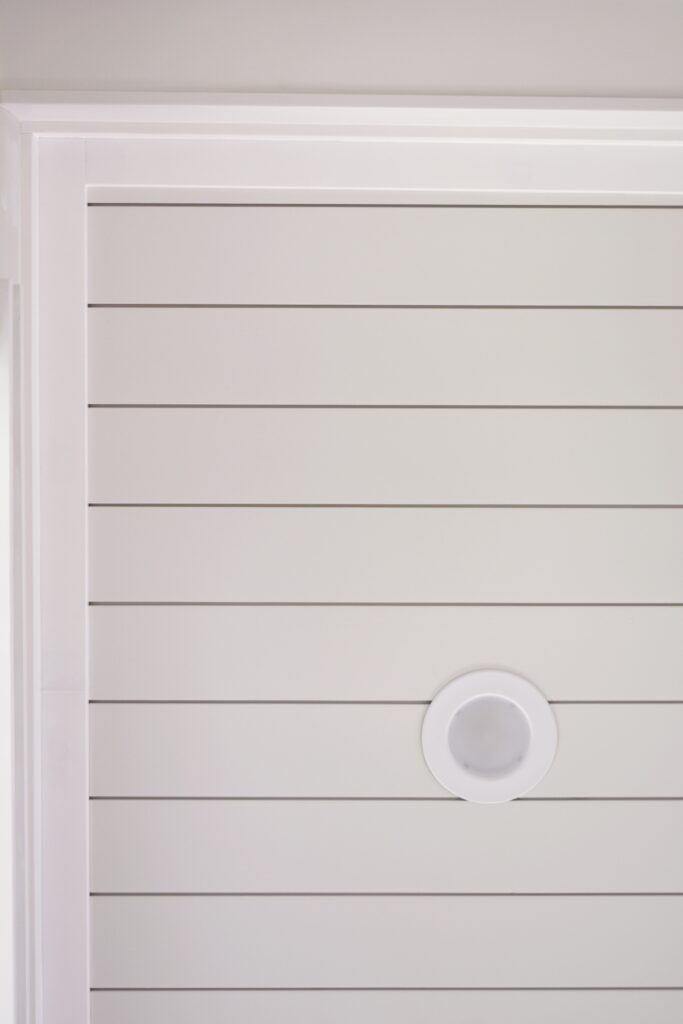
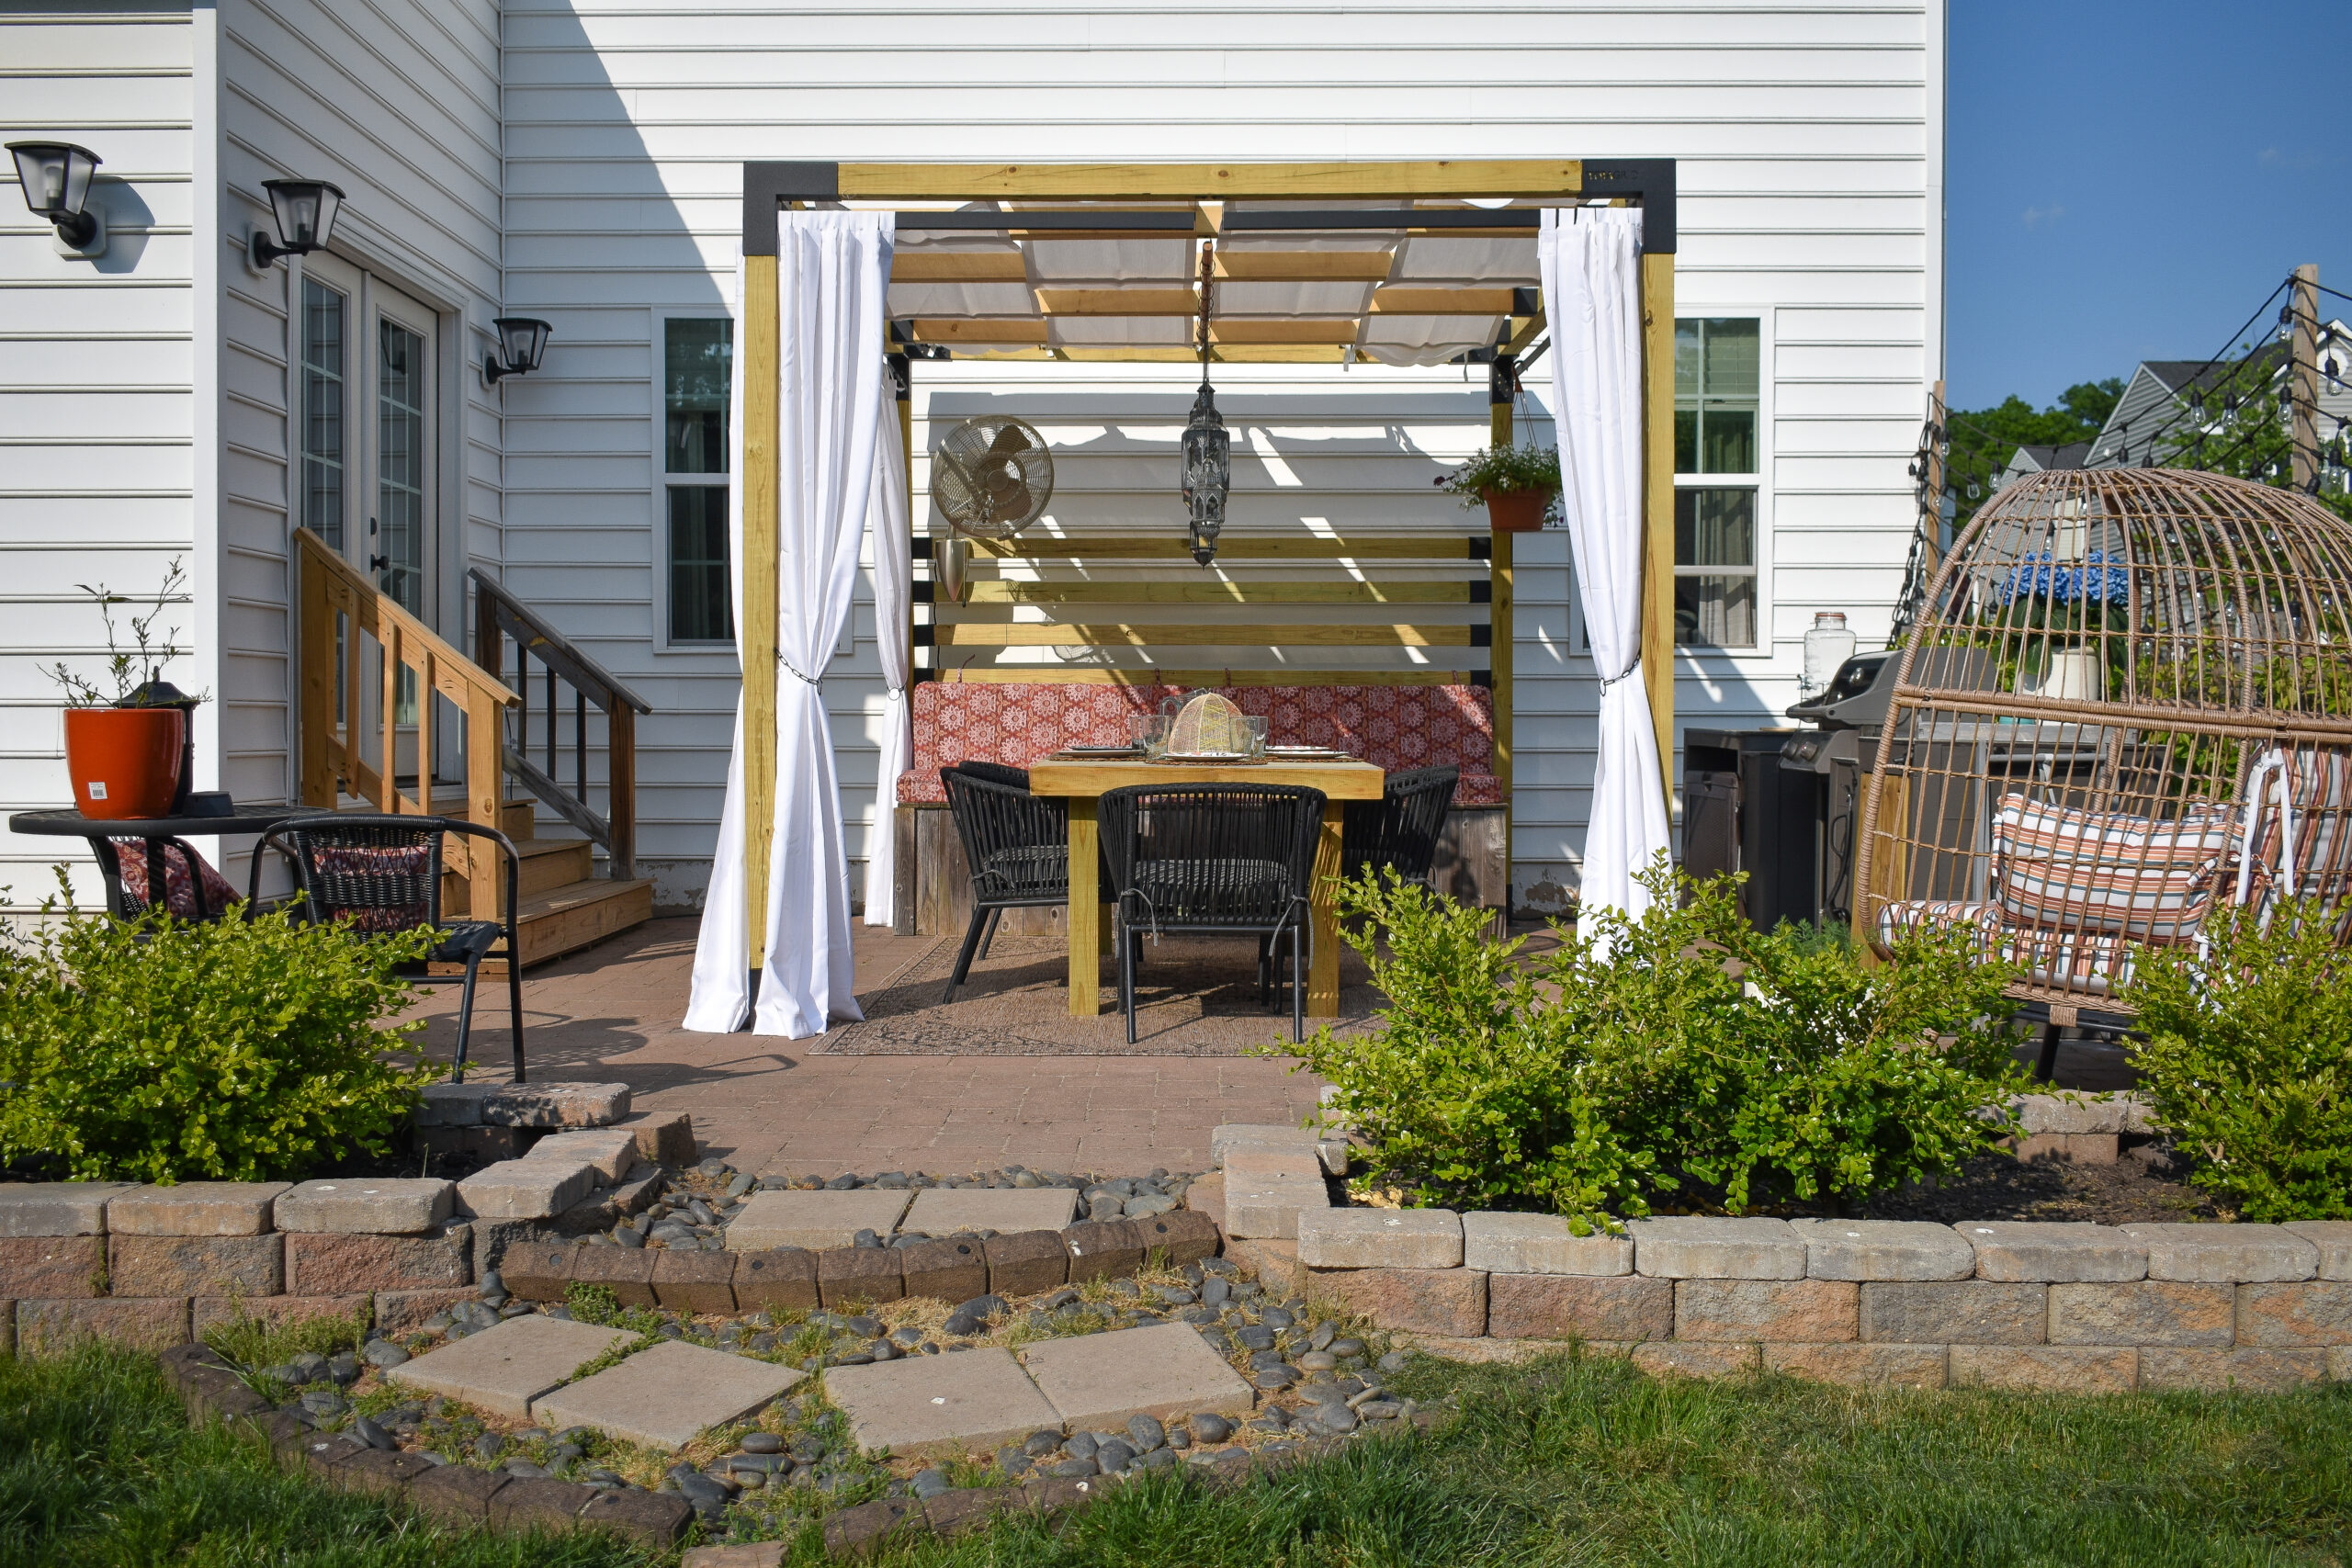
I actually took a few days off this weekend to spend some time with my boys in Hershey, PA, so I had to hustle to get one big project done before we left – and that project was installing the shiplap ceiling down the front hallway. I have been wanting to use this beautiful shiplap from Metrie for years and this was the perfect opportunity – it went up so easy that I had enough time to paint it and get the trim up before we left. I honestly had a bit of anxiety about not keeping it white, but it looks so dreamy painted the same color as the walls that that anxiety quickly went away.
This week I was also able to finally to check two of my smaller, but really fun, DIY projects off my list. And trust me, after 4 weeks of heavy lifting and non-stop painting it was a nice change of pace to tackle something I could knock out in a day or two!
Faux Hanging Gallery Wall
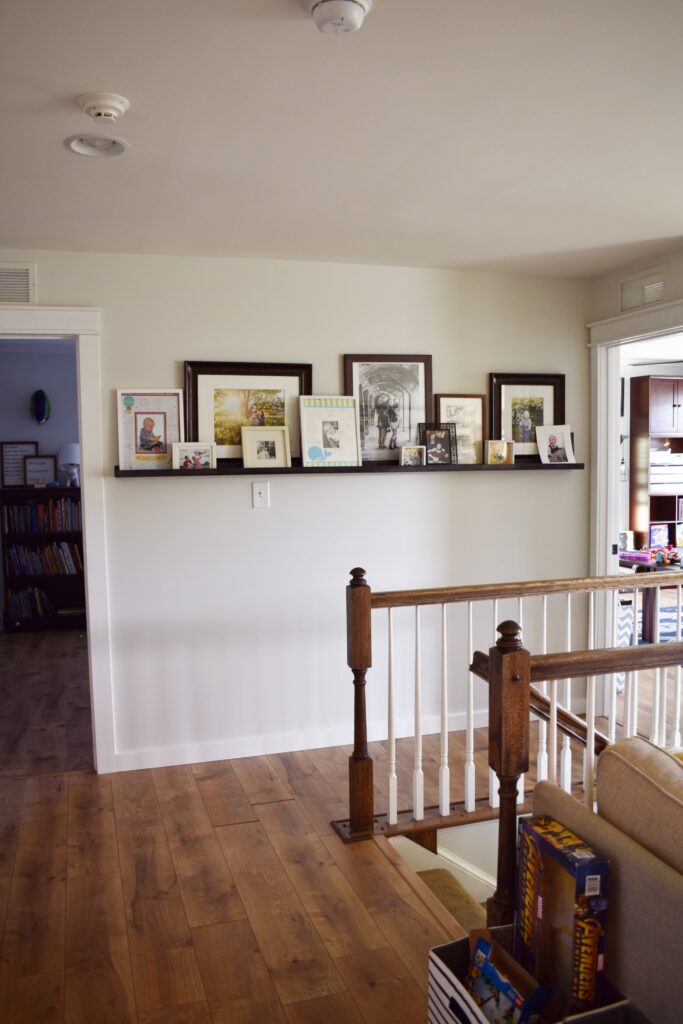
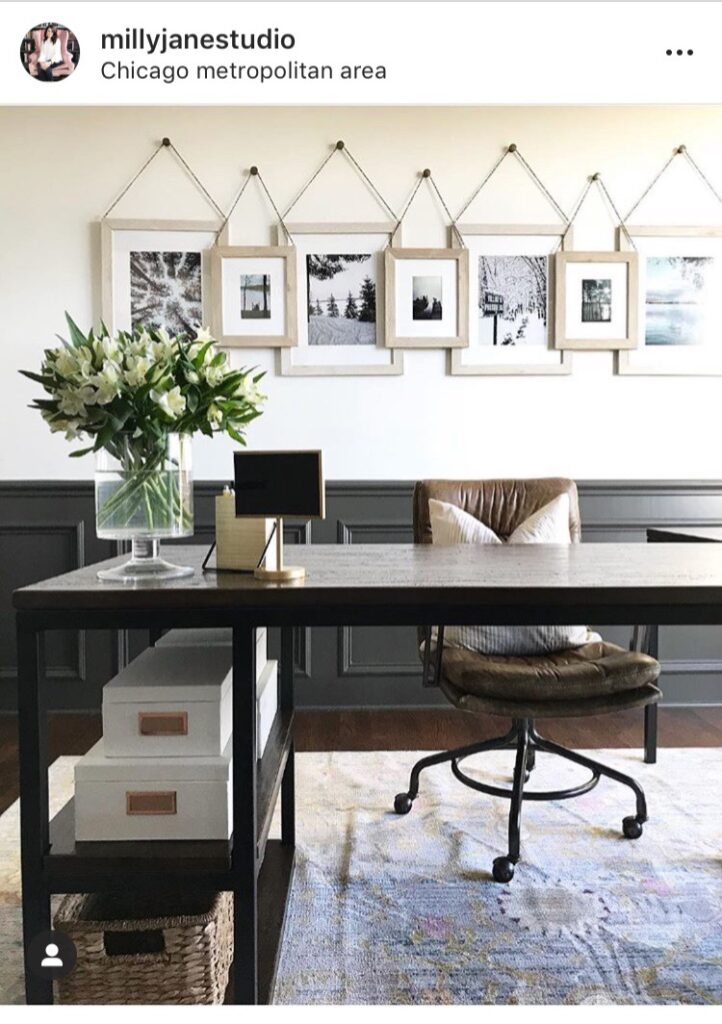
I love an art ledge – I have them scattered all through my home – but once the details of the loft came together I knew I needed to simplify the ledges that used to live on this wall while still having a place to display some of my favorite family photos. Luckily one of my favorite instagrammers (Erin from @millyjanestudio) shared this amazing picture of her office gallery wall and a light bulb went off! Now I just needed to make it happen in a way that didn’t need constant straightening or constant worry that they would fall off the wall every time the boys slammed one of the doors.
NOTE: You can find a full tutorial (including the materials I used) for this Gallery Wall here. Below is quick breakdown of how I created this display
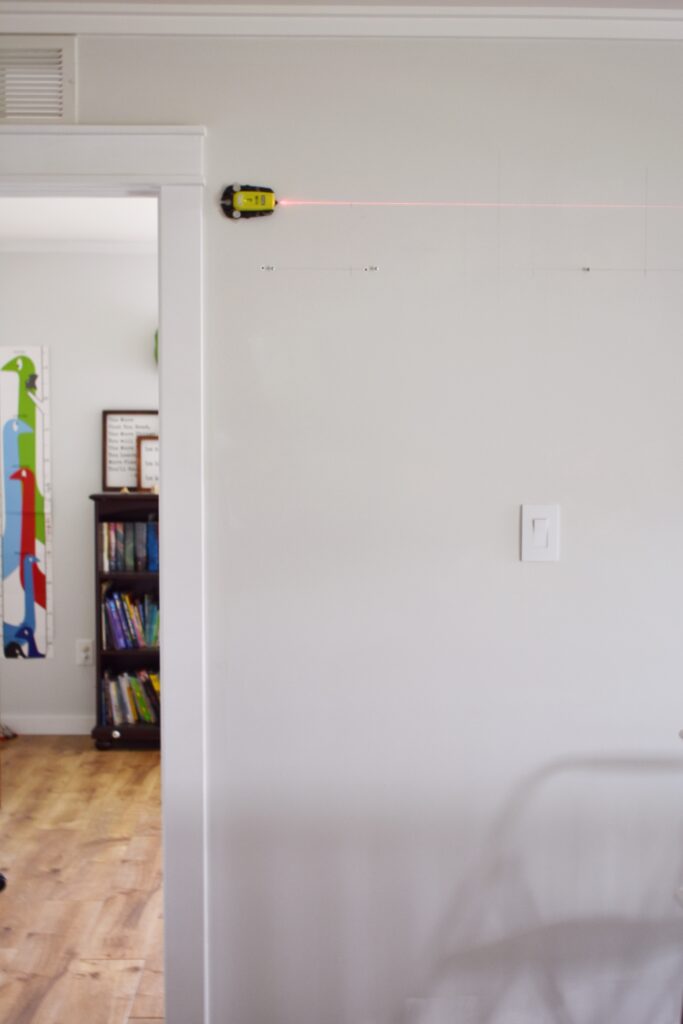
To do this, I first attached the 4 larger frames to the wall using drywall anchors and screws instead of just relying on the cords they hang from . Figure out the spacing of your hook/pegs first (I used these wood pegs from Etsy), and then you can center your screws around every other peg. I love using my Ryobi laser level to make sure all my anchors line up with each other.
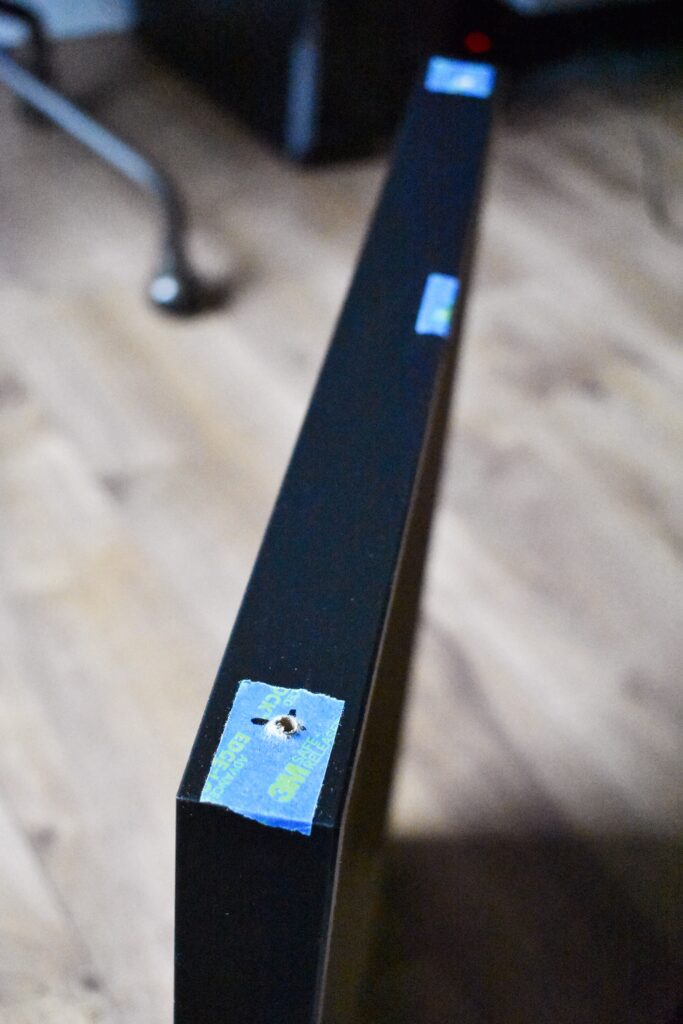
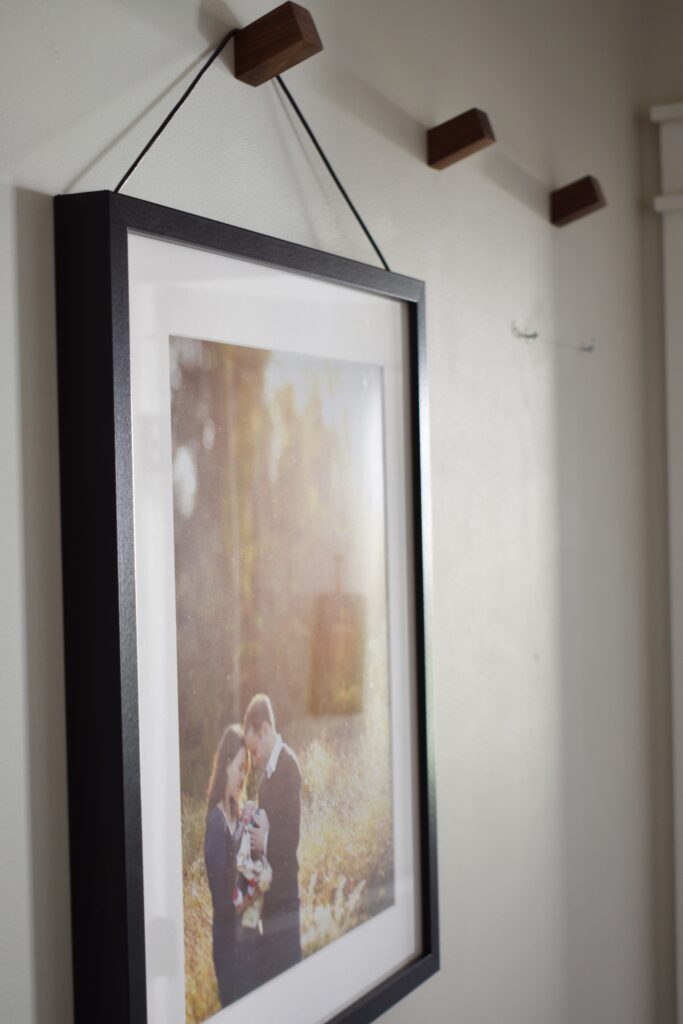
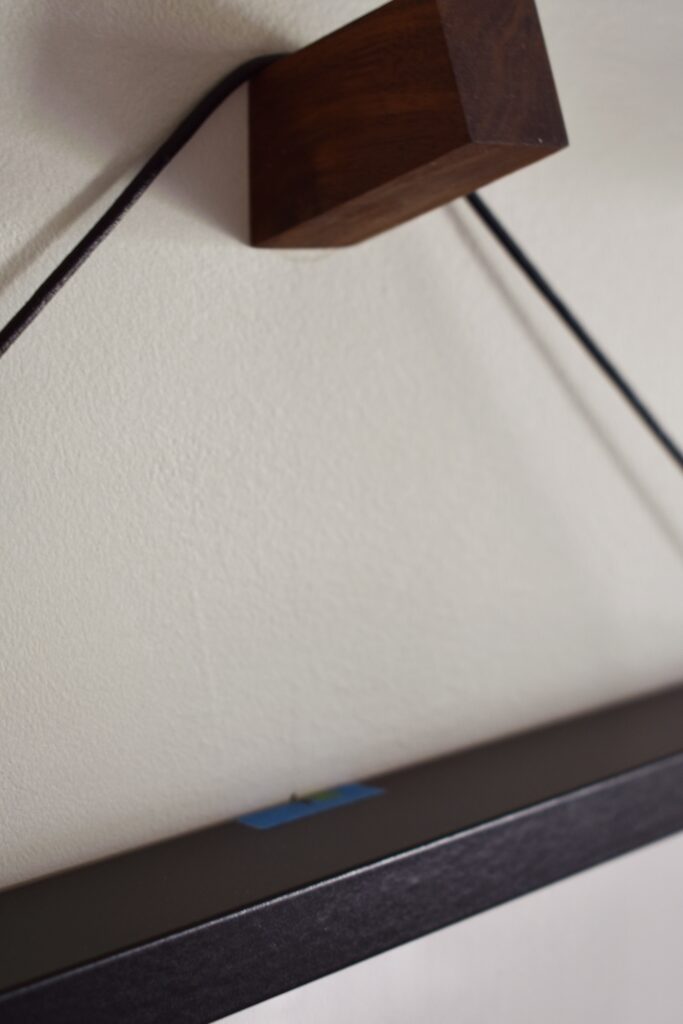
To add the Leather Cording to each frame, I drilled some small holes in the top, threaded the cord through one end and tied a knot. Then I hung each on the screws I had drilled and brought the cord around the peg and through the other hole. I just used a small piece of blue tape to mark where the cord should stop, and from that I was able to tie a knot in the other side at the right spot to make the cord look tight, but not too tight that the frame came off the screws.
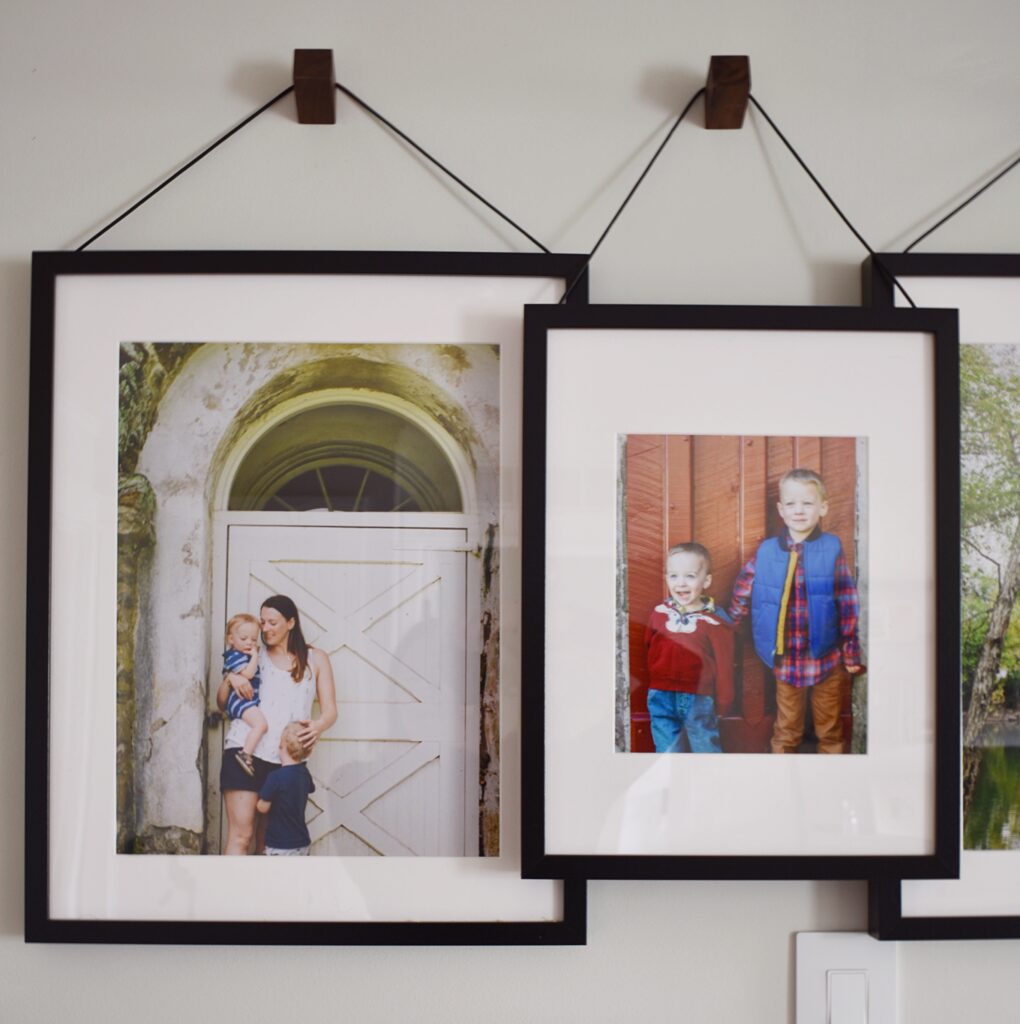
For the 3 smaller frames, I drilled some very small pilot holes into the larger frames and then carefully added some small screws to hold them in place too, then just repeated the above steps with larger lengths of cord.
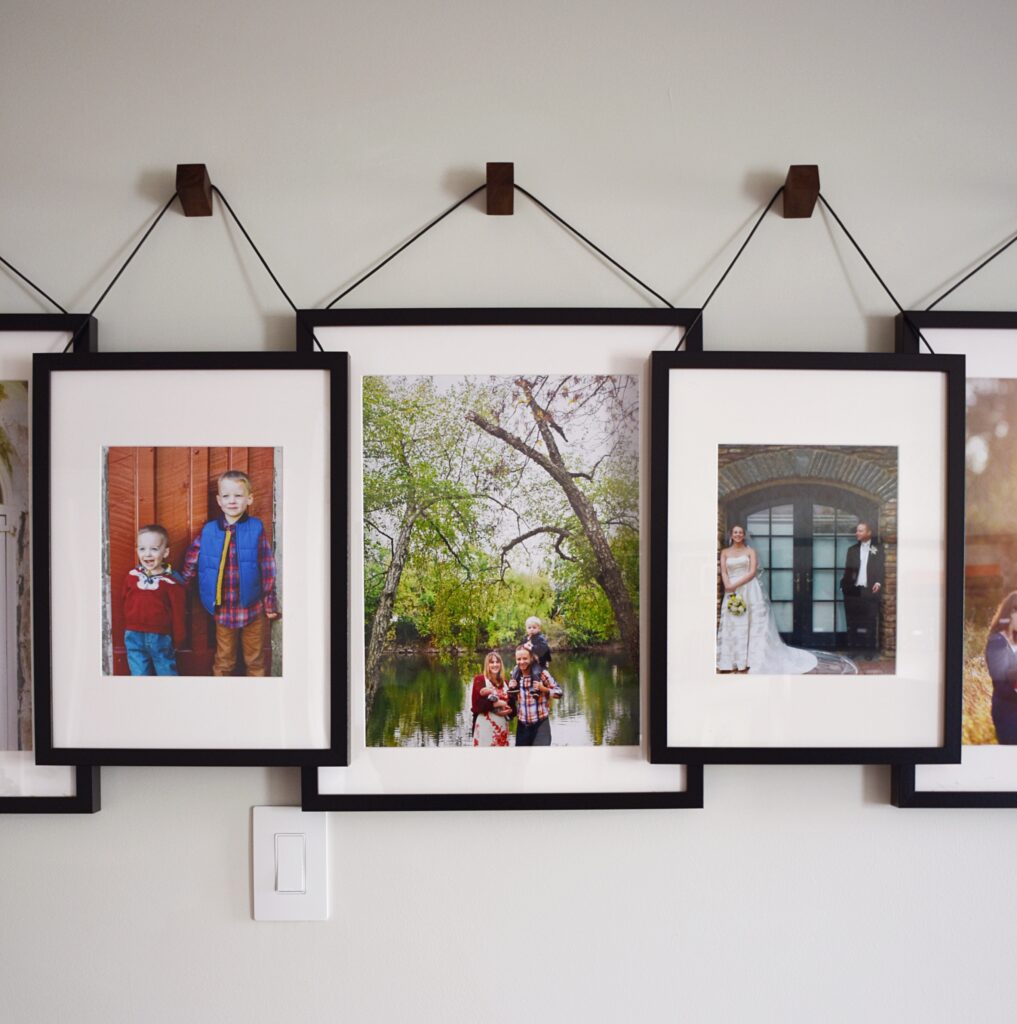
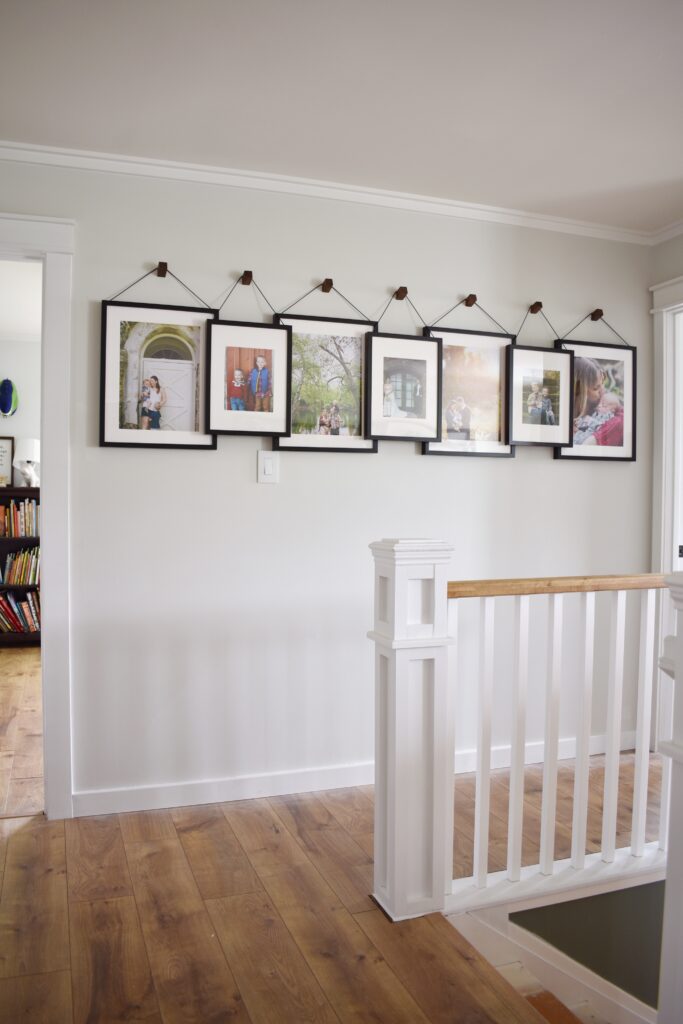
The photos all come from our family photo shoots over the years with my sweet friend from Lauri Tripaldi Photography. I love that not only are the frames super secure, they’ll also be easy to switch out with the seasons (cause you know I’ve got lots of Xmas pictures saved for next year!)
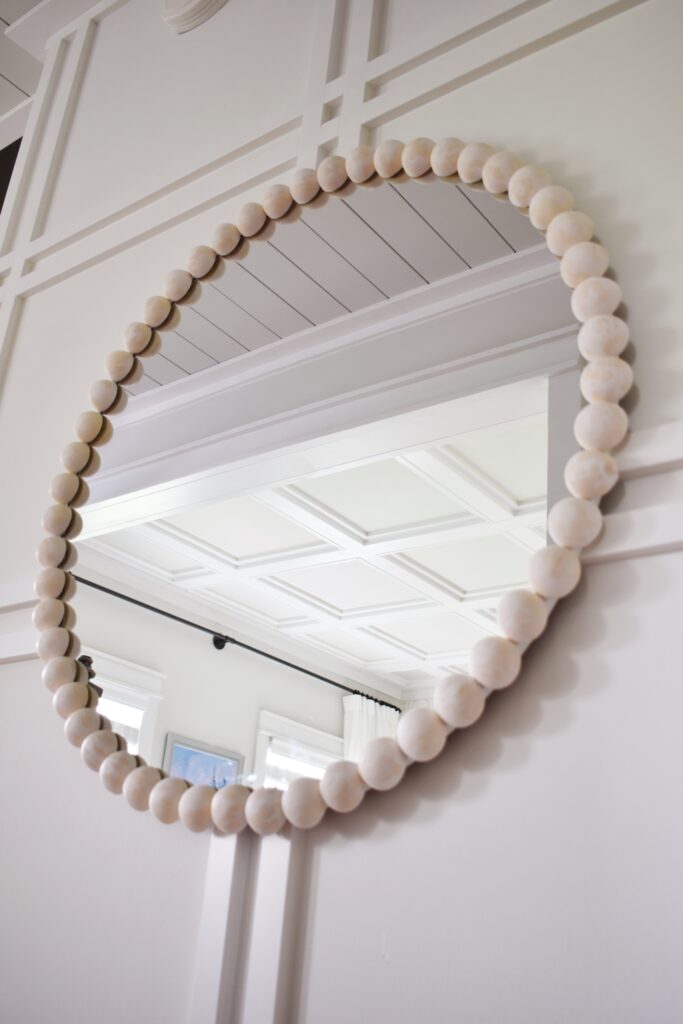
DIY Pottery Barn Inspired Mirror
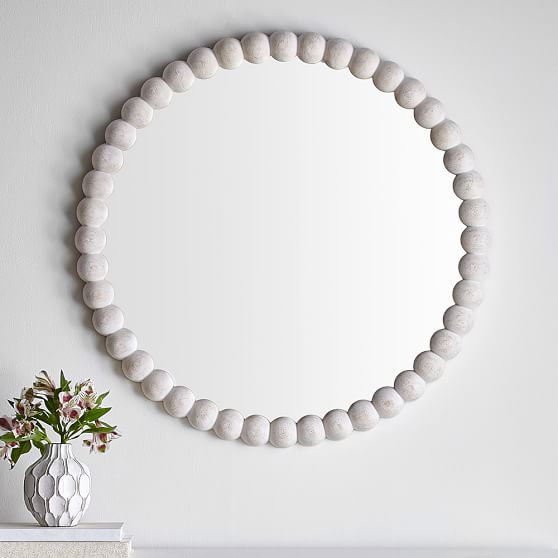
As much as I loved the mirror that was in our entryway (don’t worry – it’s gonna have a nice new home in my closet) I really needed a round mirror to stand out against the plaid wall trim. This one from Pottery Barn Teen has always been one of my favorites, and I was super close to ordering it except that it was really a few inches too small for what I needed so I set my mind to figuring out how to DIY it.

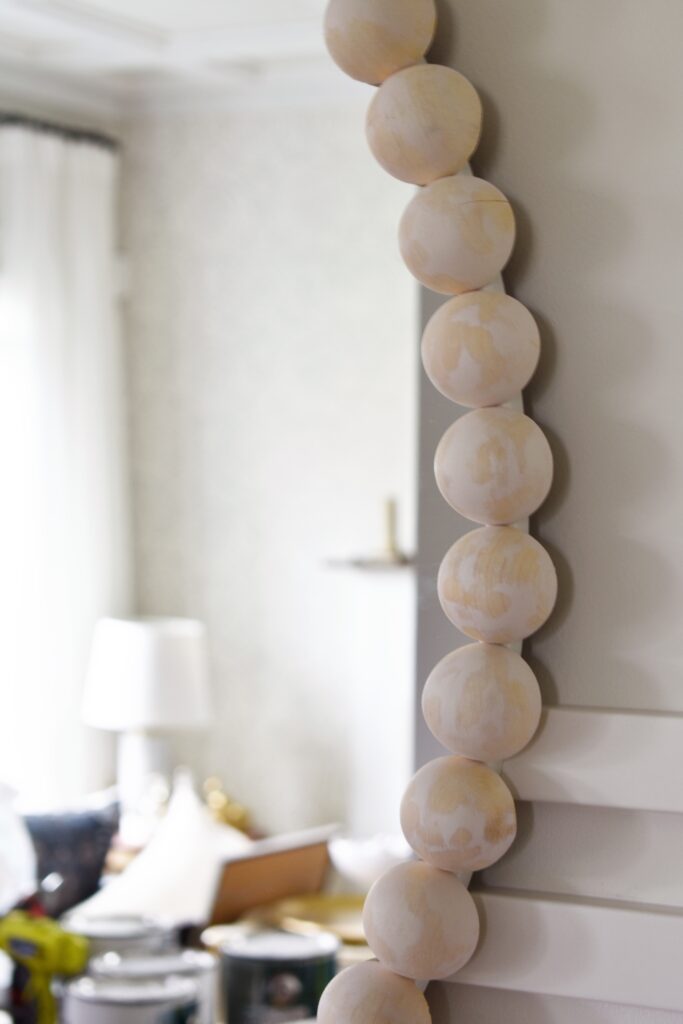
I got super lucky and grabbed this great Target mirror during an awesome sale. I found these wooden spheres on Amazon and painted them with a few coats of white chalk spray paint. A pass over each one with some sandpaper gave them a slight distressed look, and I finished each with a little bit of leftover white wax I had on hand.
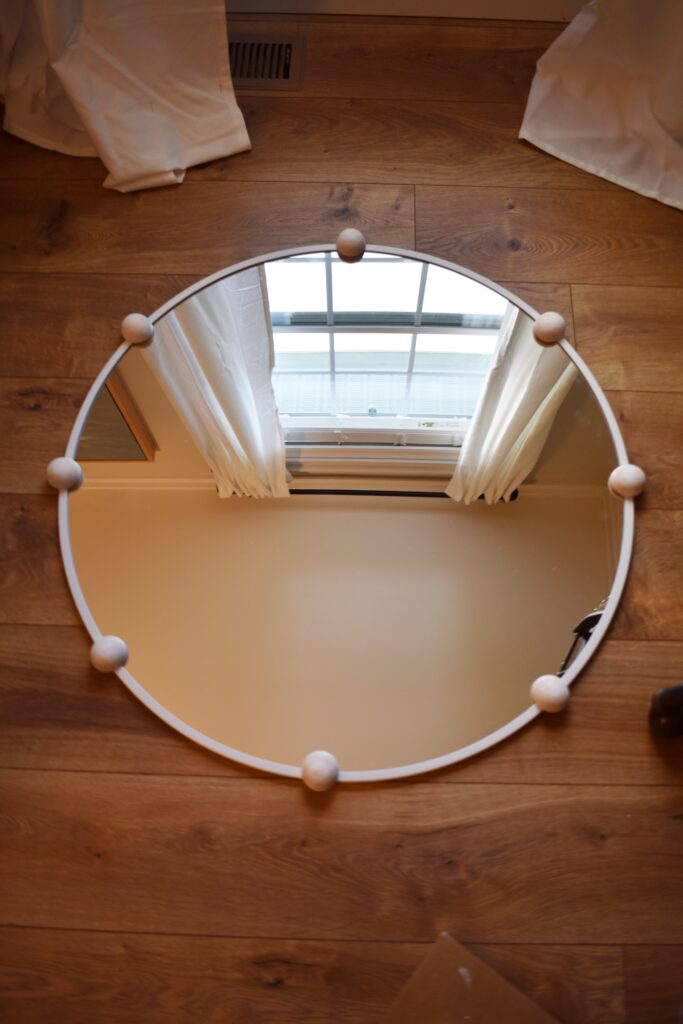
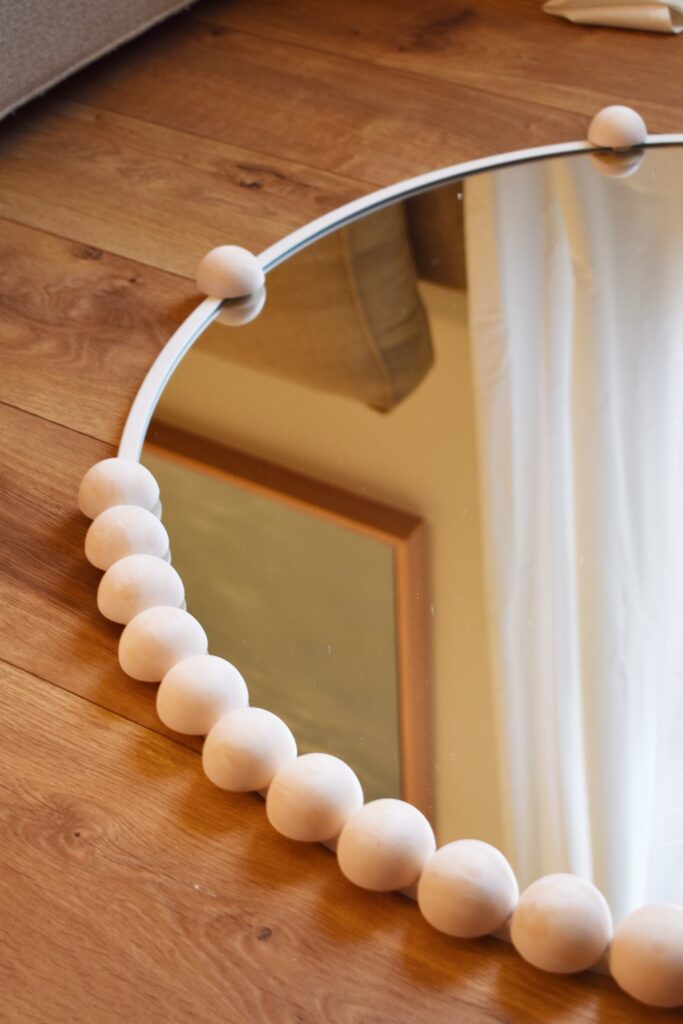
Once all my balls were ready to go, I started to space them out around the mirror beginning by dividing the circle into quarters, and then eighths. From there, I was able to space out the rest of the balls, working one section at a time. To attach them I used my tube of Liquid Nails, which takes a while to dry so I would have time to fix the spacing if I needed. If I had to change one thing about this project I would have spaced the whole things out first and then attached each ball with a slightly stronger glue because I did have a few balls fall off when I transported it to hang. I was able to re-attach them easy enough but I may go back one day and re-enforce them if there’s a problem. *****UPDATE: I have been using Gorilla Epoxy Glue to re-attach the balls and it has worked excellent so I would absolutely recommend using it or a similar Epoxy for this project.
I’m loving the way that this one turned out – and it doesn’t look it in this pic but this thing feels GIGANTIC in person which is awesome!
Believe it or not there is still a hefty number of things still left on my list to get done this week – including replacing the entire staircase! – but I think it’s gonna be doable…it may come down to the very last second but still doable. I hope you all come back next week for the final reveal, and that you’re checking out what all of my fellow One Room Challenge guest participants have been accomplishing because there are some beautiful spaces close to being finished.

Comments
Wow, I am loving ALL of your DIY crafts right now! I can’t wait to see how it comes together!
Thank you so much Andi! I can’t wait to share the final reveal with everyone next week!!
Love the mirror & that gallery wall! You’re so creative & talented
So glad you like them! And thank you for that very sweet commment
Love the frames! Question– what floor color is that? Is it hardwood or laminate?
Hi Serena – The floors are Pergo Laminate in Riverbend Oak that we bought from Home Depot and installed ourselves.
https://www.homedepot.com/p/Pergo-XP-Riverbend-Oak-10-mm-Thick-x-7-1-2-in-Wide-x-47-1-4-in-Length-Laminate-Flooring-19-63-sq-ft-case-LF000773/205661735
The ball mirror
That mirror is amazing! You got this!! Look forward to the reveal next week!
Thank you Allie! I can’t wait to share the final reveal with everyone!!!
It’s all looking amazing, Lindsey! Awesome work. Such clever DIY projects.
Thank you so much friend!! I can’t wait to share it all with you on Thursday!
I love this mirror and am thinking about doing one too!
My question is this…what glue would you use of you were to do this over again? I’m considering making one for my master bathroom?
You did such a great job on this!
Hi Kristi! I would actually use an Epoxy Glue if I was going to do this again (especially in a bathroom). I’ve used this Gorilla Epoxy Glue in the past for the mirror in my powder room and it worked great and has held up going on 3 years. You do need to use it pretty fast so I would just make sure to have all of your “balls” laid out in advance before you start gluing.
Everything looks amazing! I am loving the gallery wall! What color paint did you use? Thanks in advance!
Thank you so much! The wall color is Frosty White by Sherwin Williams
I love these two DIY ideas! Do you find that your picture frames move at all? Thanks for sharing this great tutorial for this space.
Thank you so much! I actually posted a more detailed DIY of the gallery wall and I’ll include the link below – they don’t move an inch!
/diy-hanging-gallery-wall/
Love this look! What are the two frame sizes you selected for your display?
The larger frames are 16×20 and the smaller frames are 12 x 16
I have a more detailed tutorial too at this link if you’d like to check it out:
/diy-hanging-gallery-wall/
Love the photo gallery…my question is how you threaded the leather cord…you said you drilled a hole and knotted…if you drill the hole in top of frame I am confused on how you threaded it in and it stayed??
Hi Patty – I thread the cord through the top of the whole, and then tied a not in the bottom of the cord so it is on the inside/back of the frame. The IKEA frames have about a 1/2 inch of open space on the back where the knot fits comfortably. Since the weight of the frames sit on the screws and the cord is just for show, the knot holds it in place just fine. Hope that helps!
Hi Lindsey,
Thank you so much for your response. Man do I feel stupid!!! I didn’t realize there is space on frames where you could drill holes completely through it!! Thanks again for taking the time to respond!! I will be attempting to do this project today!!
No need to every feel stupid! Always happy to answer and clarify things. Let me know how it turns out!
If you were to use a different adhesive to attach the sphere balls, what would you use? I am wanting to do this to our downstairs bathroom mirror. Thanks for the great idea!
Hi Megan – I’ve actually started to re-attach a few with Epoxy Glue (I like the Gorilla brand) and it’s working really well so I would definitely recommend it.
I love your mirror even better that the Pottery Barn one! Also your gallery wall is so great, such a neat way of displaying pictures.
Aww thank you so much for that kind compliment Hannah! I really appreciate it and am so happy to her you like these two projects
Hi I bought a mirror and am going to make the spheres one. What size half spheres did you use ?? It’s SUPER SUPER cute!!
Thank you very much! I used 2″ diameter half spheres. I found that anything smaller didn’t cover up the edge of the mirror enough
What size frames did you use for the 3smaller frames? The links take you to the same size
The smaller frames are 12×16 and the larger frames are 16×20
Thanks so much! One more question! It looks like the wooden pegs you used are no longer available on Etsy. Do you have any other suggestions?
This seller has some similar options – I know things on Etsy are up in the air right now based on limited supplies, but it looks like they still have some stock. https://www.etsy.com/shop/fmcdesign?ref=simple-shop-header-name&listing_id=191517489§ion_id=19428940
I was wondering what kind of paint and the color u used in the hallway where u have the picture frames connected? Thanks!
The paint color is Frosty White from Sherwin Williams
I have a more detailed tutorial for the Gallery Wall at the below link – hopefully that’ll help show how I have them connected…they are all resting on screws either drilled directly into the wall or the larger picture frames:
/?s=gallery+wall
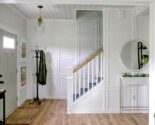
I love how the round mirror shows off your ceiling details in the 1 picture!
Hi. This PB mirror inspiration is exactly what O needed! Thank you. It looks like you used about 44 split balls. Does that sound about right?
I think it was about 55 of them – I ended up ordering 4 16-packs and I know I only had a couple leftover
Lovely ideas. Thank you for sharing.
Hello! I think I am missing how the front (smaller) frames are attached? I know the leather isn’t holding any weight. Do the screws you drill in the 16 x 20 frames hold the smaller frames? Sorry I know I am missing something obvious.
They do – the IKEA Ribba frames has a deep back and the top of the frame rests right on top of the two screws in the larger frames
Would like more info on the pegs for the pictures. Are they available for purchase or home made?
Hi Sandy – the tutorial has links to all of the supplies that I used, including the hook which are from Etsy:
/diy-hanging-gallery-wall/
Can someone recommend Black Lingerie? Cheers xx
I love both projects. Thanks for the detailed tutorials. What size mirror was used?
Thank you – I used a 30″ mirror