
$100 Room Challenge Week 4 – How to DIY a Wall Mural
Only one more week to go friends and even though my legs are definitely a little tired from a long weekend, I’m very much on schedule for next week’s reveal! This week was all about bringing some of my personality and design style into the room and the best ways I know how to do that are to build something, DIY something, and paint something – so that’s what I did.
Week 1 | Week 2 | Week 3 | Week 4 | Week 5
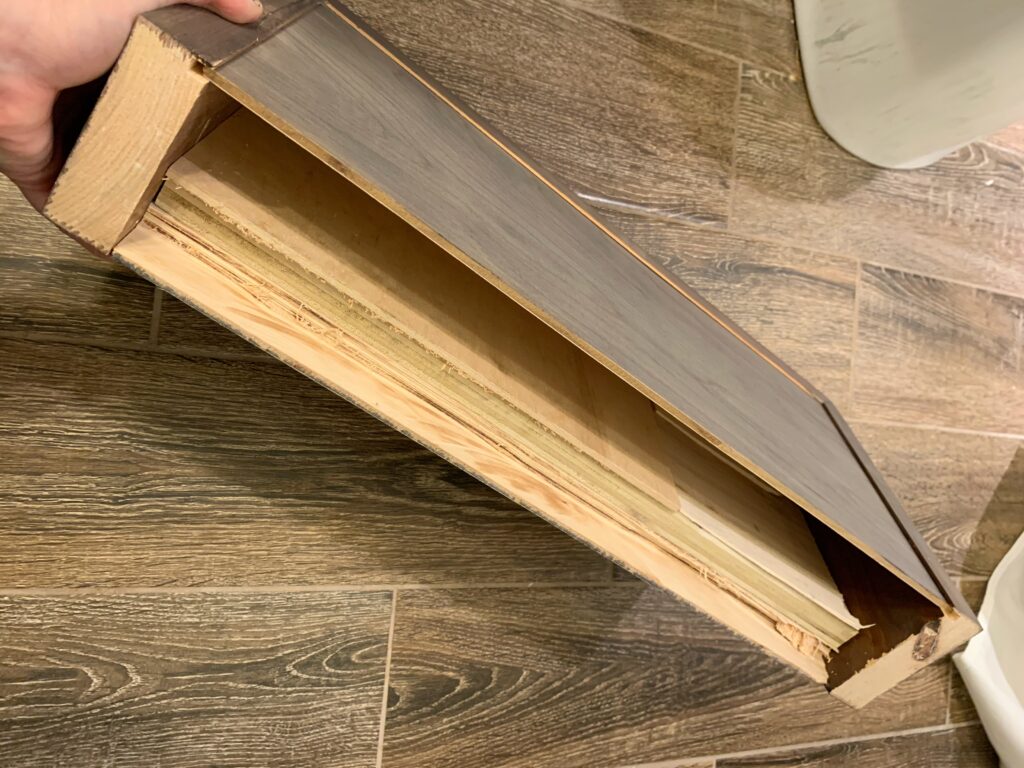
We had a random warm Saturday so I took advantage of it and built a new set of shelves for above the toilet. During the first remodel of this room I installed some super simple pipe shelves, but this time I wanted to modernize them by turning them into floating shelves — without spending any additional money. So I came up with a plan – re-use the pipes as brackets and then build shelf “shells” to go around the pipes using scrap wood from my garage.
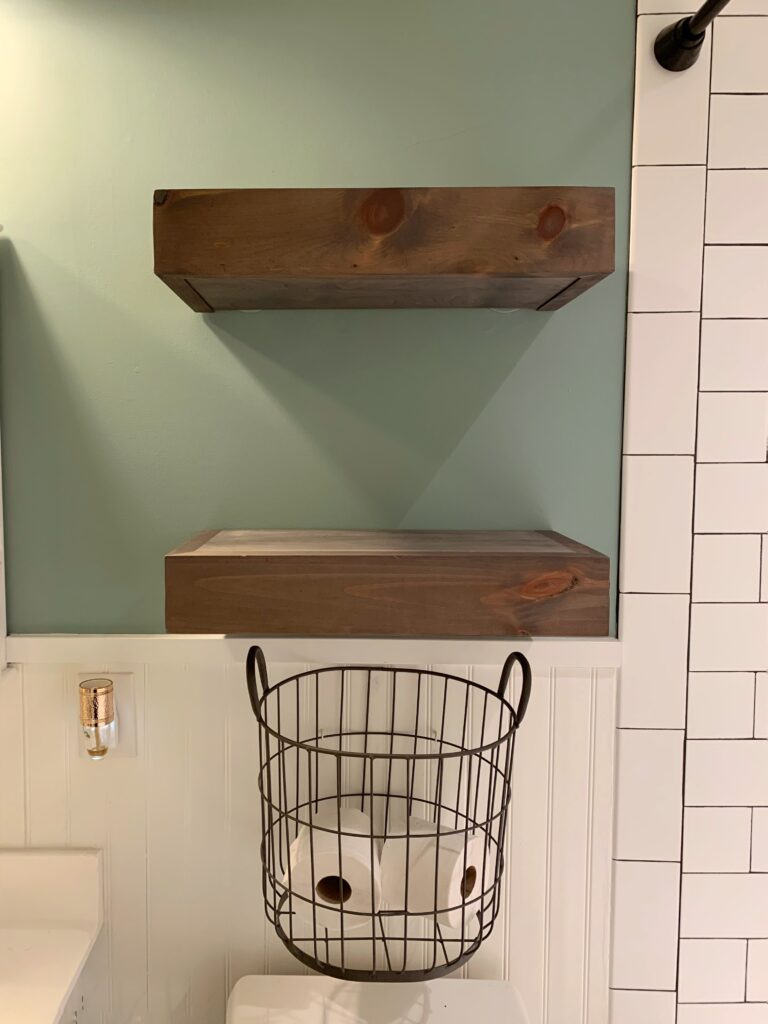
To keep them from looking too much like the Franken-Shelves that they are, I stained them using an aging wash (WeatherWash Pined Stain) and I’m really happy that my planned actually worked and they came out just as I was hoping. Oh and a keen eye might notice that I switched out the toilet paper basket for a larger one that I’ve had laying around the house for years.
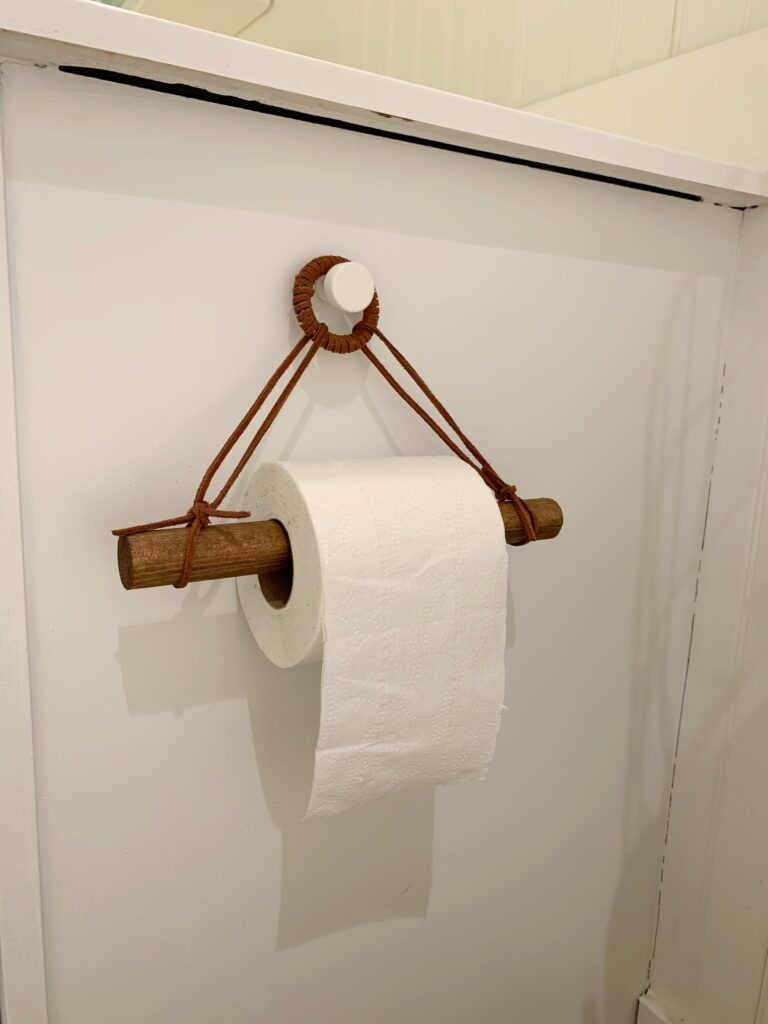
Speaking of toilet paper – we’ve needed a new toilet paper holder for months but buying one wasn’t going to fit in the $100 budget so I did what any good DIY’er does…..I started searching my whole house for random supplies I could use. What I came up with was a leftover piece of dowel, some leather cord, and a random cabinet knob – then I picked up a pack of $2 rings from Home Depot and voila — a little BoHo toilet paper holder. I may need to tweak it a little once the kids start using it regularly but so far so good. (Don’t mind the cracked caulk lines – that’s on the agenda for this week.)
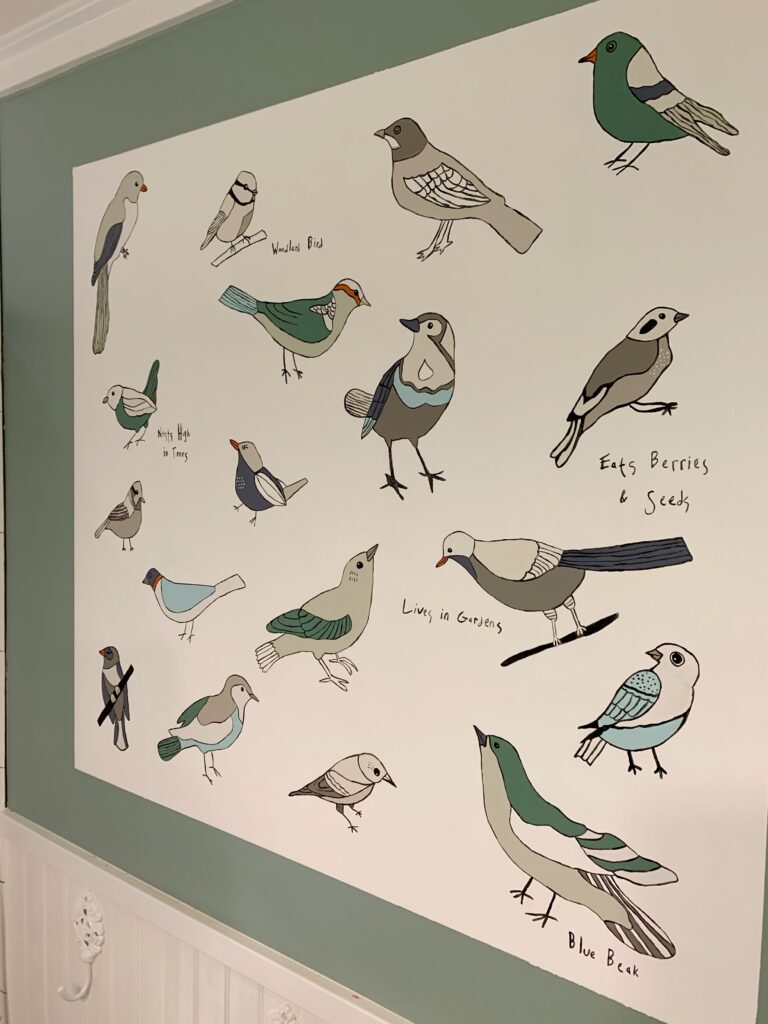
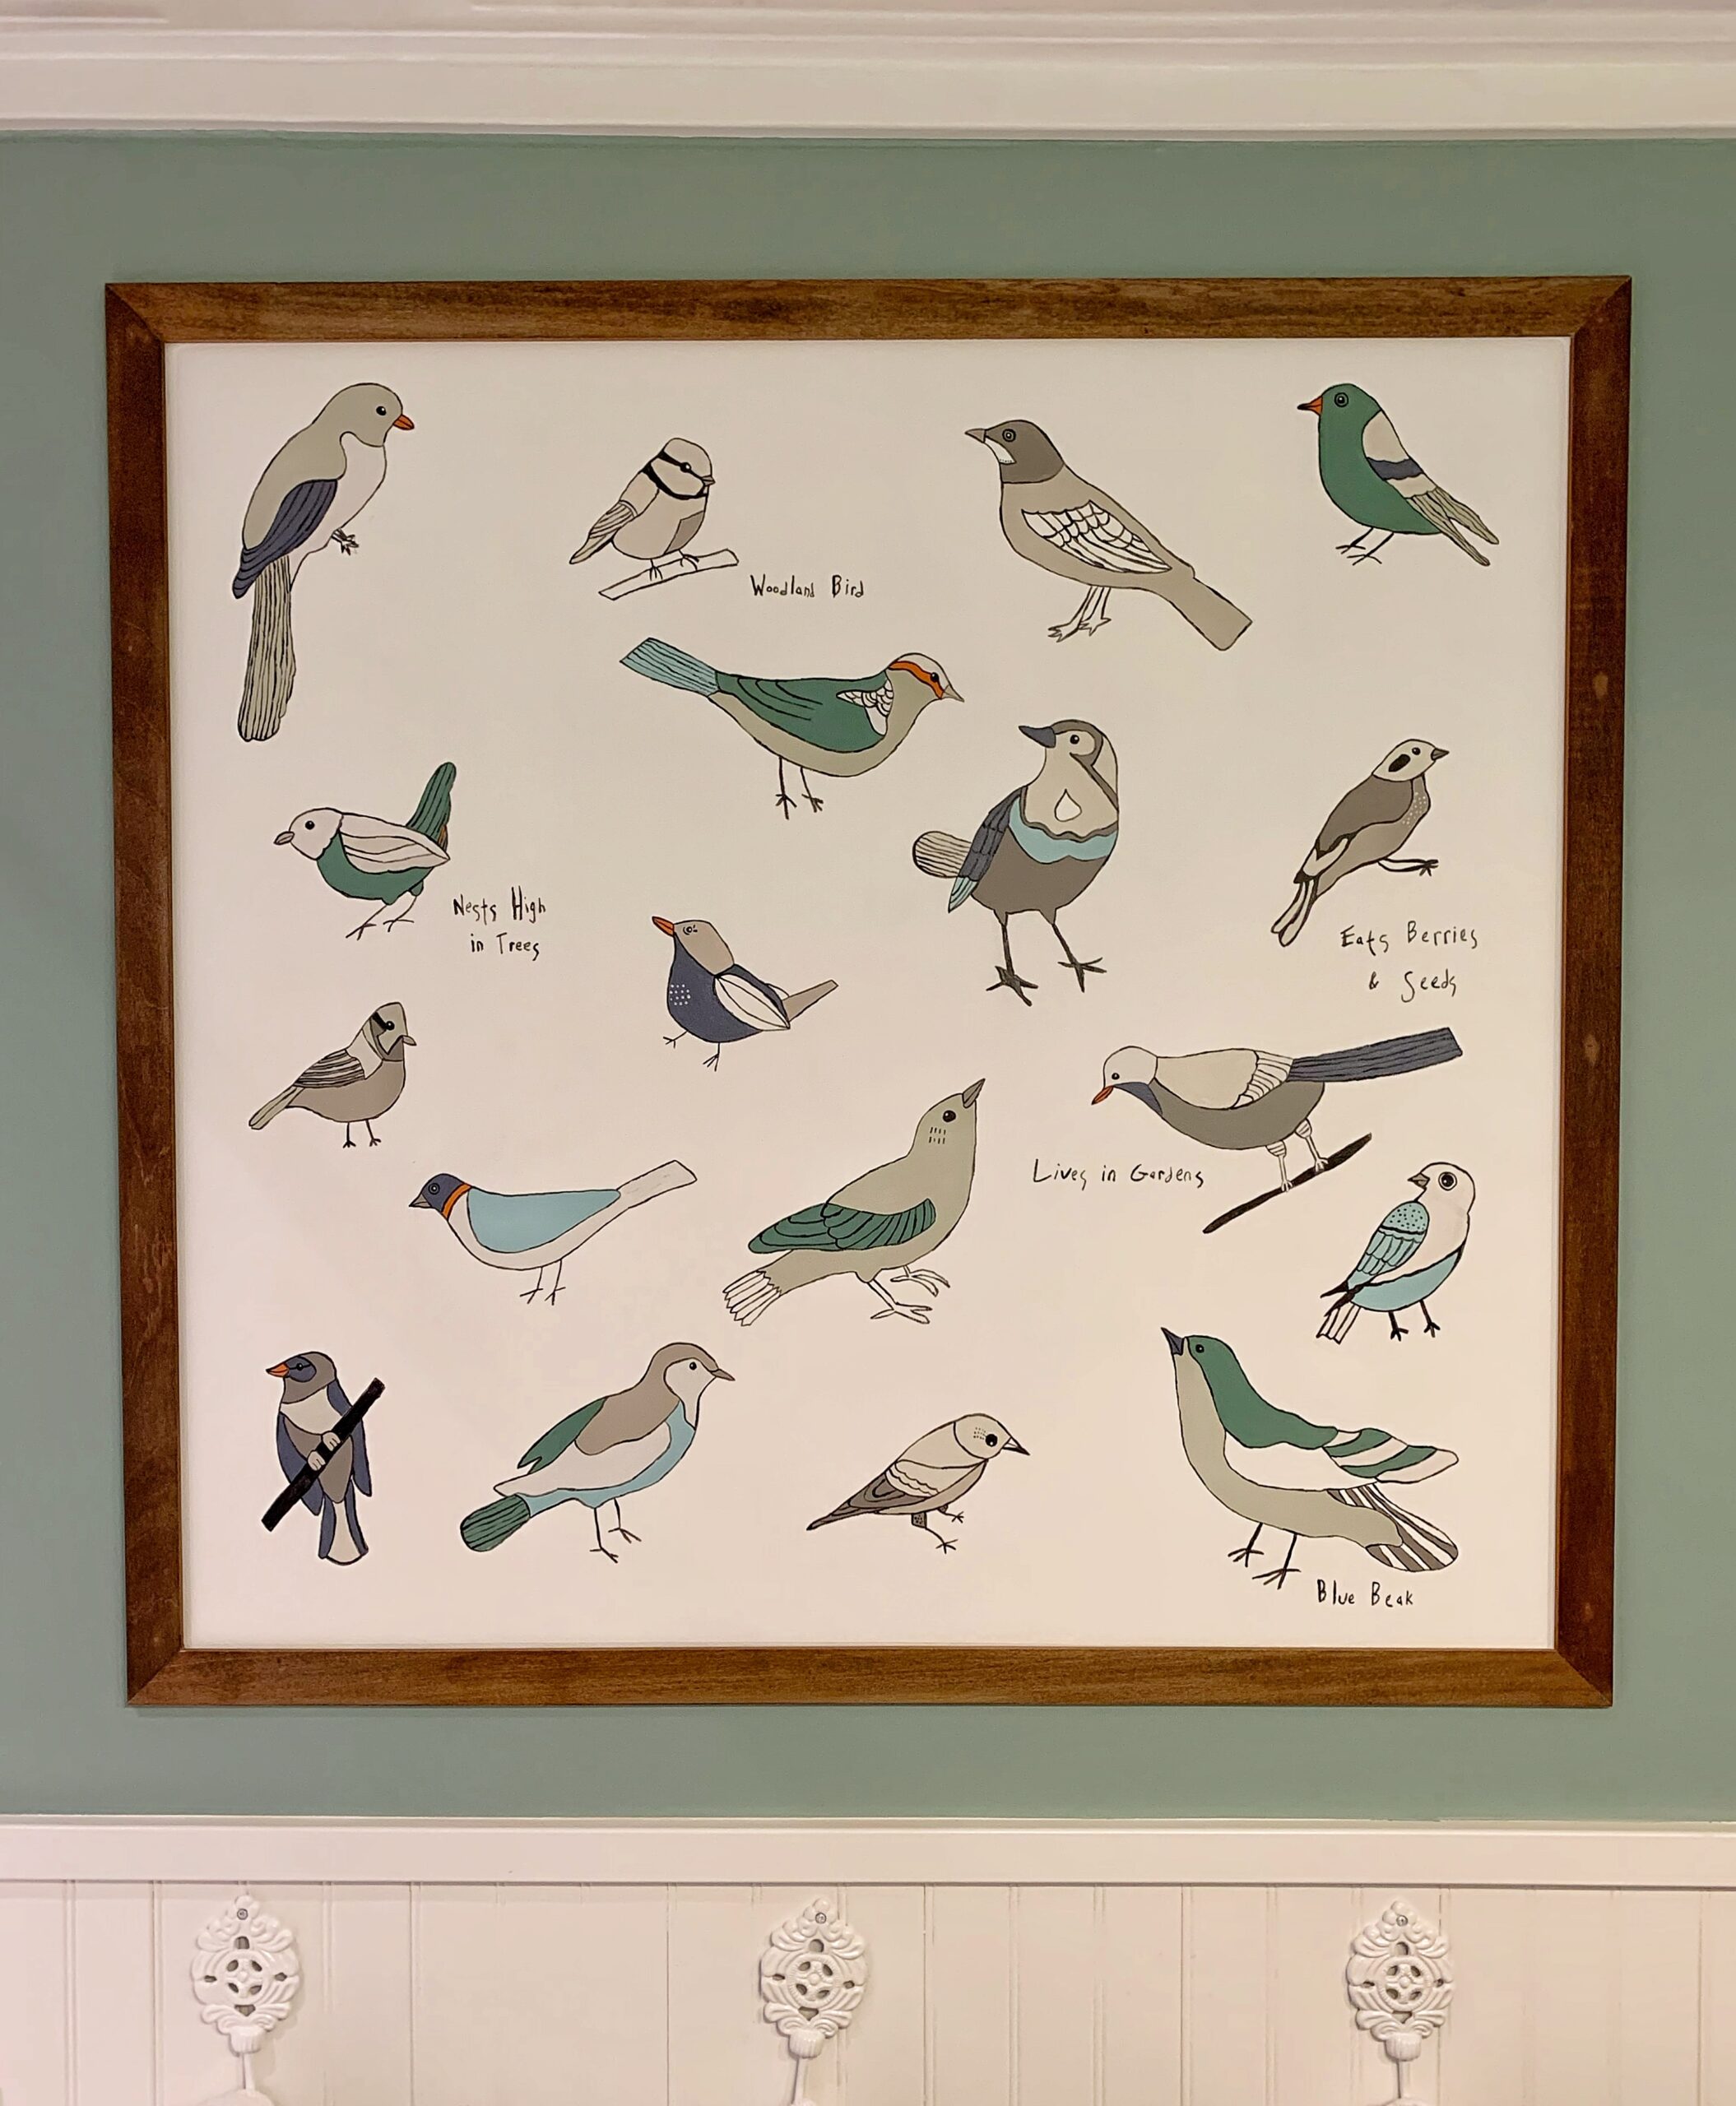
Ok – now onto the project I have been dying to show you — My bird mural! I have painted a few wall murals in my life and I’m really happy to finally have found a place to add one to this home. If you’re curious how I did it I’m going to break down the steps below but I will caution one thing about this project – only tackle something like this if you really enjoy painting! You absolutely do not need to be a trained artist to re-create this technique, but if painting is not a relaxing experience for you then you’re probably not gonna enjoy this one.
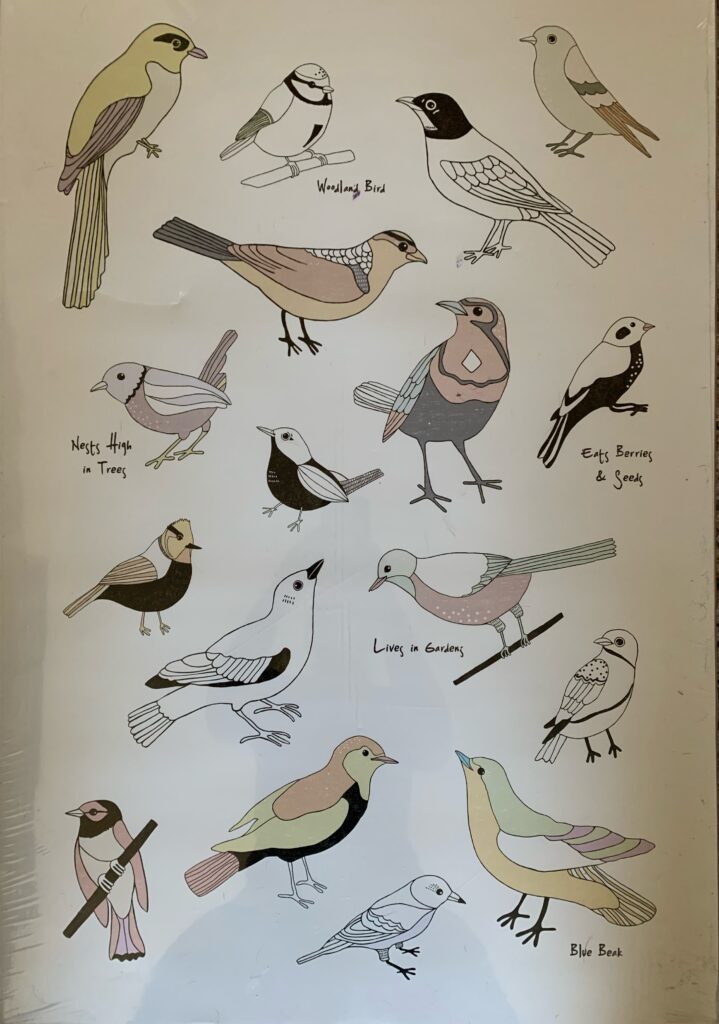
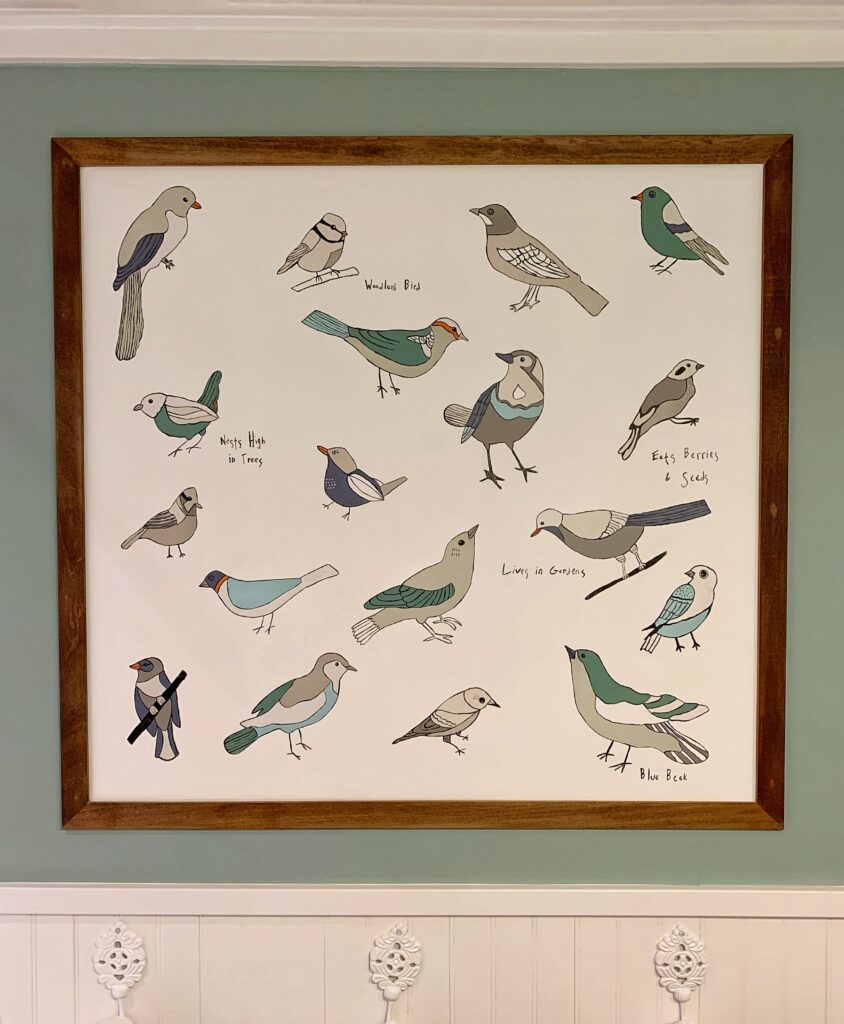
My inspiration for this mural was a poster from IKEA that I have had sitting in my closet for at least 3 years. I debated just hanging the poster up – but then I’d have to buy a frame and even then it wasn’t exactly the size I was looking for, so turning it into a painting seemed like the perfect solution. When I painted the room I taped off the size “canvas” that I wanted and painted it a solid white using a small tester pot of paint from Home Depot.
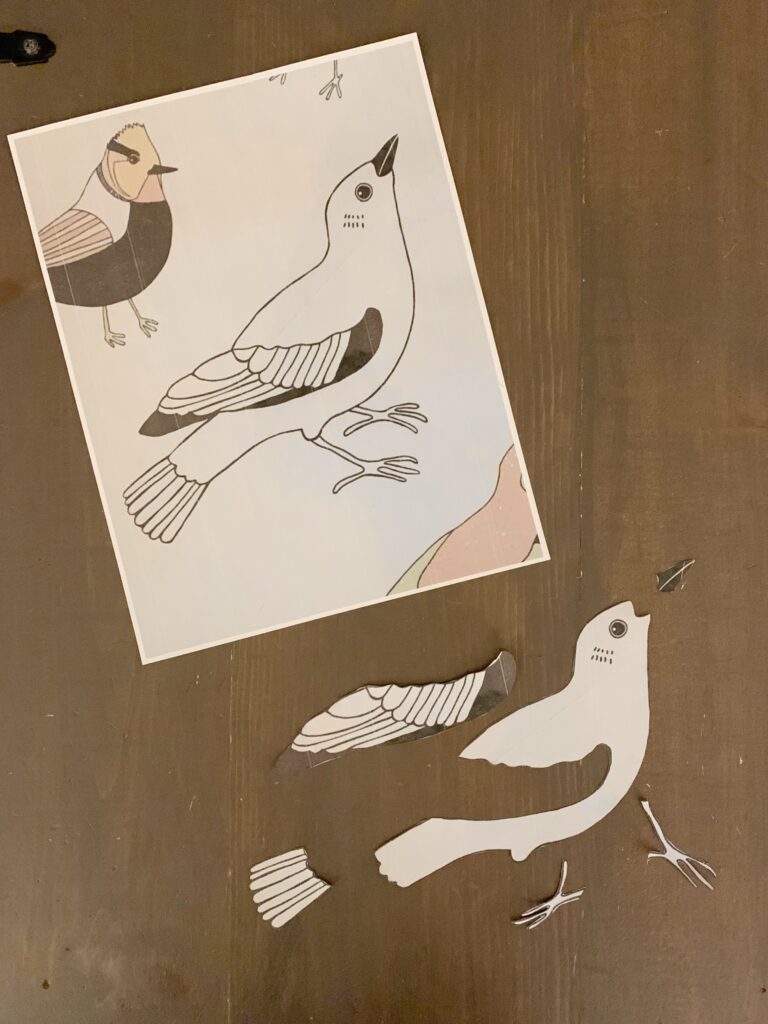
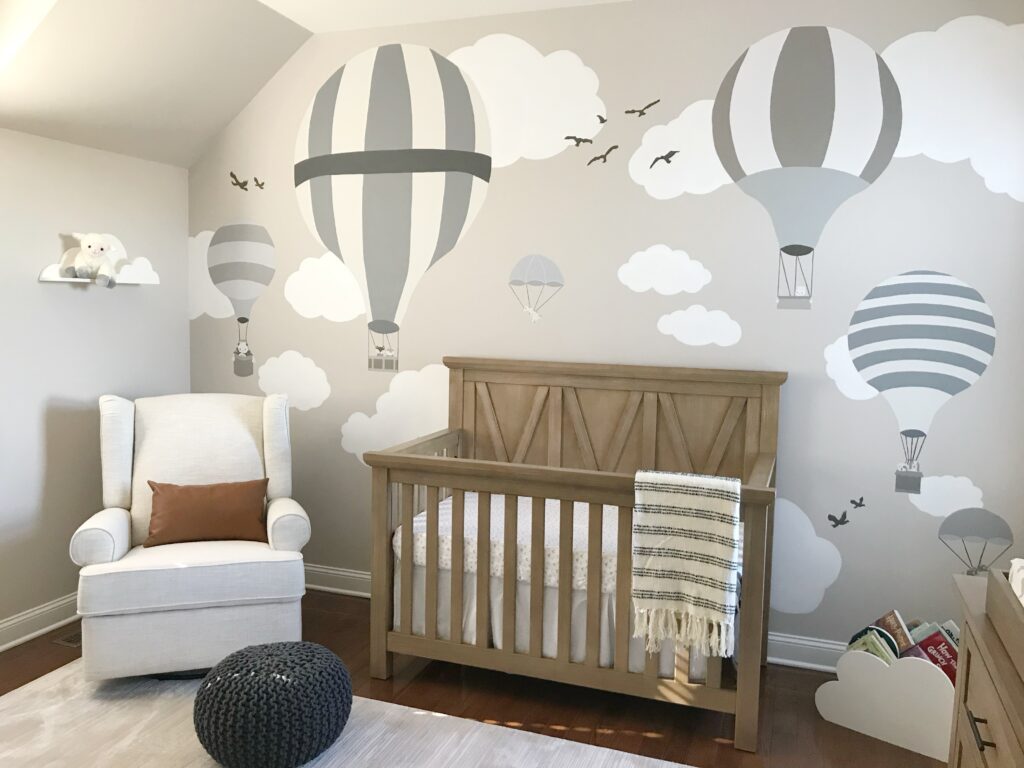
To transfer it to the wall, I’ve used two different methods in the past and one is super super low-tech! When I painted my sons nursery in our old townhouse, I just used my computer to blow up my inspo pictures to the size I wanted, then printed out each of them on regular old computer paper, cut them apart into their different parts, and traced the shapes onto the wall. If you’re working in a smaller area this is totally a technique that would work and save you from having to buy any additional equipment.
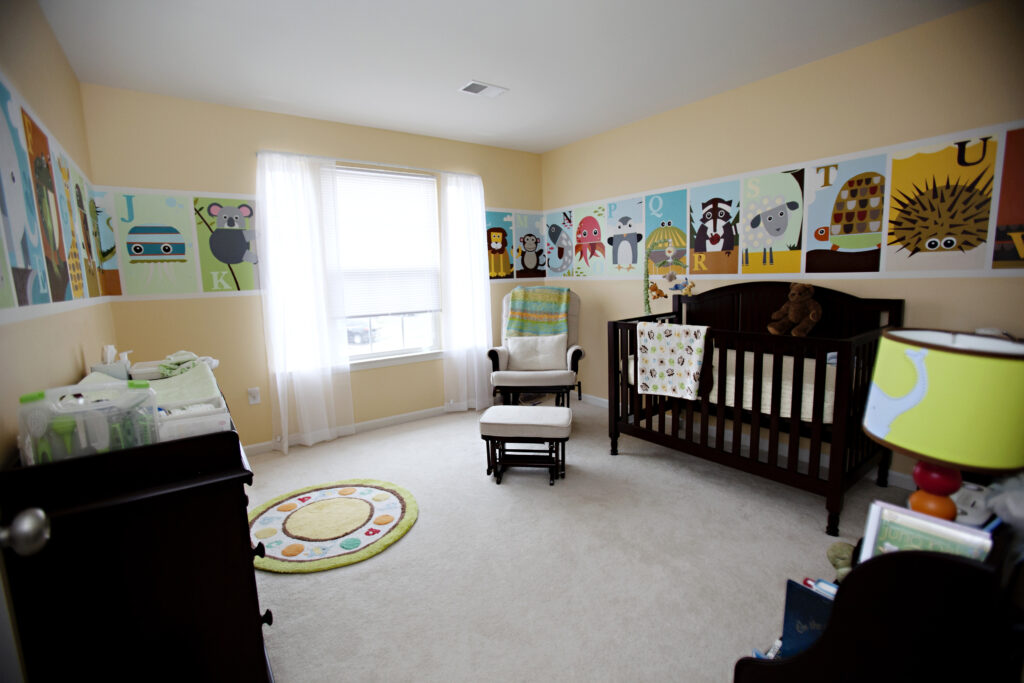
For this bathroom, I used a more high-tech technique that I used for a nursery mural last year. I hooked up a small projector to move the different birds around the canvas and outlined them with very light pencil strokes. (NOTE: If you’re thinking about blowing something up to the size of a whole wall I would absolutely use this method! It gives you great control over what size you want your images and can help you plan around your furniture so your images aren’t obscured.)
Once my images are on the wall, I treat them like a big paint by number set. Normally I have a good idea in advance of what colors I’m going to use, but honestly this time I just winged it (no pun intended). I sort of used the original poster as a guide but I really just used whatever color tester pots I had on hand and added color as I went with a mix of small craft brushes. You will need to do several coats of each paint to get total coverage so I work my way around the canvas adding color while waiting for other sections to dry.
![]()
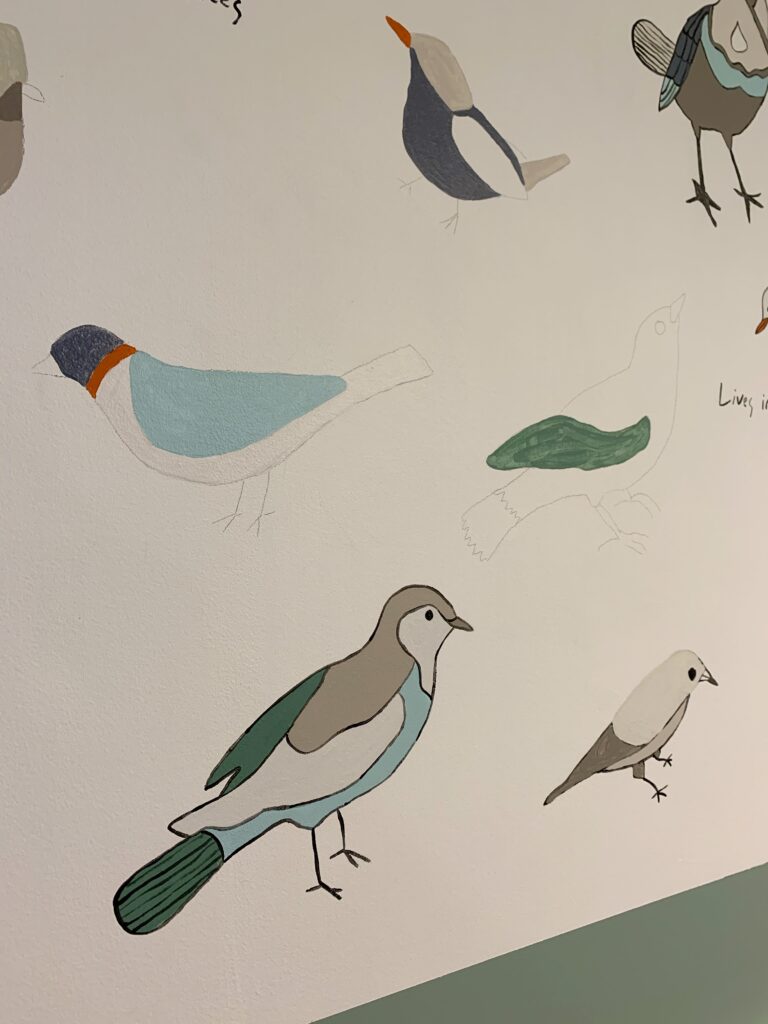
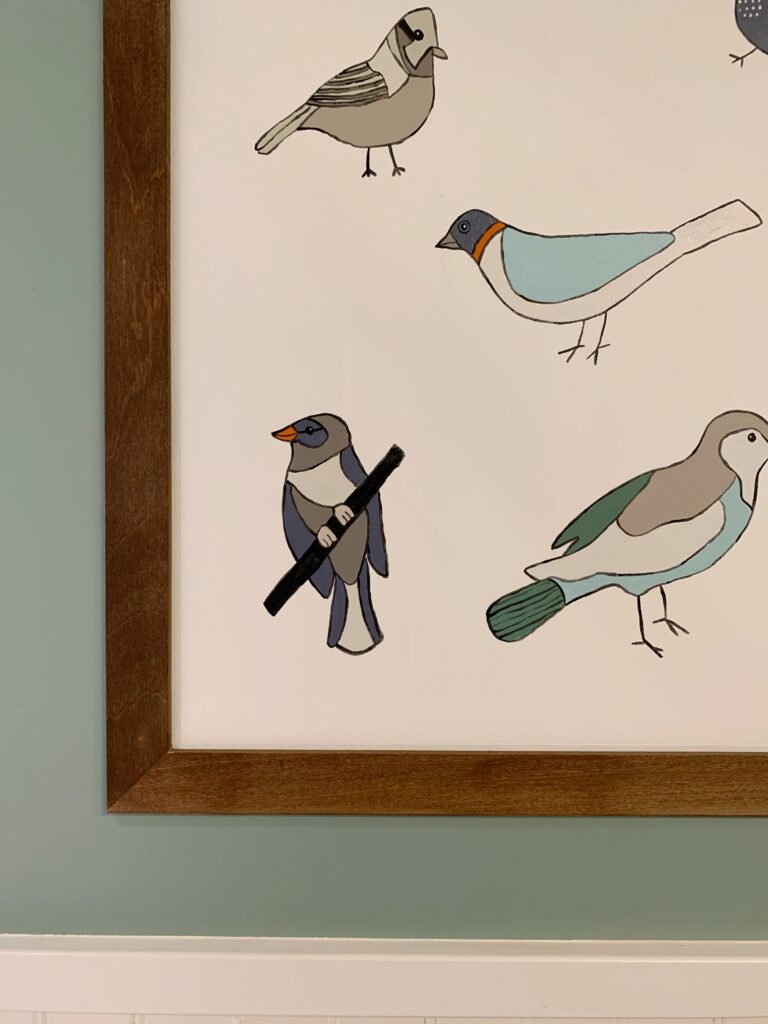
For this particular design I outlined everything in black paint at the end using a very very fine paint brush. This technique gives you a little bit more wiggle room when you’re blocking in your colors, but if you’re planning on forgoing the outline and just have your colors touching (like in the nursery mural I mentioned) you will need to be much more careful and outline each section very carefully to avoid yourself the headache of a lot of touch up work.
To give the whole thing a polished look, I picked up a few pieces of 1/2″ poplar hobby boards from Home Depot, stained them, and cut them into pieces that I attached directly to the wall, creating a frame for my new artwork.
I cannot explain how happy this project makes me! It brings back happy memories of the hours I spent painting the boys nursery before they were born and of the time we spent in that beloved room that we had to leave behind when we moved. It also gives this room the one thing that it was missing to make it really feel like my own – a story.
Make sure you come back next week for the big reveal – the final accessories are going in and I even added one unexpected project to the list at the last moment (I mean what else is new). And make sure you head over and check out all of the other $100 Room Challenge participants as they get ready for that final push! There’s so many good ideas going around and you don’t want to miss them.
Money Spent – $54.06
Paint for Vanity (Sherwin Williams Urethane Trim Enamel in Extra White) – $30.15 (used 30% off coupon)
2 Pack of Foam Rollers – $4.97
1 1/2″ Brad Nails – $4.67
White Paint Sample – $3.98
4 1/2″ Poplar Boards – $8.40
Silver Rings – $1.89
Left to Spend – $45.94
Supplies On Hand
Painting Supplies –
- Large Paint Roller for Walls
- Paint Trays (large and small)
- Small paint roller
- Painters Tape
- Brown Paper
- Angled Brush
- Sherwin Williams Extreme Bond Primer
- Bronze Spray Paint
- Paint for the room – Sherwin Williams Halcyon Green
- Various Small tester pots
- Small Craft Brushes
Misc Home Improvement Supplies –
- Liquid Nails
- White Caulk
- 3M Spackle
- Sanding Block
- WeatherWash Stain
- Early American Stain
- Scrap Wood for Shelves
- Wood Filler
- Wood Glue
- Dowel
- Leather Cord
- Cabinet Knob
Tools –
- Pry Bar
- Nail Gun
- Caulking Gun
- Putty Knife
- Level w/Ruler
- Miter and Table Saw
- Pocket Hole Jig and Screws
- Sander
- Glue Gun
Comments
I seriously love everything about this bathroom! The art – those shelves…. its all perfect!
Thank you so much for those kind words Tammy! I’m so glad you like it as much as I do
Lindsay, I love all of it but oh my, that mural. I’m a huge bird/nature/garden lover and this is epic. I used a make shift projector to enlarge the letters on my bedroom wall but love your low-tech idea and now I want to try it!!
Thank you so much Patti! I very much love adding as many images of nature in my home so I’m so happy that you like it! If you use the low-tech idea let me know! You’d be amazed how great it works and you can use it anywhere!
What a beautiful wall display. Love the shelving and what a neat idea to store toilet paper. You are so clever with the toilet paper holder. Looks amazing. Now for the wall….I said it was beautiful but Lindsey this truly is a great piece. Love it!
Aww Terrie that is so incredibly kind of you to say – thank you! I really love painting and it’s so nice to finally be able to share some of it because I never get time.
Ahh this is so cute!! It’s really coming together!
Thank you Elizabeth! The final touches are really going to tie everything together next week
amazing job on the mural!!! I need to find a place in our home to do something like this.