

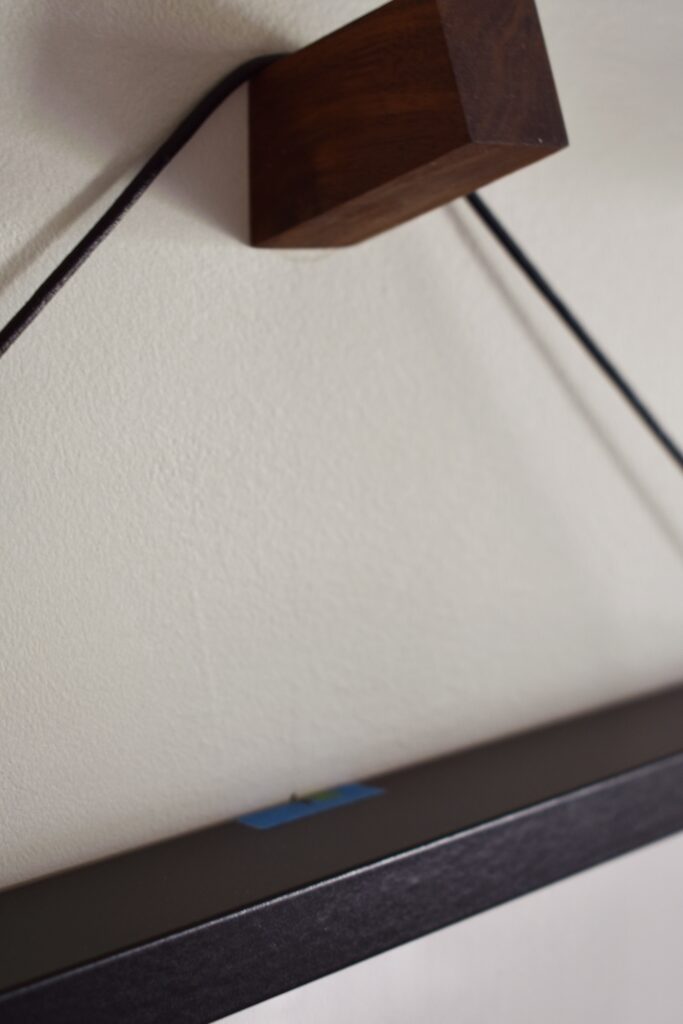
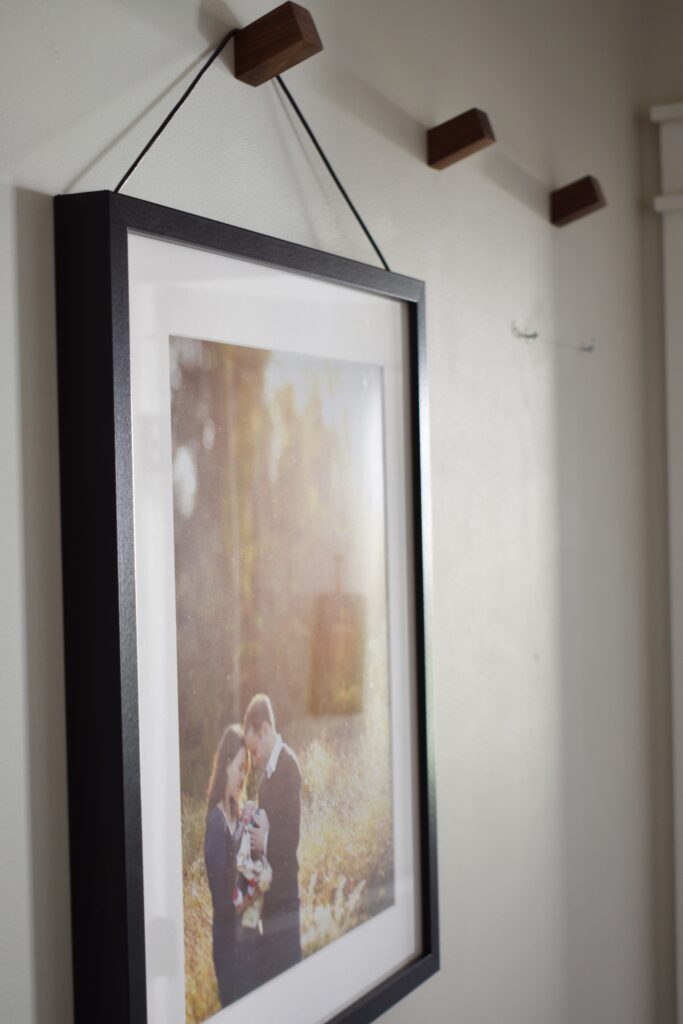
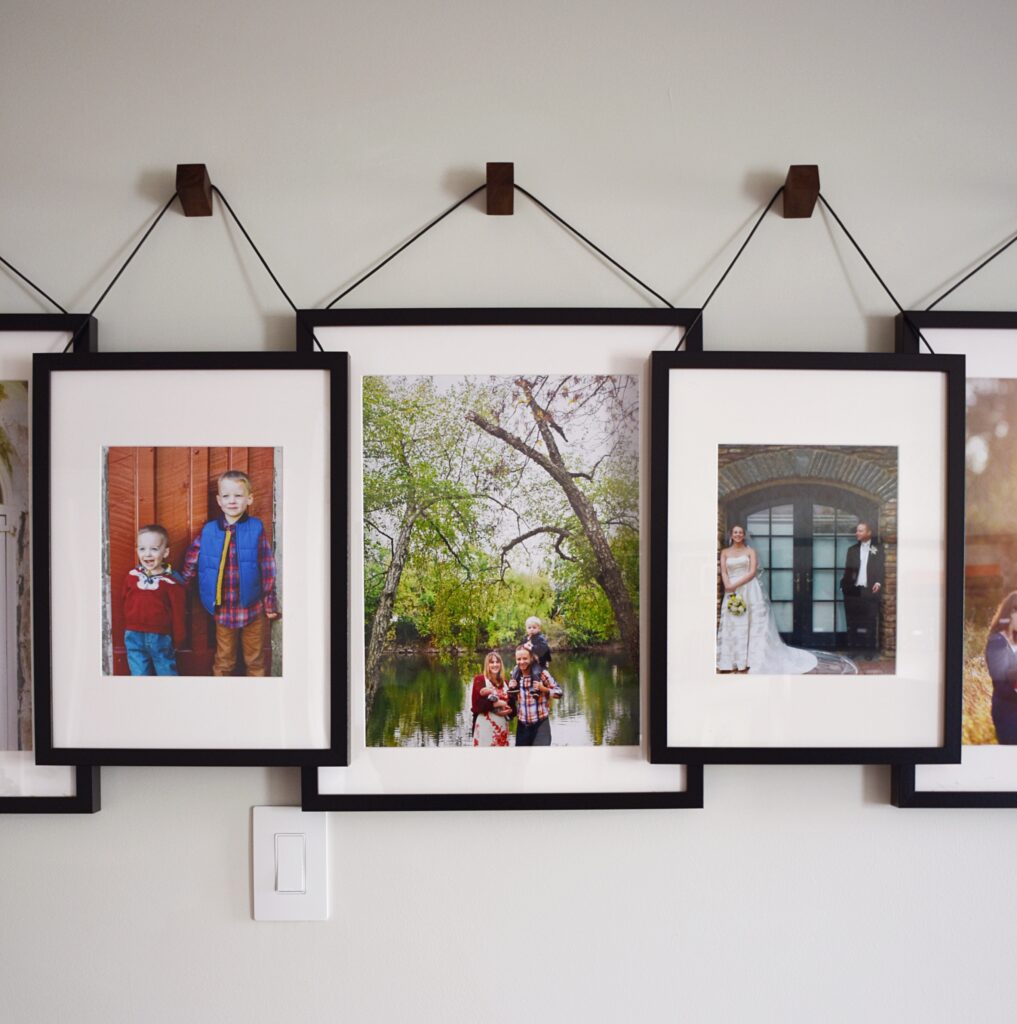
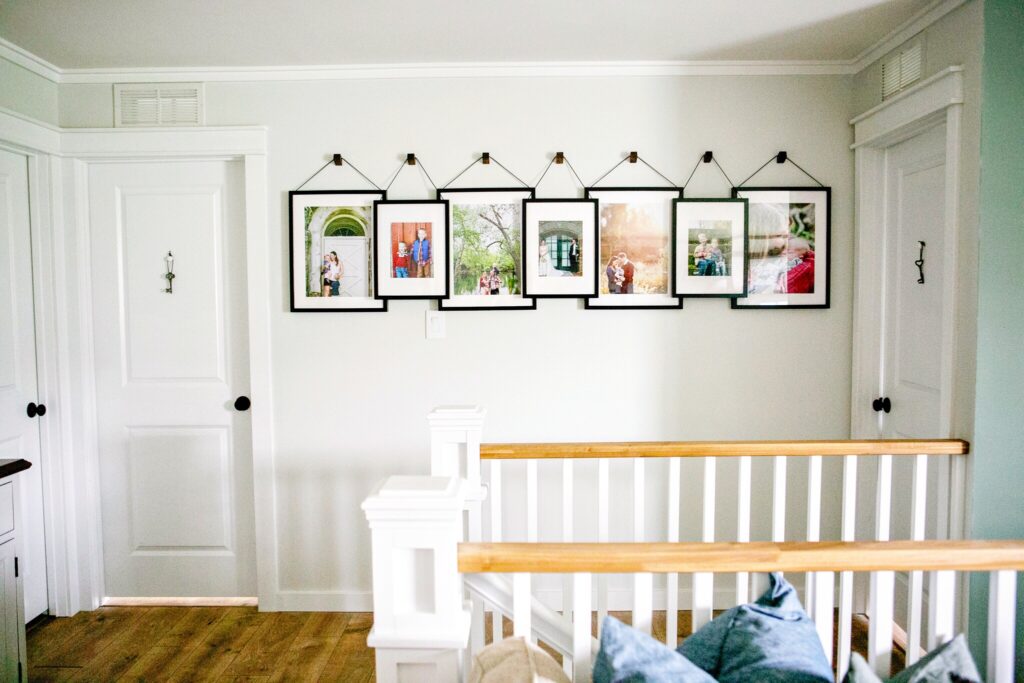
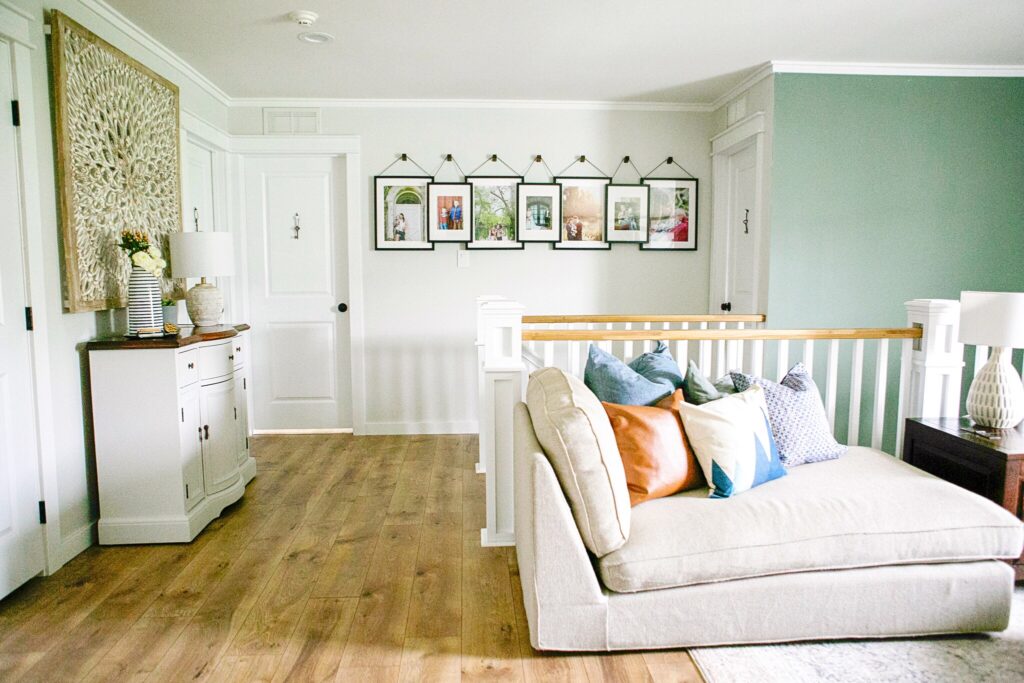
These frames only look like they’re hanging. They’re actually all supported on screws so they always stay straight and are easily accessible to swap out pictures. These measurements will work for a space that is at least 93″ wide.
A NOTE ABOUT PICTURE SIZE: I use ShutterFly to print out all my photos. For the smaller frames I used 8×10 photos that fit w/in the mats included with the frames. For the larger frames I used 16×20 photos with a lot of background that wouldn’t crop out the subject when the mat was added. Alternately, Shutterfly has the option to add a white border to your photo before you print it which would help avoid the cropping issue.
Materials
7 Wooden Hooks (The exact hooks that I used are no longer sold but these are similar) NOTE: If this product also shows as sold out I would suggest to search Etsy for “Rectangle Wooden Wall Hooks.” Unfortunately despite my diligence these hooks seem to sell out or go out of stock pretty regularly.
1 spool of Black Leather Cord
8 Drywall Anchors and Screws
6 small screws
Blue Painters Tape
Tools
Cordless Drill
1/2″ drill bit
Hammer
Level (I use one with a built in ruler as well as this Ryobi Laser Level)
Measuring Tape
Pencil
Black Sharpie or Marker
Steps
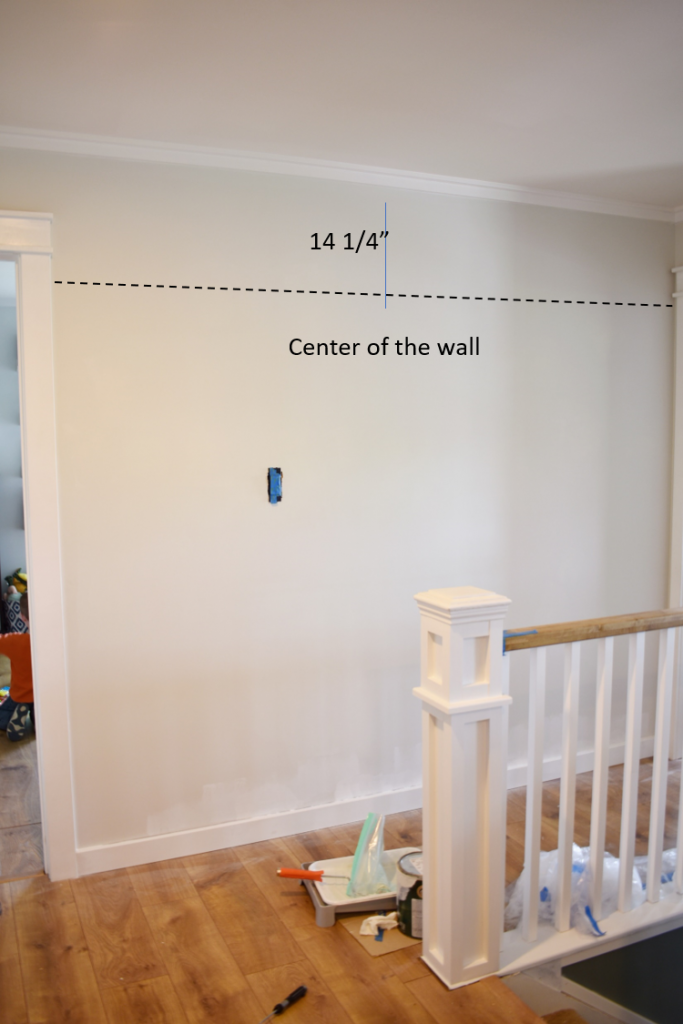
- Measure the width of your wall and mark the center; measure 14 1/4″ down from the top of your wall and mark that spot. *Where those two marks intersect is where you will install your center hook
- Using your level, draw a light pencil line at that height along your wall (if you are using the laser level you can leave it attached it to the wall at the correct height)
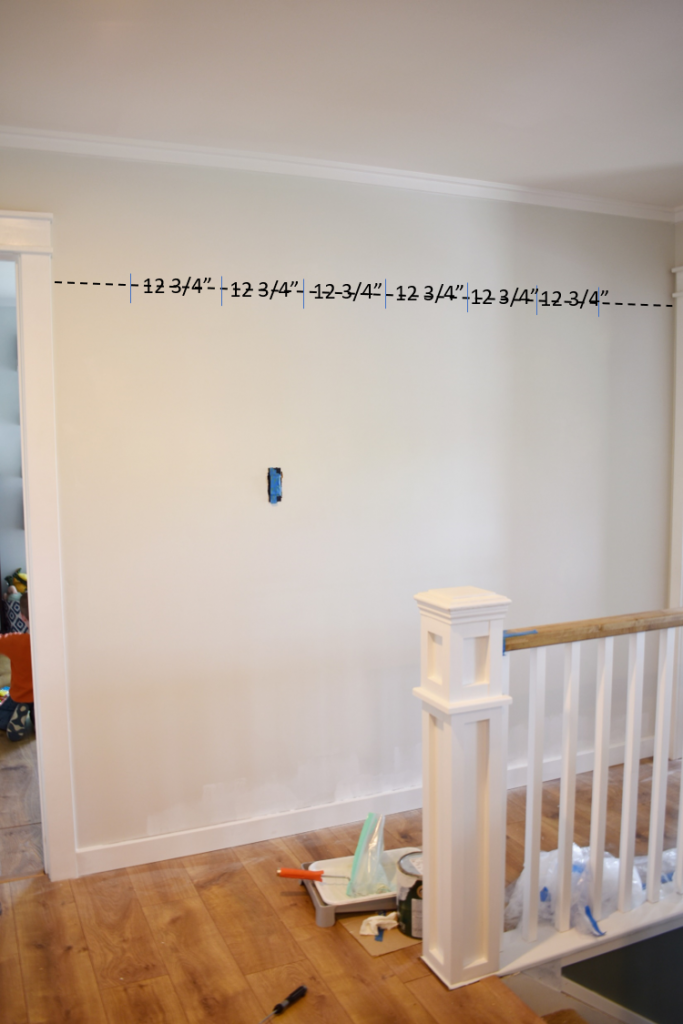
- From the center mark measure 12 3/4″ on either side 3 times and mark each one with your pencil; you will end up with seven marks total for your seven hooks
- With your 1/2″ drill bit, pre-drill a hole at each of your markings. Gently tap the anchors that came with your wall hooks in each of the holes with your hammer
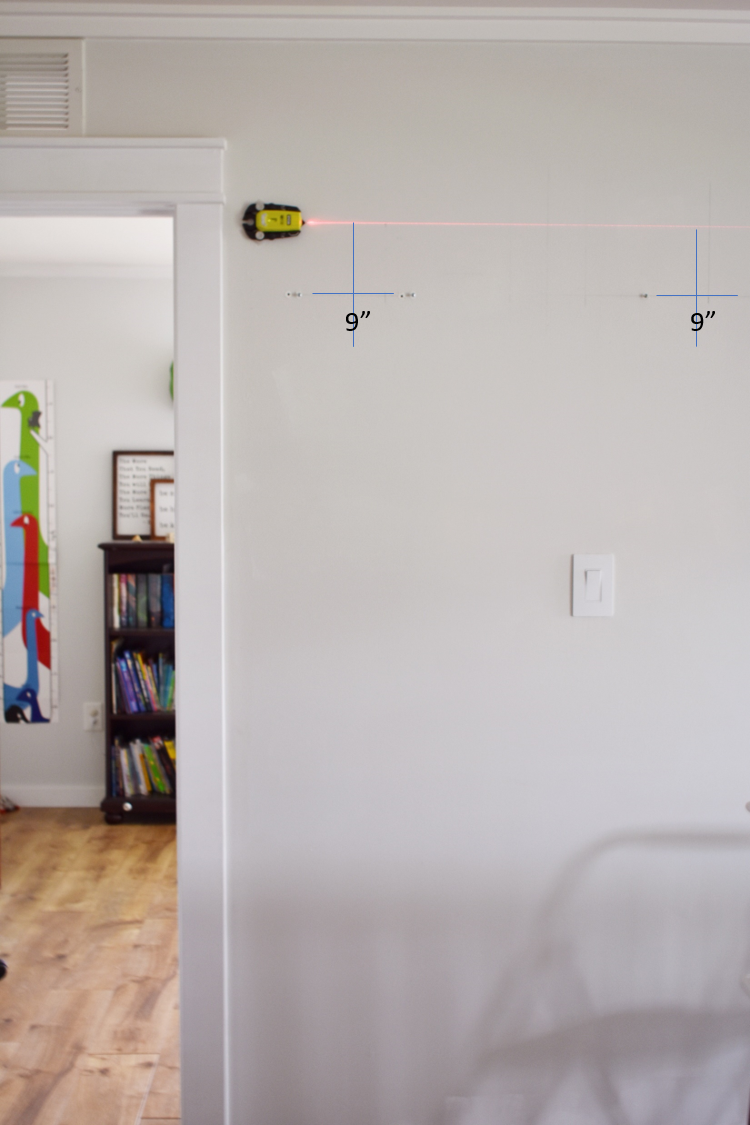
- Measure down from the left-most hole 5 3/8″ (this will be the height you will install the screws for your larger frames); as you did before, use your level and draw a light pencil line at that height along the wall. Then mark the intersection of that line and straight down from every other anchor point (you will have 4 intersection lines total)
- At each intersection – mark two points 4 1/2″ from the center, or 9″ apart. Install a drywall anchor and a screw at each of these points.
- Screw your wooden hooks into the top anchors. Twist until they are straight – remember, these will not be holding any weight

- Prepare your frames – using painters paint and a sharpie
- Mark the center of each large frame to help you line then up later.
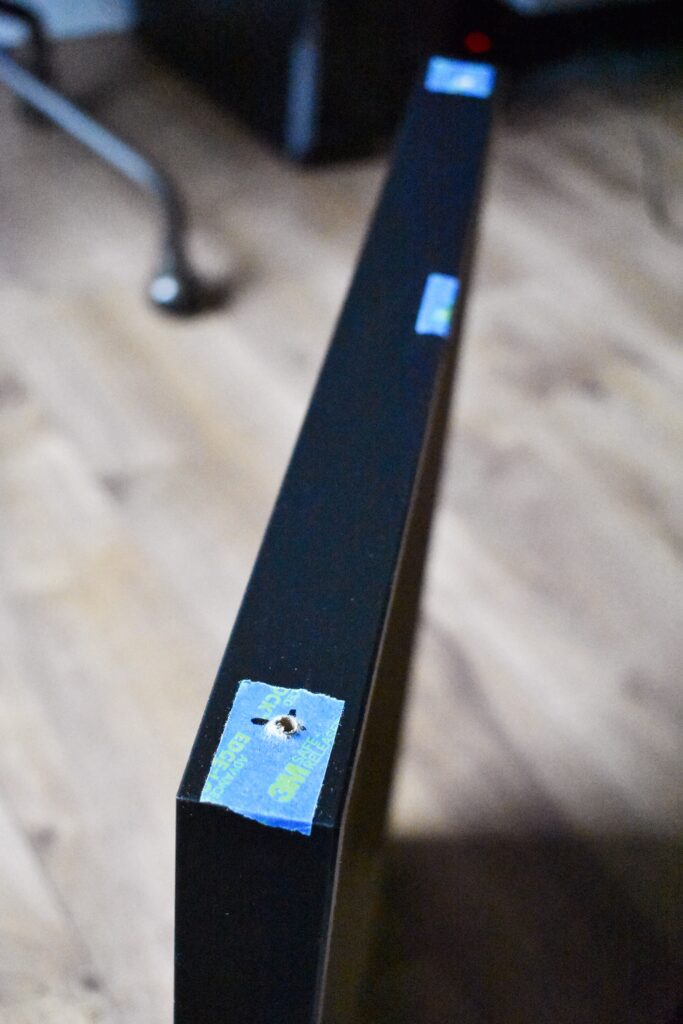
- On the top of each large and small frame frame – Mark 1″ inside from each outside edge and use your drill bit to drill a hole throw the frame at each point.
- On the front of the center two large frames – Mark 2″ down from the top on each side and pre-drill a small hole; you will add your small screws to these later
- On the front of the left-most large frame – Mark 2″ down from the top of the right side and pre-drill a small hole; you will add a small screw to this later
- On the front of the right-most large frame – Mark 2″ down from the top of the left side and pre-drill a small hole; you will add a small screw to this later
- To attach the cords – thread one end throw one of your top holes in the larger frames and make a knot. Hang the frame on the screws you attached to the wall (line the center mark up with pencil line on the wall). Drape the cord over the wooden hook and cut enough length to reach the other hole and make a knot. Thread through the second hole and make a knot so that the cord is taught, but loose enough that the frame rests on the two screws. Repeat for the remaining three large frames.
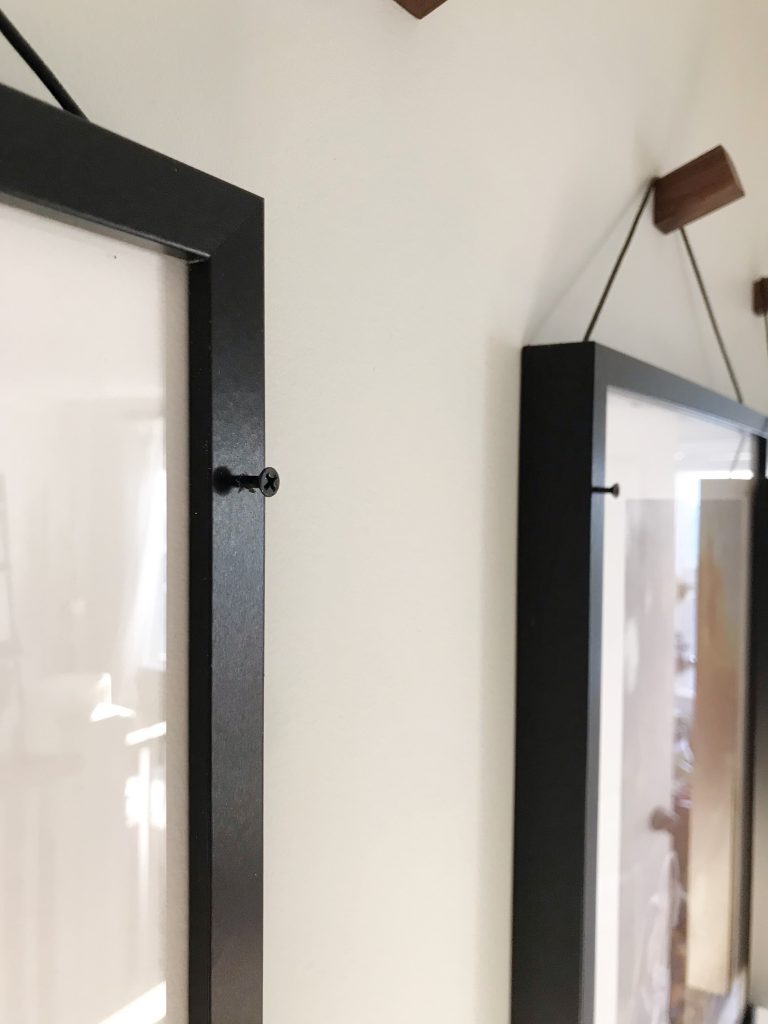
- Add your small screws to the pre-drilled holes on the front of the large frames; your small frames will rest on these screws and overlap the large frames.
- Rest the small frames on the screws and repeat the same procedure to attach the cords.
- Clean up any stray pencil marks but keep the lines in the center of each of the larger frames to help you line them up after you add your photos.
Comments
Wonderful idea. I love it, can’t wait to recreate and put my little spin on it. Just a quick question what size prints on the photos did you use.
That’s great! I love when people but their own spins on projects! For my prints I used 8x10s for the smaller ones and 12x16s for the larger ones
What is the height of the wall you have this on? I love it!
Hi Kristi – Our ceilings are 8 ft tall
I love it and so appreciate the detailed tutorial! I am getting ready to order the knobs from your link – since they are from outside the US, do you recall if you were subject to additional customs fees?
Hi Dawn – I just checked my receipt and no, there weren’t any additional customs charges. Just the $10 shipping fee
I am in love with this idea. I have all my prints ready to go just need to finish paining my walls. Will these same wall measurements work with any size frames? I’m thinking 11X14 and 8X18’s.
For smaller frames you’ll have to bring everything a few inches closer so that the smaller frames can rest on top of the larger frames. I’d lay everything out on the floor first to see how much space you need to leave in between and go from there.
I probably missed this, but how do the smaller frames hang? I see the screws on the side, but those screws don’t hold the smaller frames do they?
They do – the IKEA RIBBA frames are really deep (which is one reason I love them) so the tops just rest on the screws in the larger frames
Love the gallery wall so much I have bought everything to do this myself but I dont see an option to print photos 12X14 for the larger frame with the white border. Am I missing an option on Shutterfly?
Hi Jenn! This link on shutterfly explains how to do it and has helpful screenshots:
https://support.shutterfly.com/s/article/prints-borders-1
This is by far my most favorite design for hanging pictures. We did ours this weekend and are obsessed! Thank you for the inspiration! (I tried to attach a picture but it doesn’t allow for that).
Oh I am so glad to hear that this arrangement worked out so well for you! I love hearing it
Am I missing how the front frames hang? I see you have screws for them to rest on but how are the front frames being held in place. Sorry….I’m a little slow to the party or missing something obnoxious.
No apologies necessary! The back of IKEA RIBBA frames are deep, I’d say at least 1/2″, so they have room to rest right on top of the screws. It’s one of the reason’s I like to use them – they’re much more forgiving to hang
I just bought all the materials to make our own hanging gallery wall. I’m replacing an outdated gallery wall, I’m so excited to start the project. Thank you for the inspiration!
Oh yay! I’m so excited to hear that! I hope you enjoy it in your home as much as I enjoy it in mine
Hi there! What do you mean by “To attach the cords – thread one end throw one of your top holes in the larger frames and make a knot.” How is the cord attached to the frame? I’m a bit confused. What do you mean by thread? How is that done? Sorry for all the questions. I’m very inspired!! Thanks for the inspiration!!!
Hi Sandra – After you drill your holes insert the leather cord from the top (or the outside of the frame to the inside of a frame). Then tie a knot at the end of the cord to stop it from slipping back out of the hole. It’s not necessary to secure the cords more than that since they do not support the weight of the frames. Hope that helps!
Hi there! I have a question regarding the 16×20 pictures you ordered through Shutterfly. I am trying to order mine and it says pictures may appear blurry when printed. Is there any way to avoid this or did this happen to you also and they didn’t print blurry? Love this idea so much, I have everything but the pictures so really want it to work! Thanks so much
Hi Emily –
The photos I used were professionally taken so I was able to blow them up with no distortion due to their high image quality. One thing you can try to do is increase the size of the border so that the image themselves print a bit smaller, or you could just print one and see the quality that comes back?
Thanks so much for getting back to me! I thought the same thing about the quality. You used 16×20 prints for the large frames correct? I’ll try the border. Thanks so much!
Correct! 16×20 for the larger ones
Also how wide is your wall?
This wall is 93″ wide
Are the frames too heavy to hang on the pegs alone? Wondering if the extra screws in the walls and smaller frames can be skipped….
They’re not too heavy – but they would move around a lot without something to hold them to the wall and the screws make it easier to ensure that the frames are level. If you skip the screws I would use Command Strips or something similar to help keep them in place.
The link for the leather cord is no longer active. Do you happen to recall the thickness of this by chance?
Thanks so much!
It’s 2mm leather cord – I usually just pick it up at Michael’s which you can find at this link – https://www.michaels.com/product/hemptique-2mm-genuine-round-leather-cord-121978780375433216