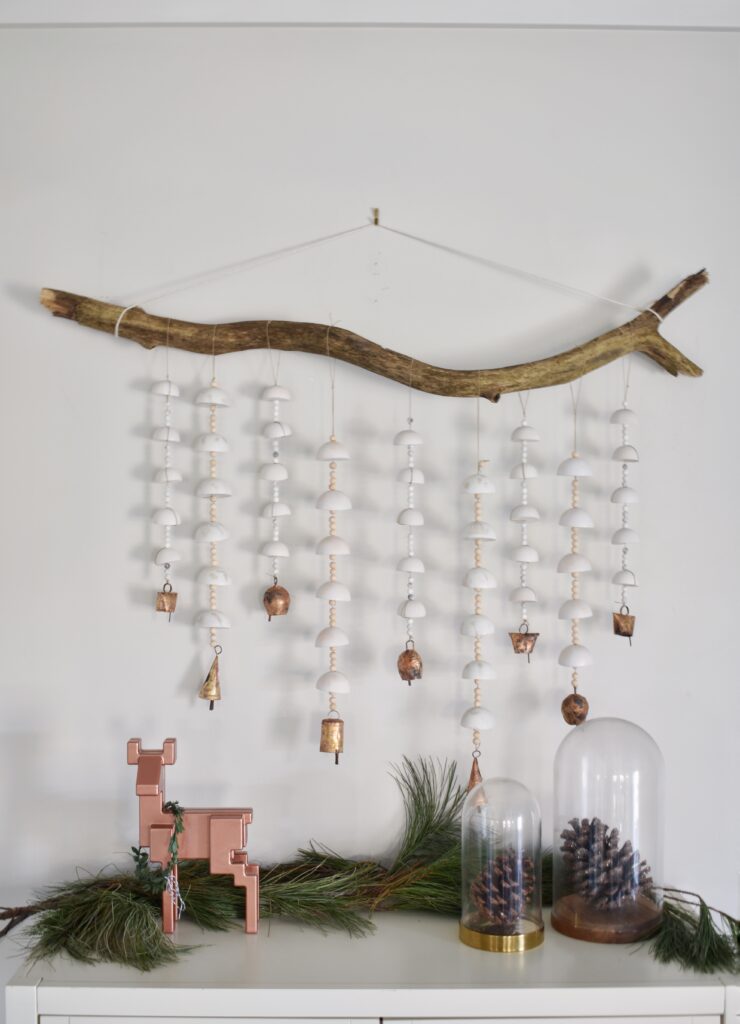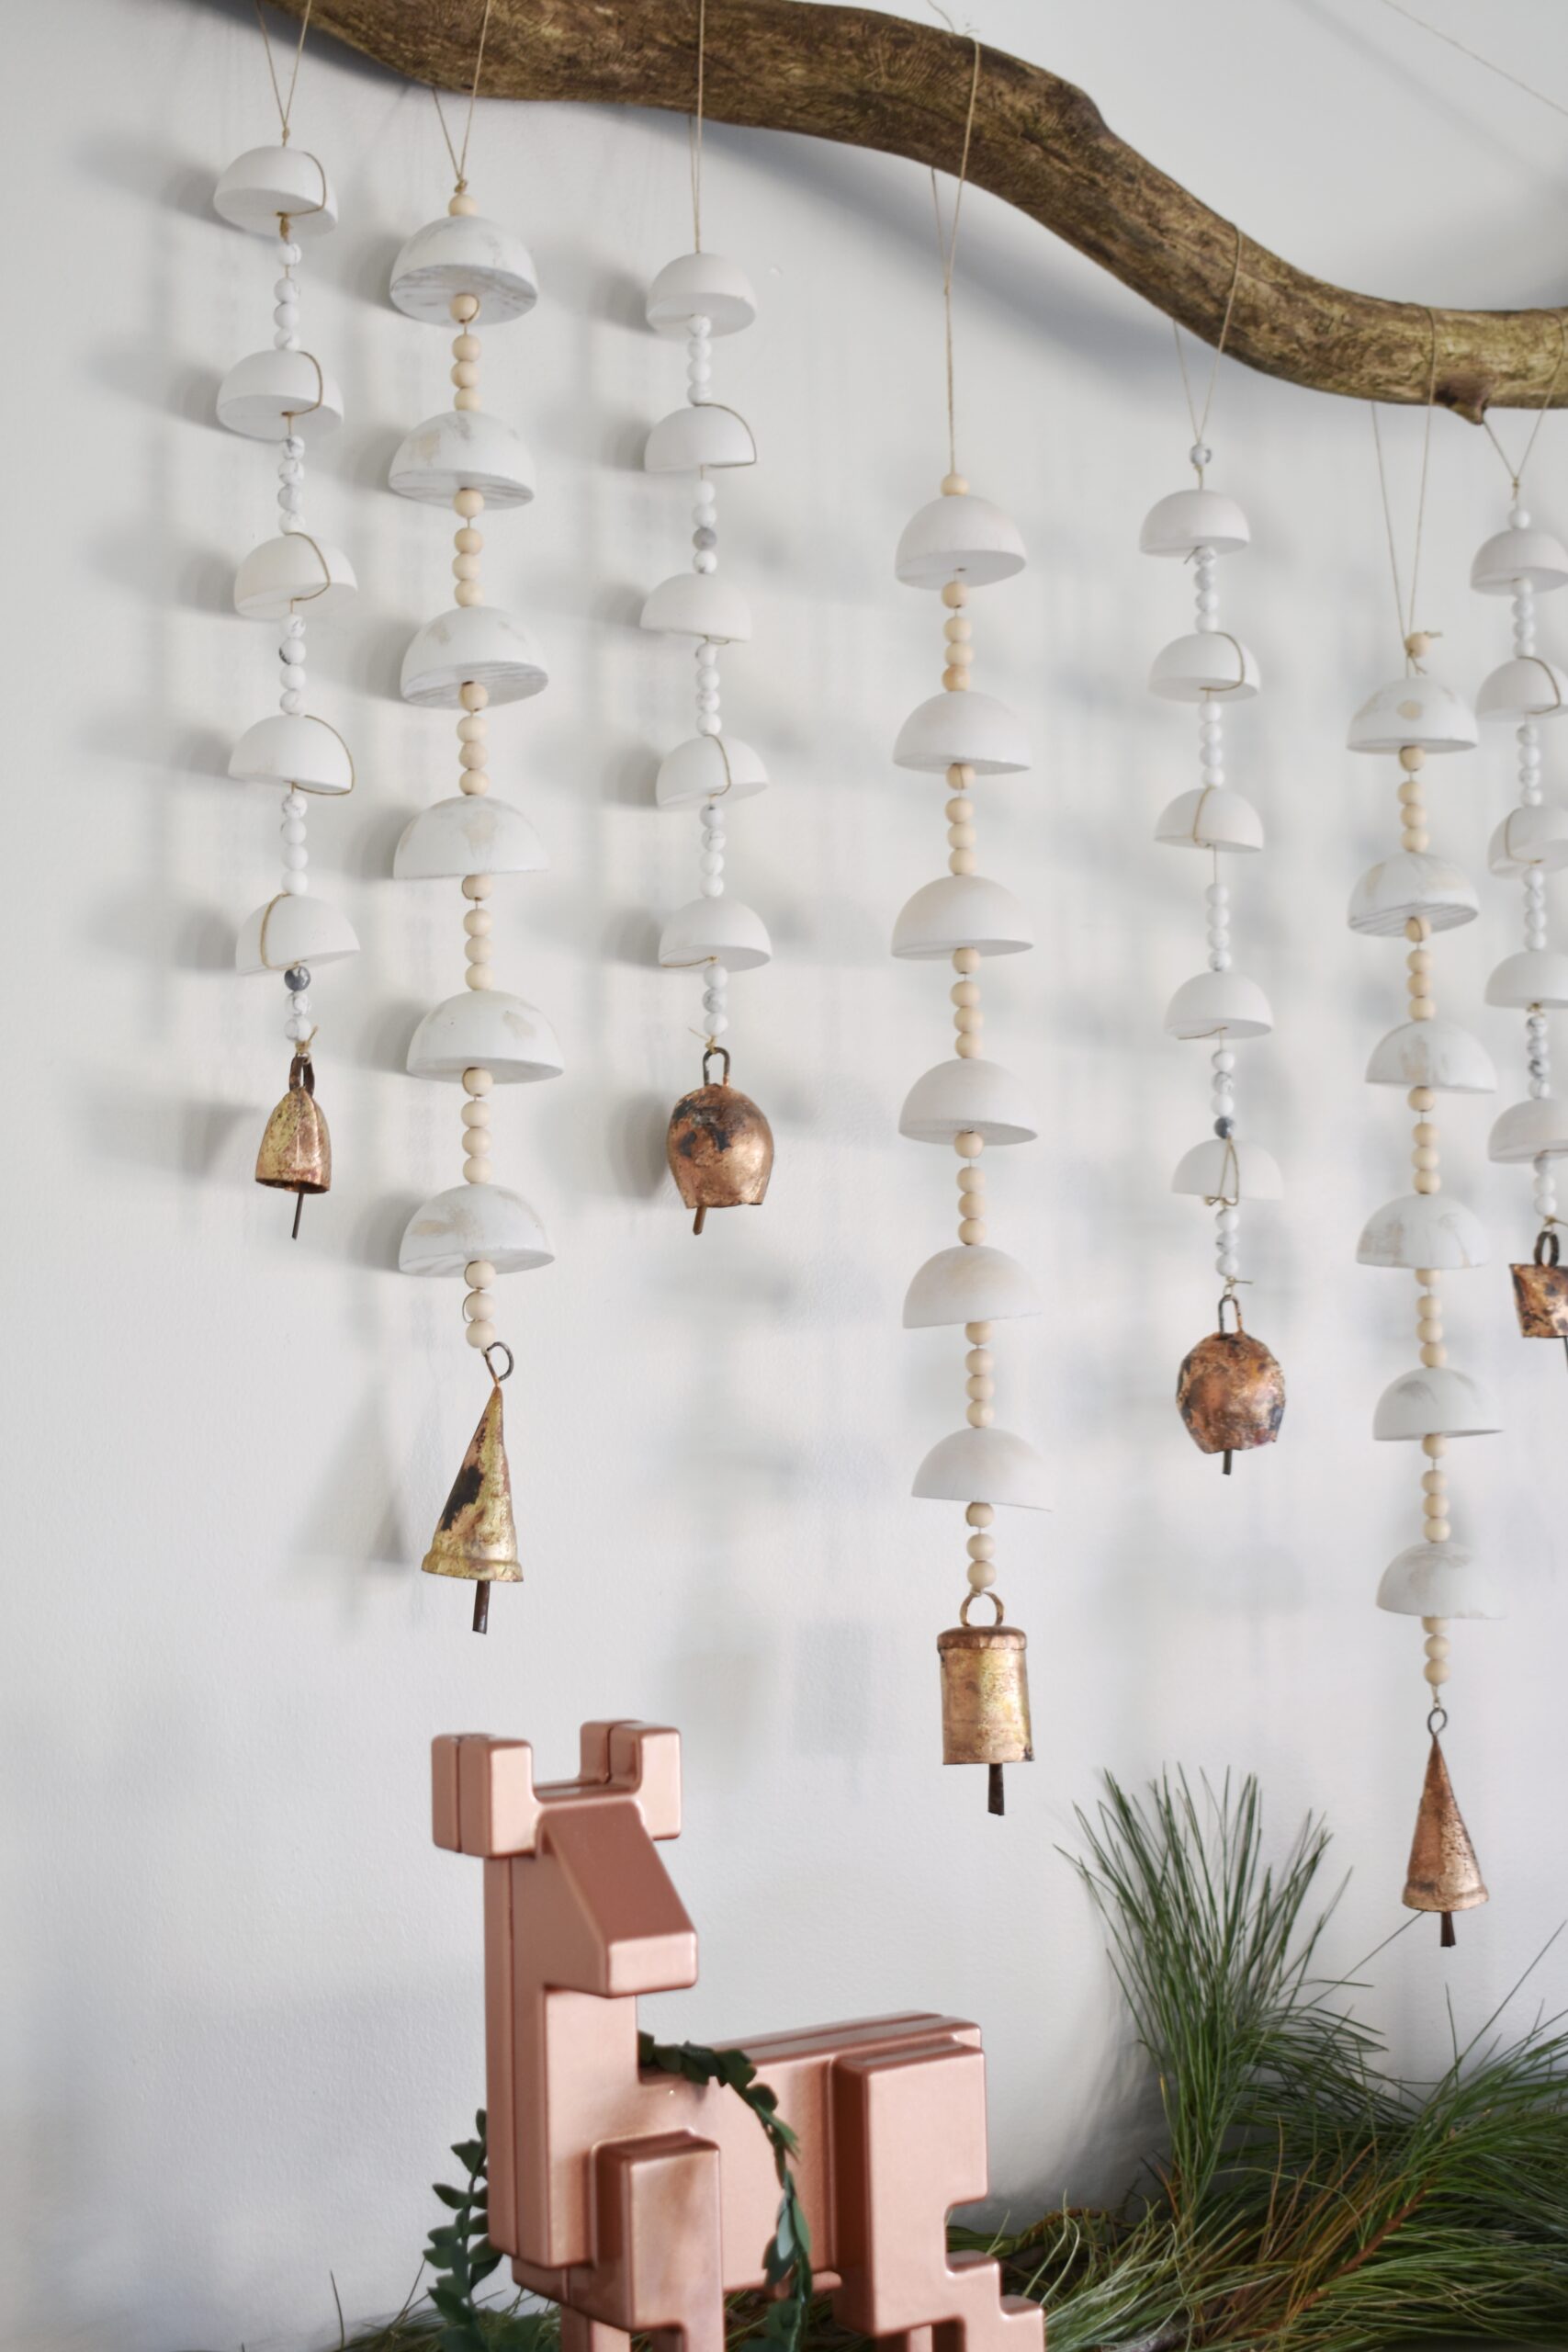
I could never figure out what to put above my glass cabinet at Christmas time, but my DIY wooden windchimes have given the room the perfect dose of rustic homemade charm that I just love during the holidays. You can mix up the type of beads (I used both wood and marble) and add any type of bell you like to the bottom. These rustic bronze ones came off of a garland that I found on clearance at Target and make the most lovely sound. I chose to hang mine from a branch I found on the walking trail behind our house, but they would look just as lovely hanging individually or in pairs around the house.
Materials
Sandpaper *optional for a distressed effect
White wax
Bells
Tools
Cordless Drill
1/4″ drill bit
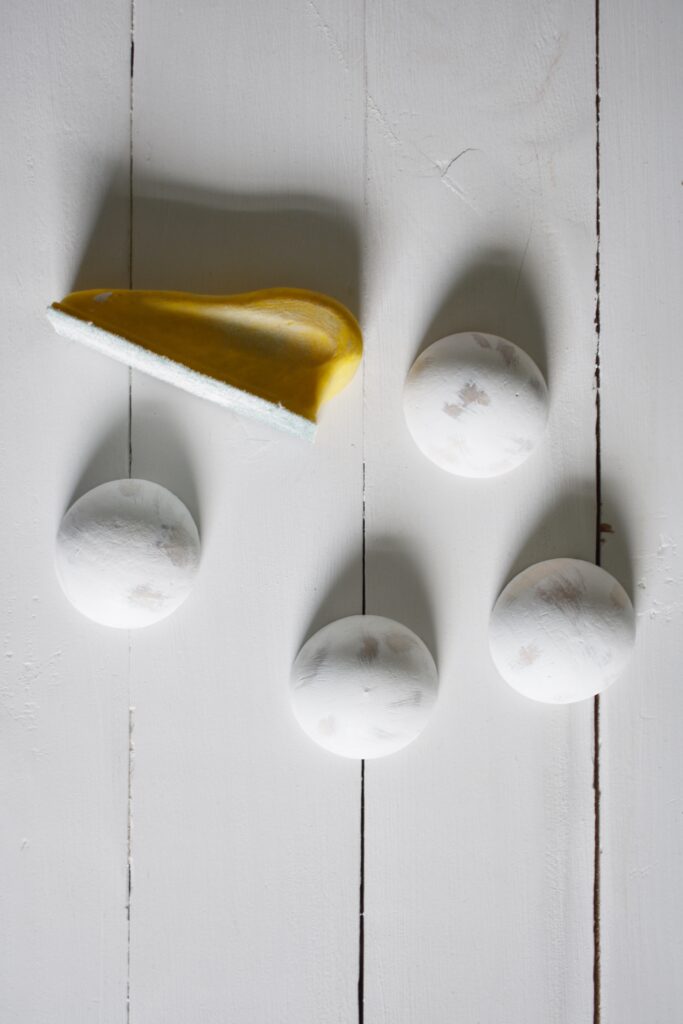
1. Spray your split wood balls with white chalk spray paint. If desired, give them a distressed effect with some sandpaper (I love this Gator Micro Zip Sander for small jobs like this)
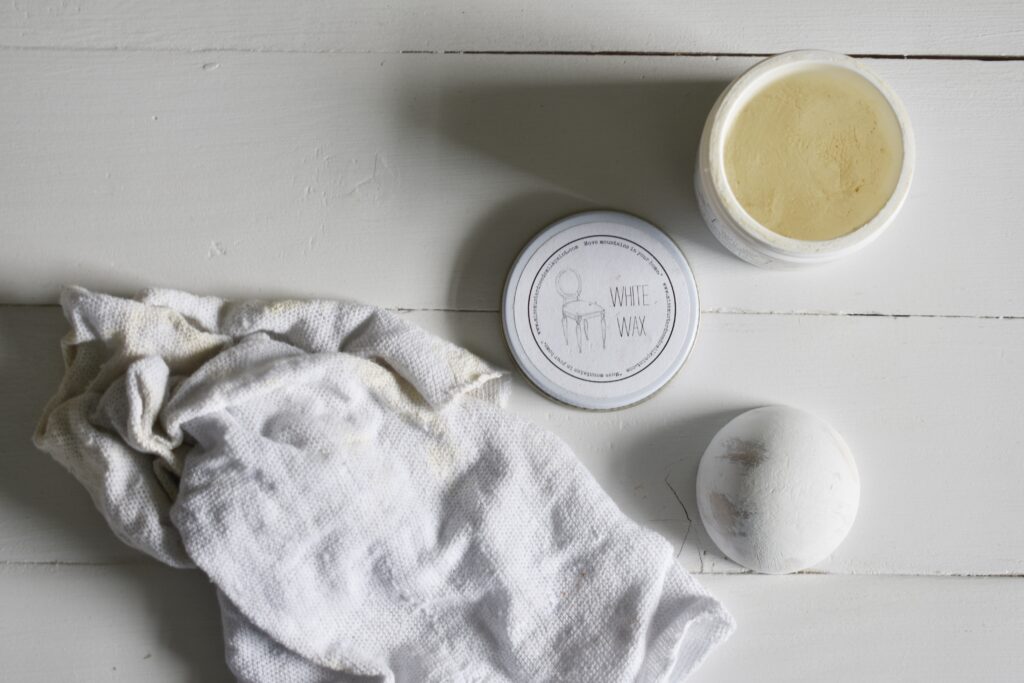
2. Seal the finished balls with some white wax; I just use a scrap towel to wipe the wax over each piece
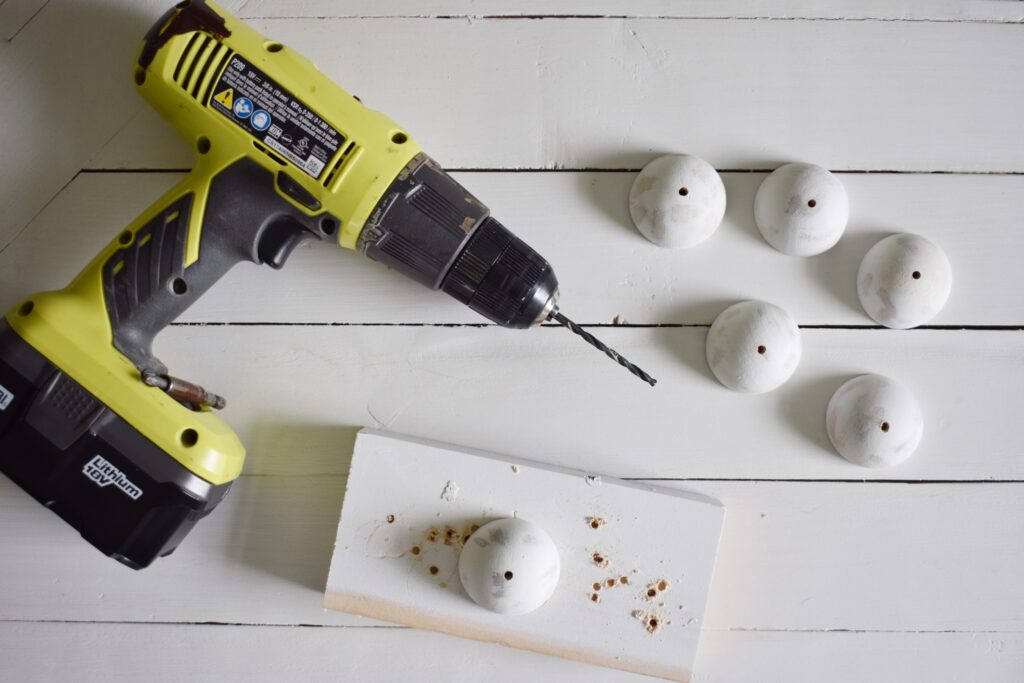
3. Using your cordless drill and your 1/4″ drill bit, drill a whole into the top of each wooden ball; use a scrap piece of wood underneath so you don’t drill through your surface
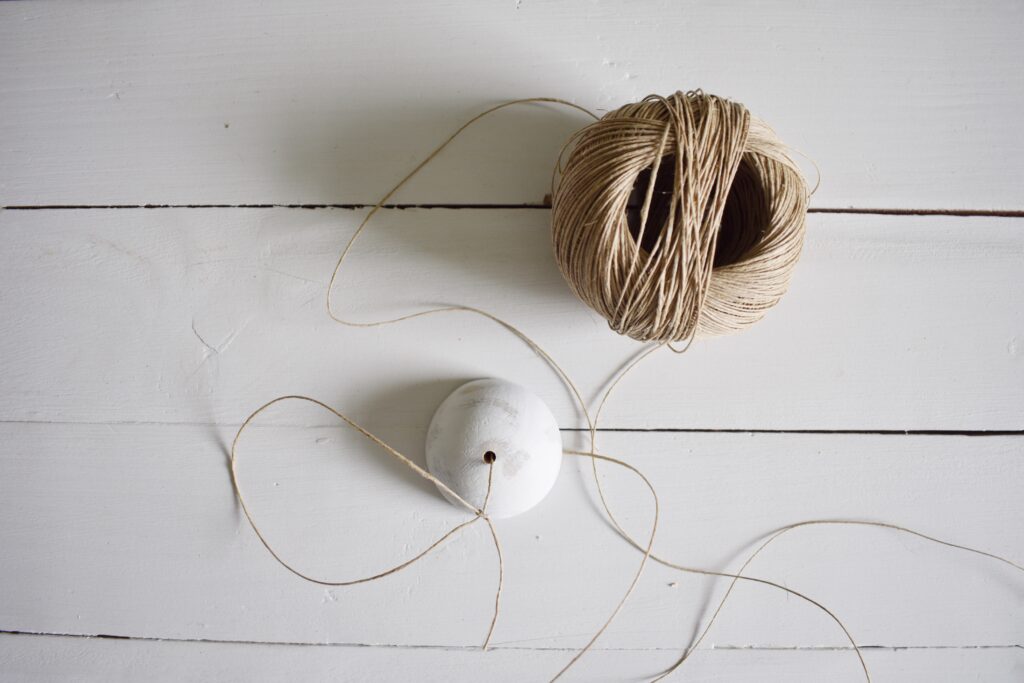
4. To start your chime, cut a long piece of wax cord – make sure that it is a decent length longer than the finished chime you are looking to make. Thread one end of wax cord through the top of the first wooden ball, and tie a knot to form a loop to hang the chime from.
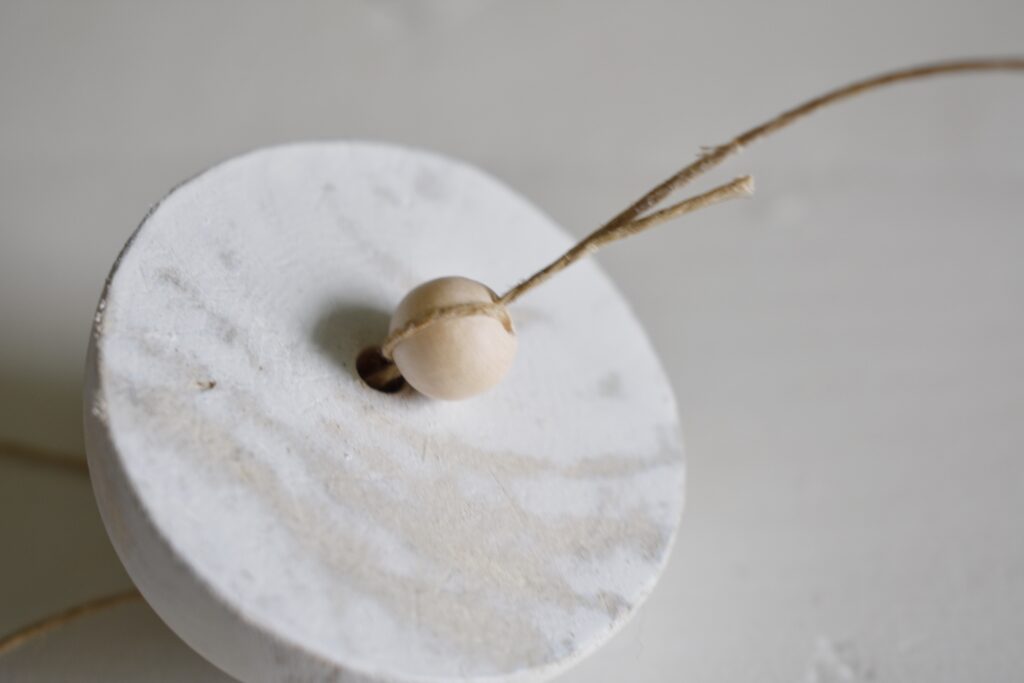
5. Thread the other side of the wax cord throw the first wooden bead; to secure it in place, I loop it back through the top of wooden bead and out the bottom. This will ensure that it holds tightly against the wooden ball.
6. Before you continue, add one bead to the top of the wooden ball and tie a knot; this first wooden ball should not be secure at the top and the bottom so it will not work on you.
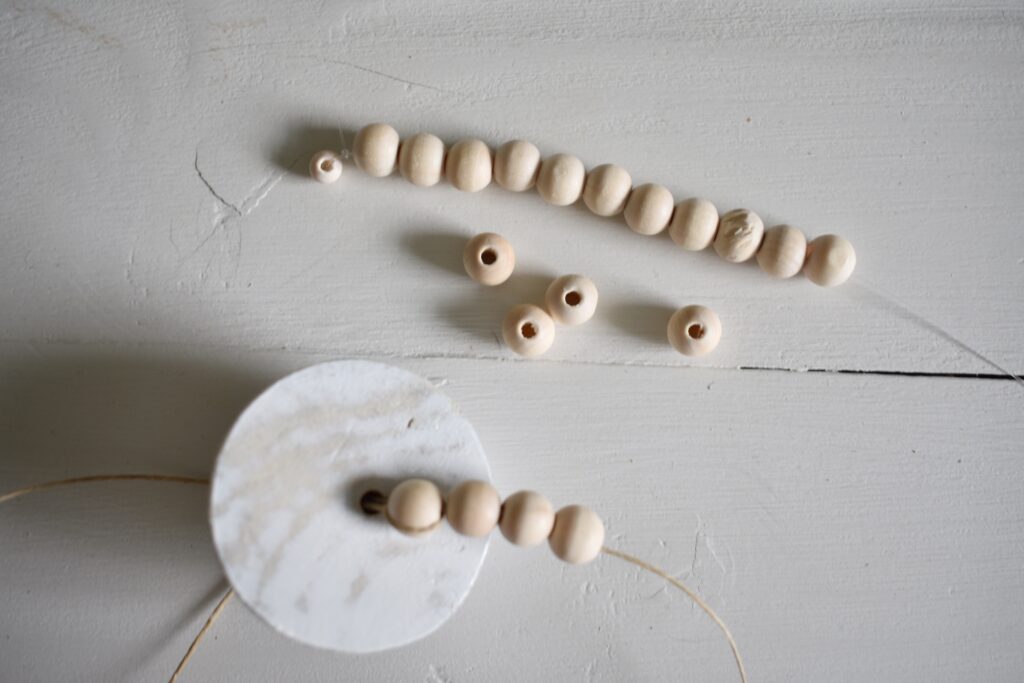
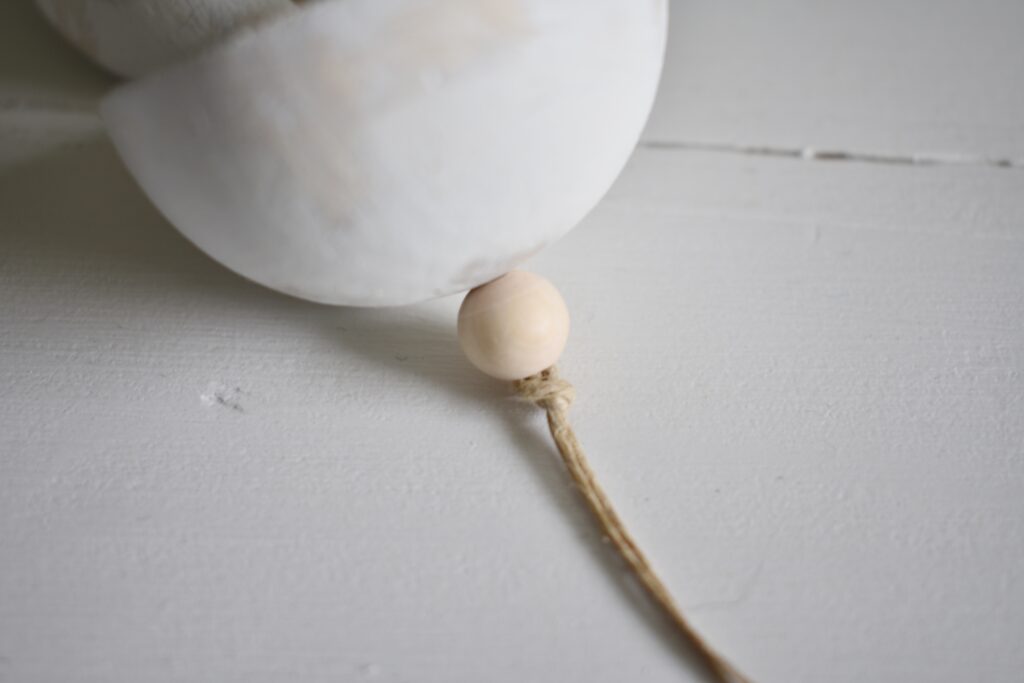
7. To continue the pattern, thread three more wooden beads onto the wax cord and then one wooden ball.
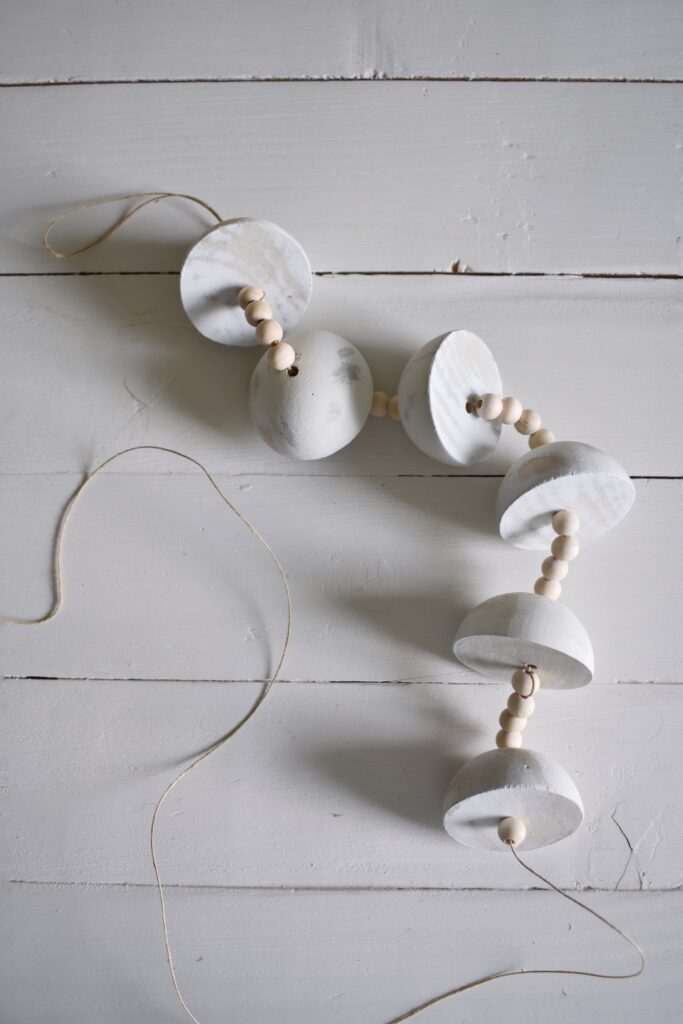
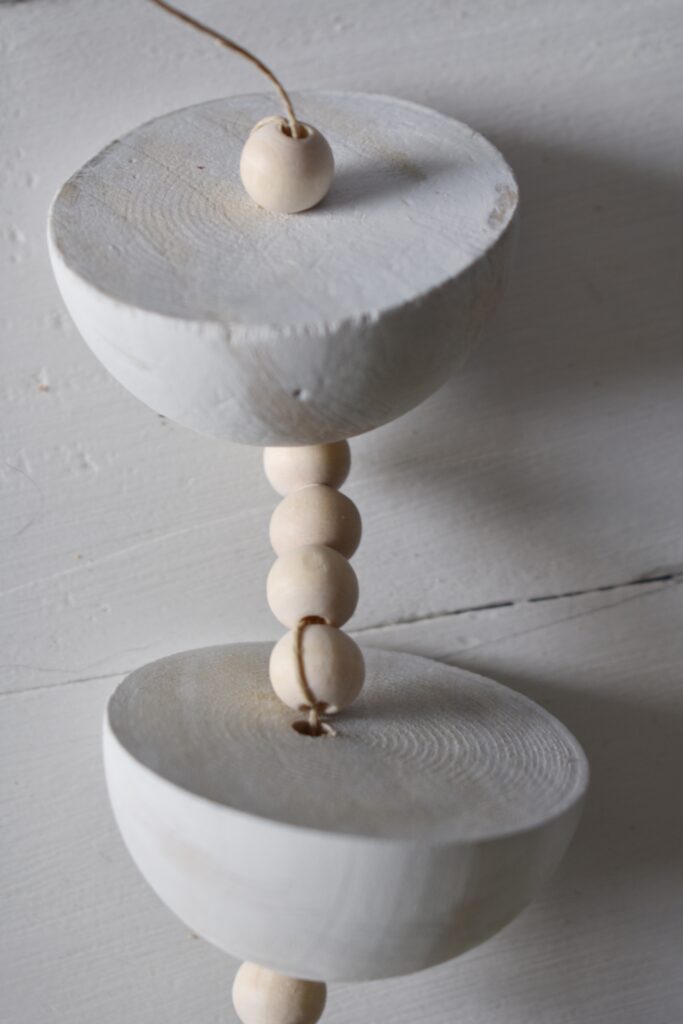
8. Loop the wax cord back through the wooden bead after each wooden ball; this will keep your beads nice and tight and make it easier to work with as it gets longer.
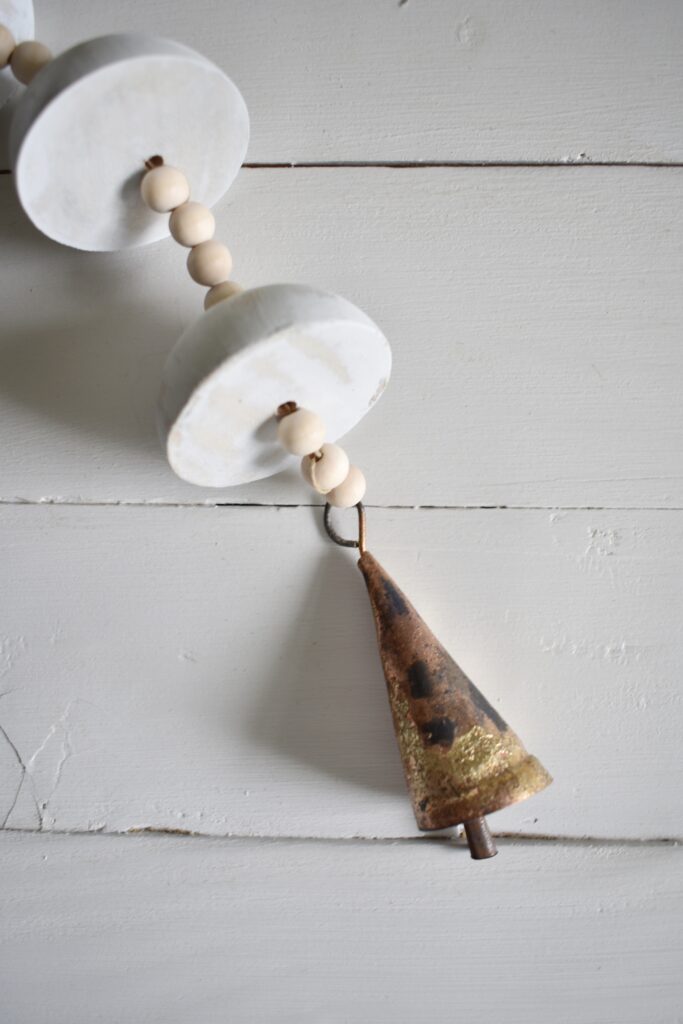
9 After the last wooden ball, thread three beads and then add your bell. I take the end of the cord and loop it back through the last bead before I cut it off.