Amidst my summer of full-time job stress, carpooling kids to camp and back, and squeezing in dinner with friends/afternoons in the pool whenever possible…I took on the long-dreaded task of reorganizing my garage. Over the years we’ve tried our hands a few times to clean out unneeded clutter (including last year when I did a BIG sweep of my scrap materials pile) but we had only really ever added storage haphazardly as we needed which has always made it feel a little uncomfortable to work in — and that little bit of uncomfort adds up quickly when you work in a space as much as I work in my garage.
Before we get too far into this post I just need to clarify – this space update has ZERO to do with aesthetics. As much as I love looking at gorgeous shiny epoxy garage floors, colorful or even wallpapered garage walls, or massive built in storage systems on Pinterest the look of the garage wasn’t a priority for us. Maybe one day down the line we’ll paint the walls (definitely will be painting the badly peeling door next year!) but for now I just want to share some of the organization tips that have COMPLETELY changed the way not only myself but my family uses this space and can assure you that even without an aesthetic makeover we still walk into the garage and talk about how much nicer it feels. (SIDE NOTE: My dad informed me that the best time to paint your garage, especially in a new build, is before you move a single thing into it…I told him that reminder would have been really helpful 10 years ago but at least I can pass it on to you.)


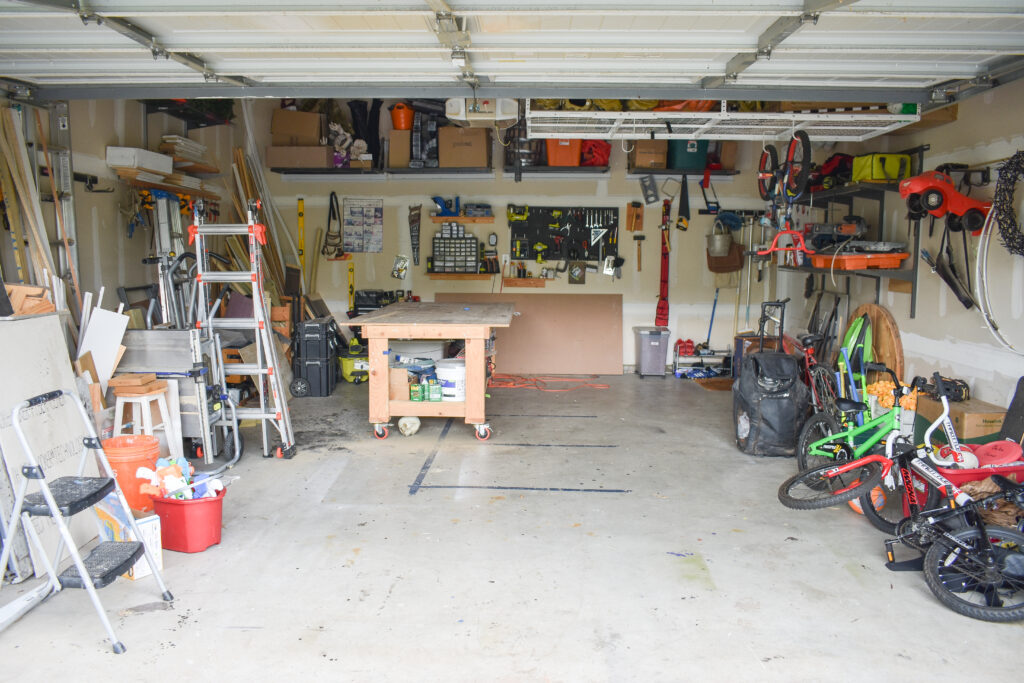
My number one, absolutely had to make it happen, uber important goal for this update was to re-arrange the garage into three distinct areas — one for my husband and my boys things, one for my tools and materials, and one for our holiday decor.
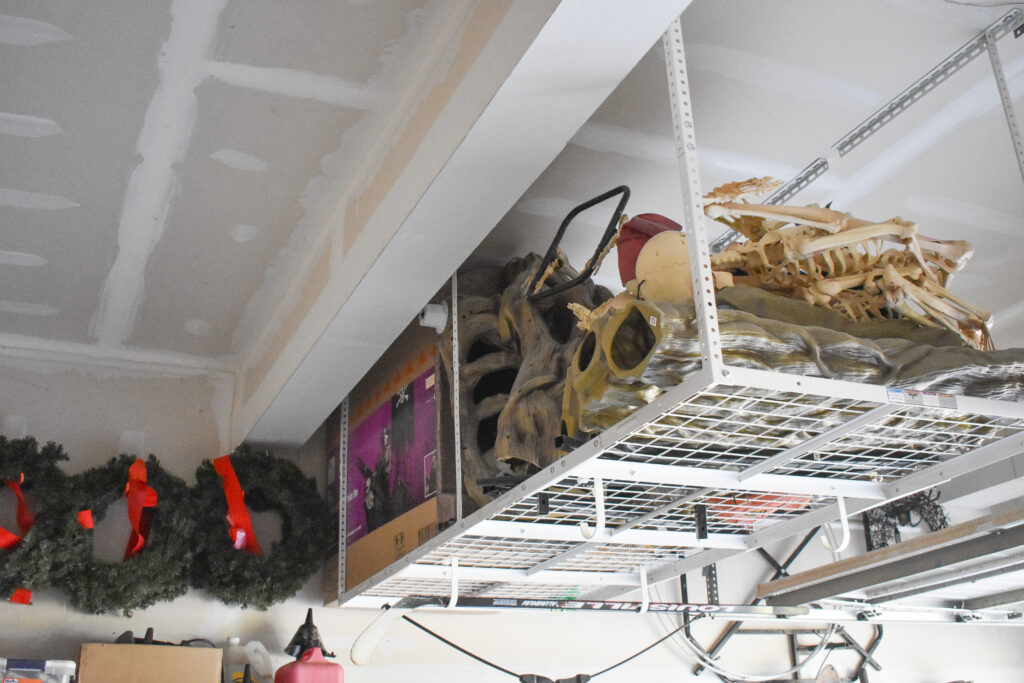
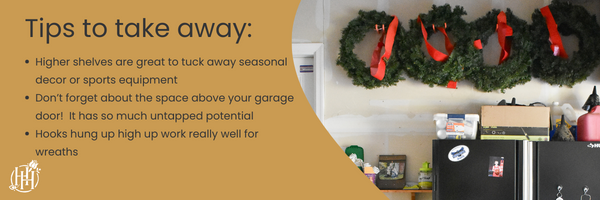
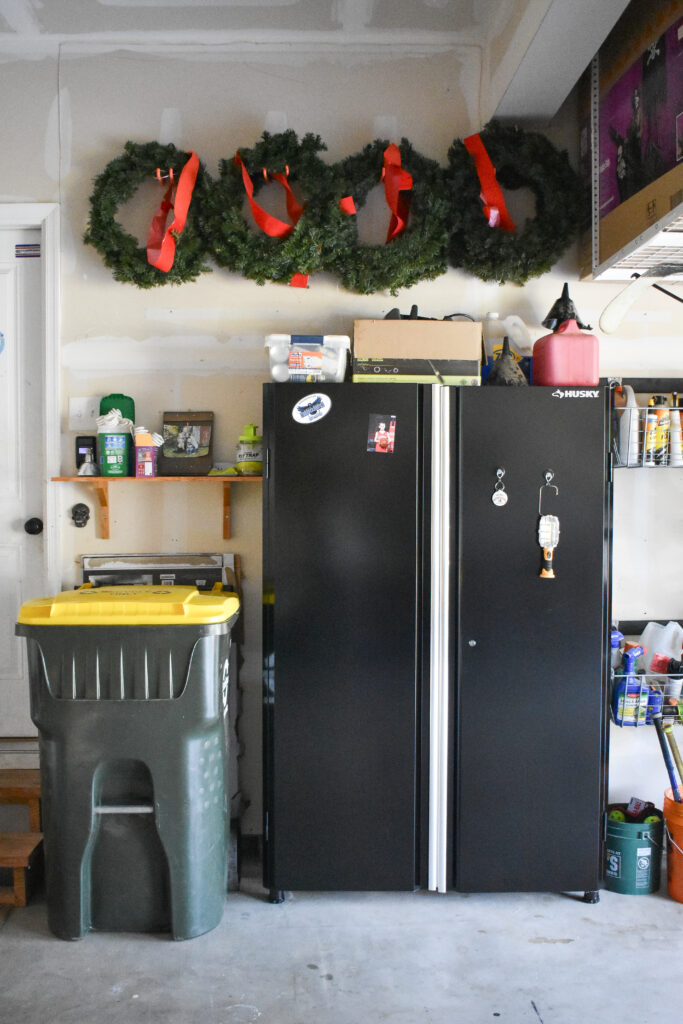
The last one was actually the easiest to plan out and just involved taking even more advantage of our garage’s nice tall ceilings. We already had upper shelves along the back wall as well as a ceiling mounted system installed which held the majority of our stuff (including our giant Home Depot skeleton) so I invested in a few more shelves and hooks to give us room to expand our collection even further. I’m particularly happy to finally have a place to store my faux front porch flowers in the off seasons.
The next two were just a bit harder to execute. For the last few years we had been trying to divide the garage into front (boys area) / back (my area) but inevitably one would creep into the other and neither would become accessible so I knew I needed to move all of my family’s stuff to one designated side and give them as many storage spots as I could.
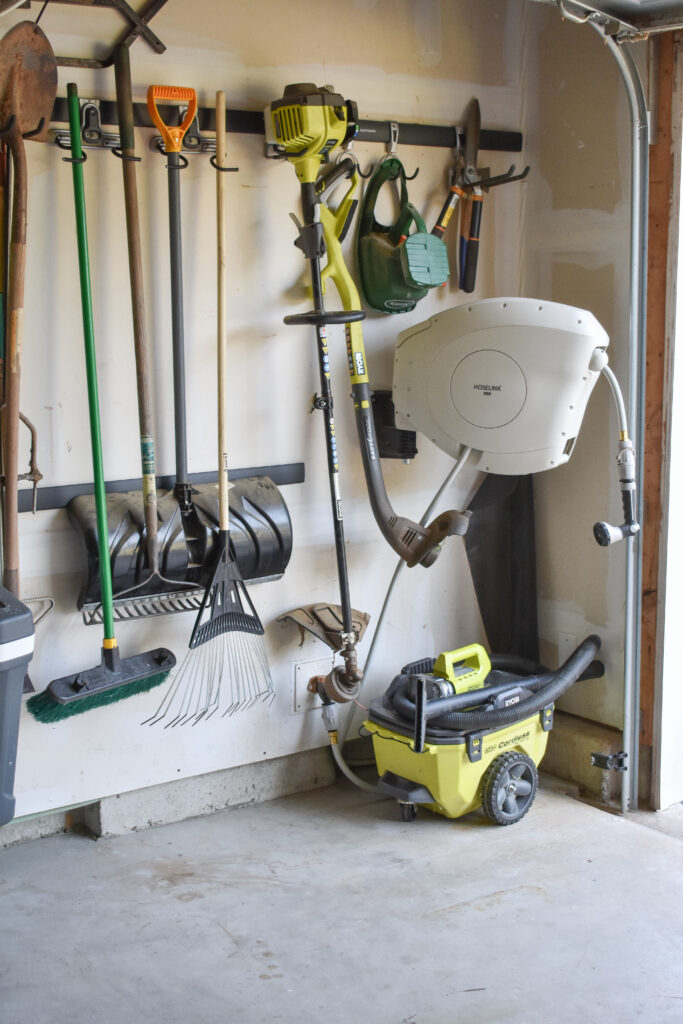
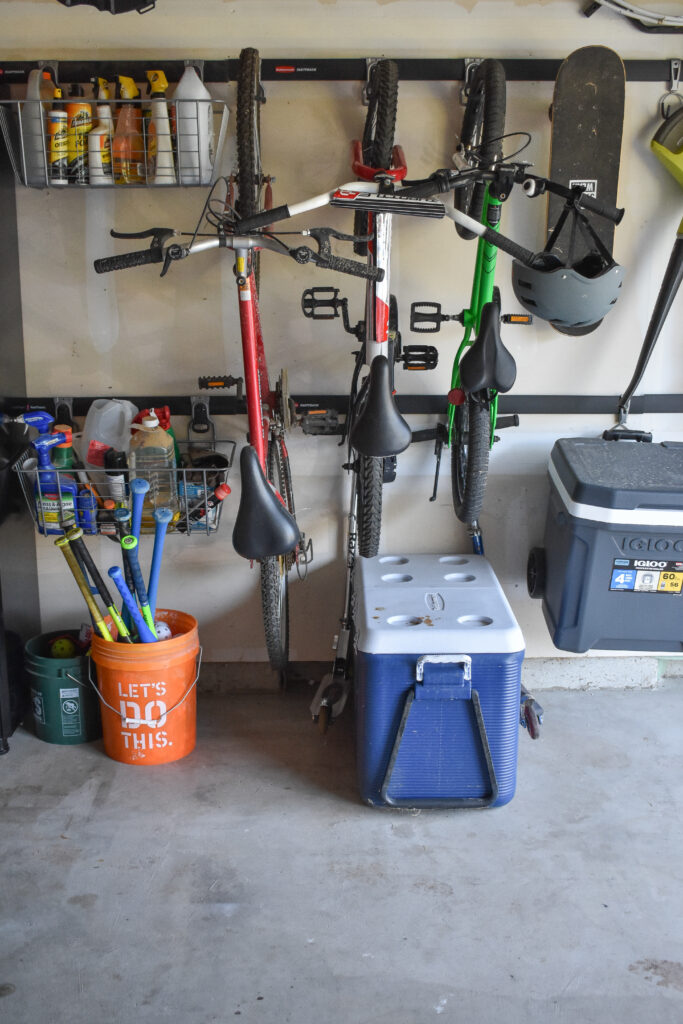
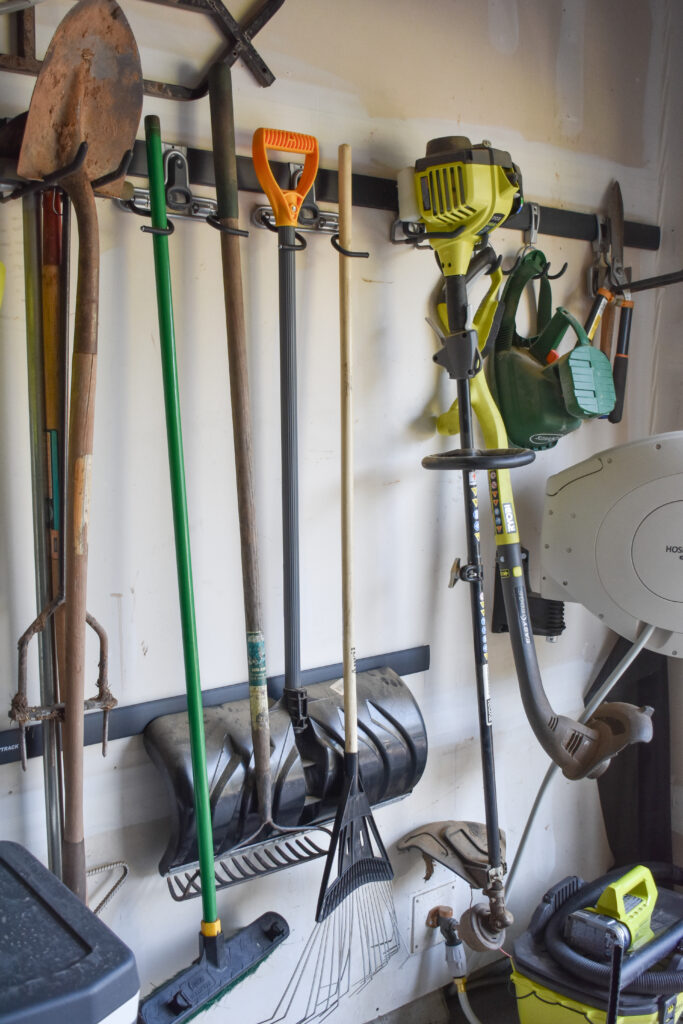
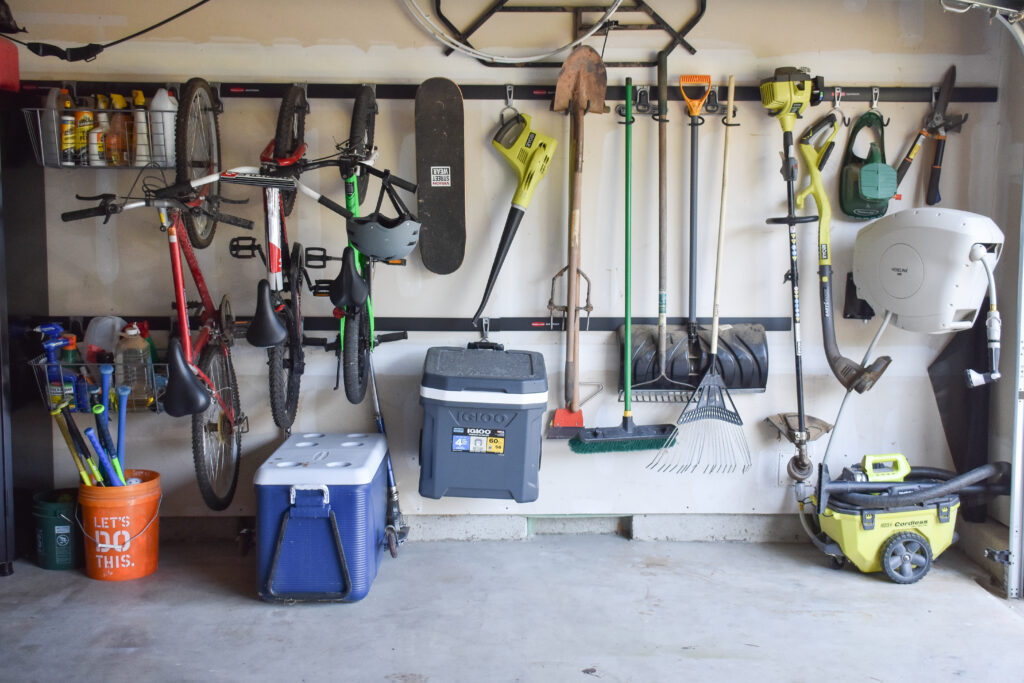
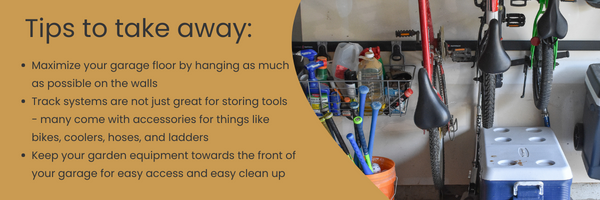
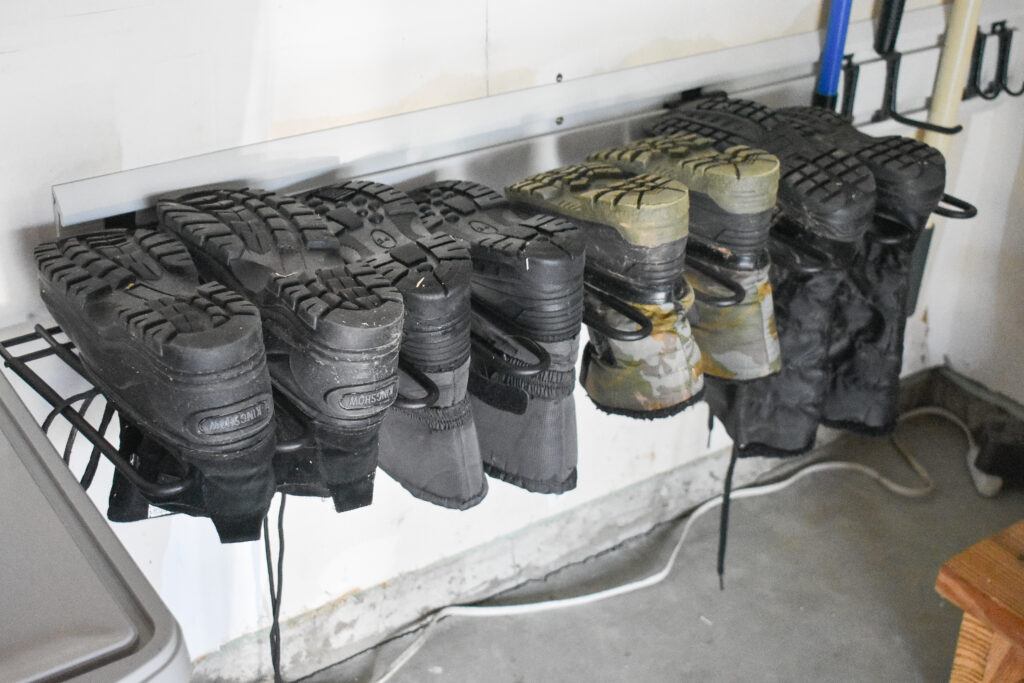
The front of the garage seemed like the natural choice for my husband’s gardening equipment since our hose bib is located there (adding a new Hoselink retractable hose was the very first thing we did and I can’t recommend this brand enough if you’re looking to upgrade) and since we already had more than a few pieces from the Rubbermaid FastTrack storage system I simply moved what we already had around and added enough hooks to hold everything from our garden tools to our bikes.
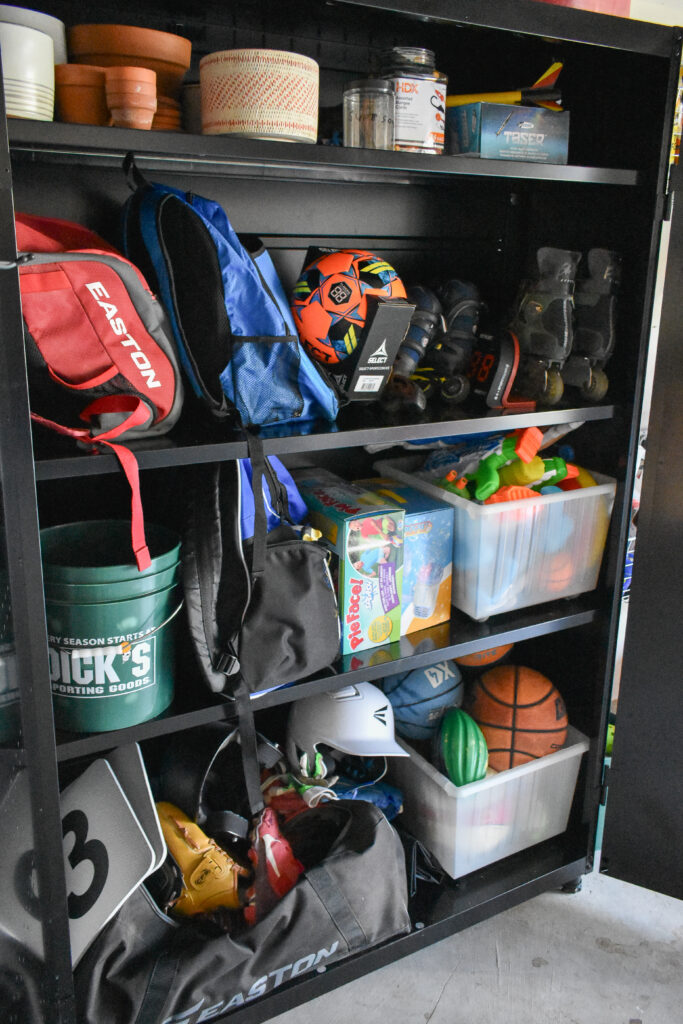
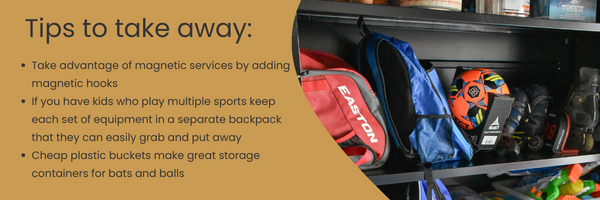
Beyond the lack of a good storage system the other major problem I faced was that EVERYTHING would end up covered in a layer of saw dust from my projects. I felt really guilty every time my boys would have to shake out their cleats or bike helmets before they put them on so I knew that I had to invest in some kind of closed storage system for their sports equipment and ended up adding this free-standing metal locker from Husky.
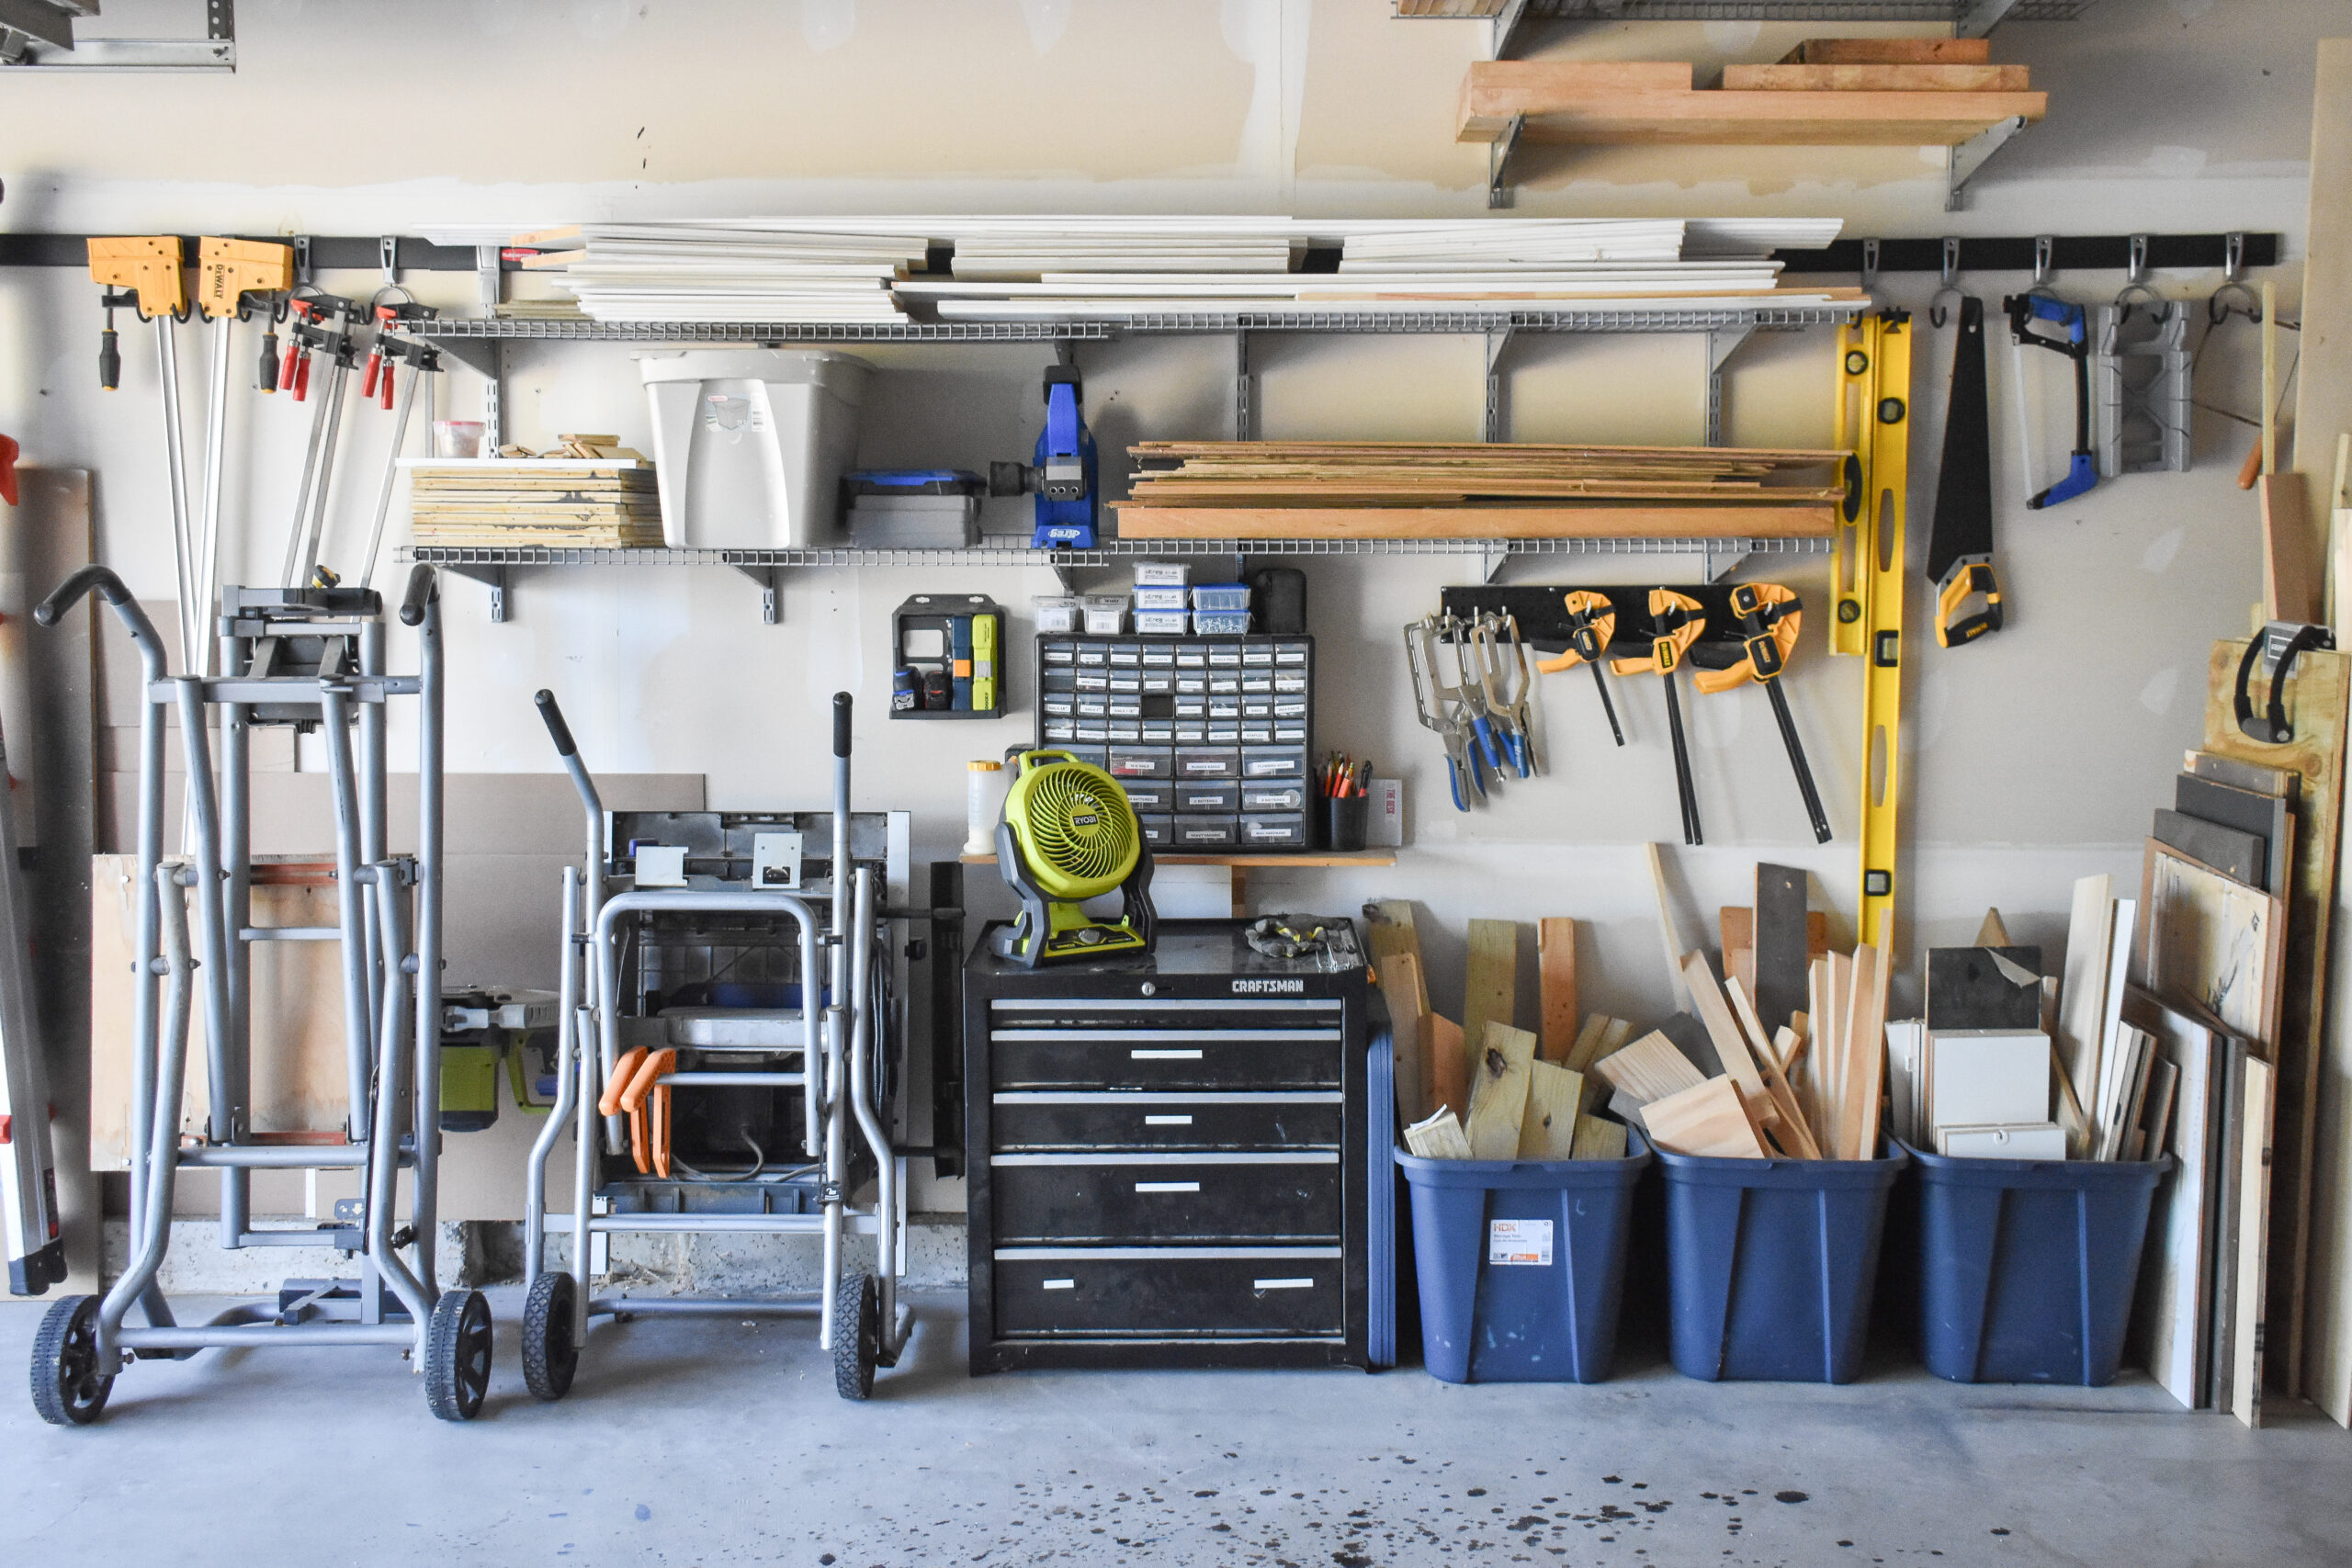
All of that work was really just the prelude to the monster task that awaited me — untangling the mess that was my “workshop” side of the garage. I had really let it go over the previous few months but I took my time and slowly pulled apart my piles, cleaned out the spiderwebs, and put everything back in a way that makes so much more sense.

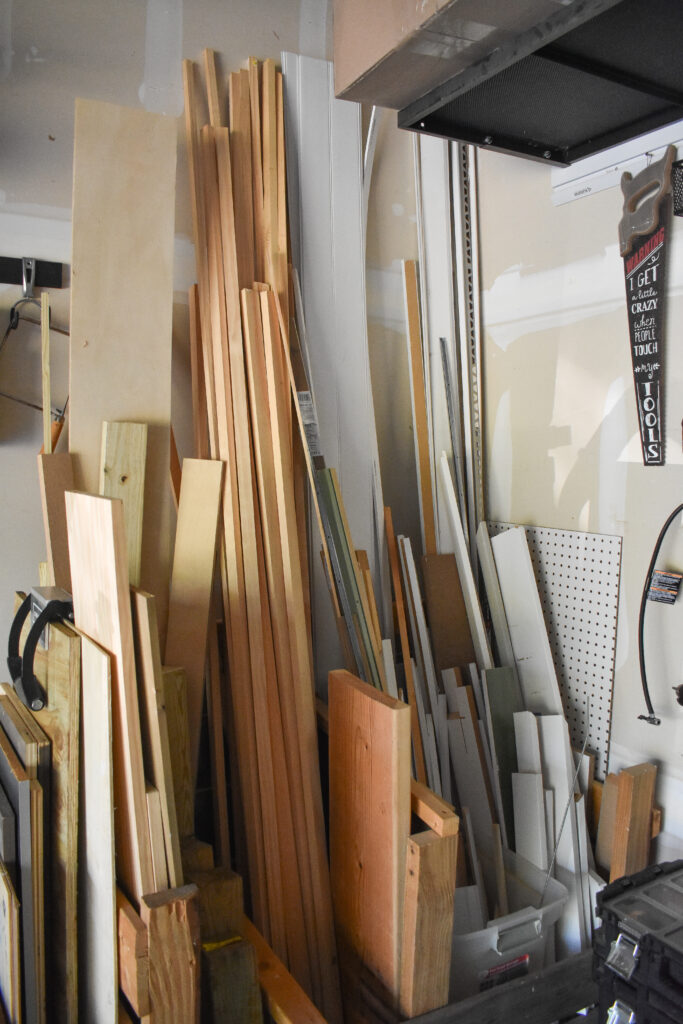
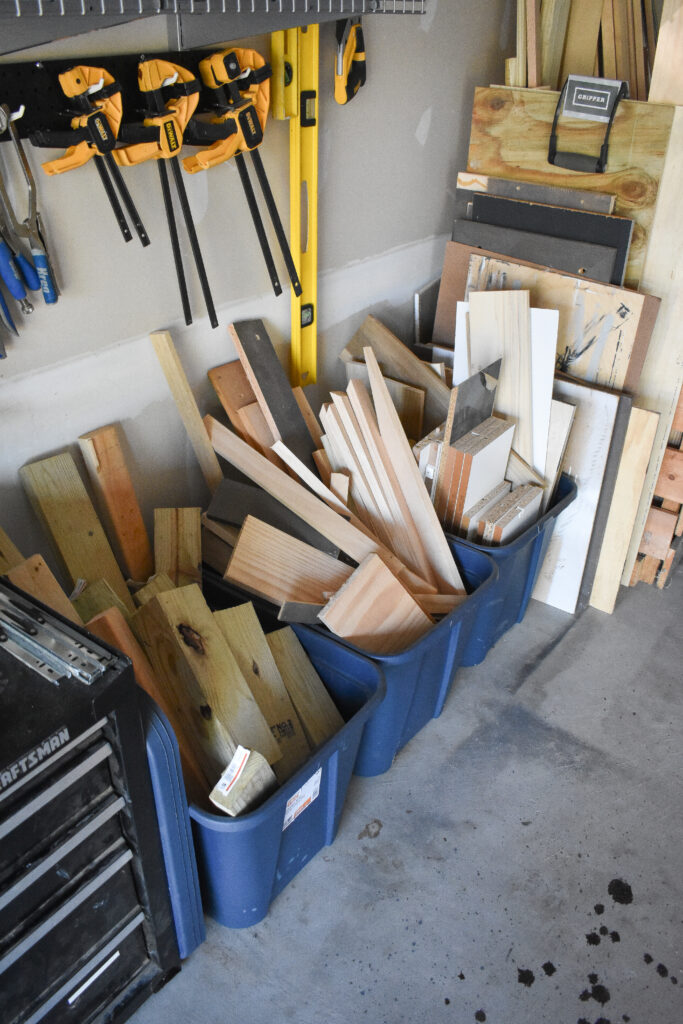
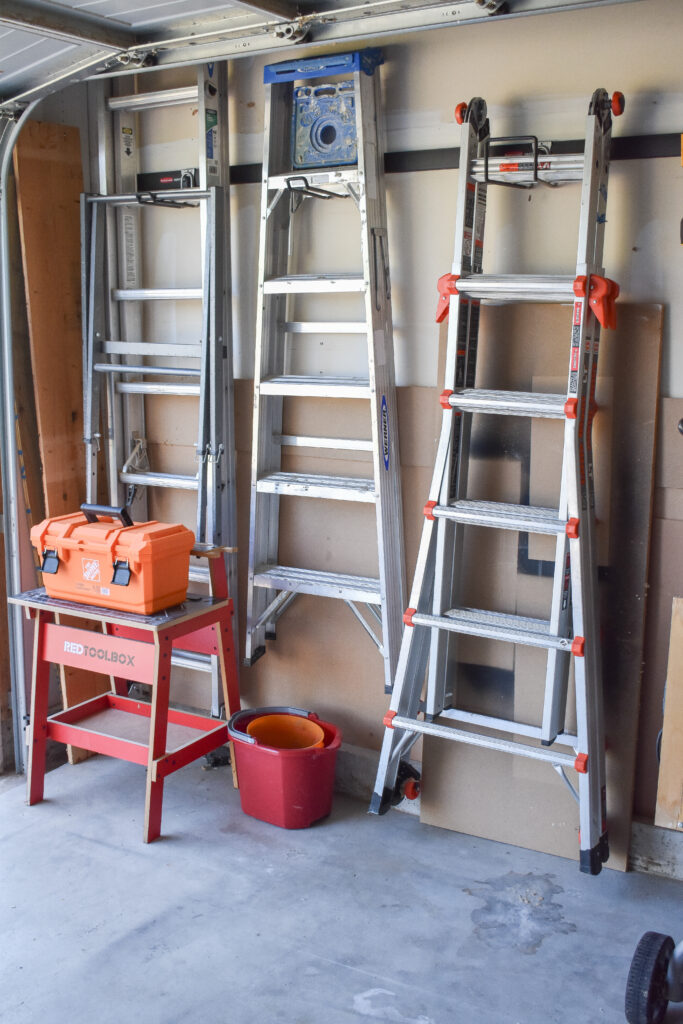
From the start I knew that I had to make everything from tools to materials super accessible so I started with my scrap wood pile. I added floor bins for smaller pieces of wood, organized my larger pieces into different categories, and moved some shelves around to hold my specialty boards. The extra bonus of this system is that GOB can help himself to the smaller pieces whenever he wants to build one of his creations (currently he’s working on a window frame). I also added designated spots where my mitre/table saws and collection of ladders can live without obstruction.
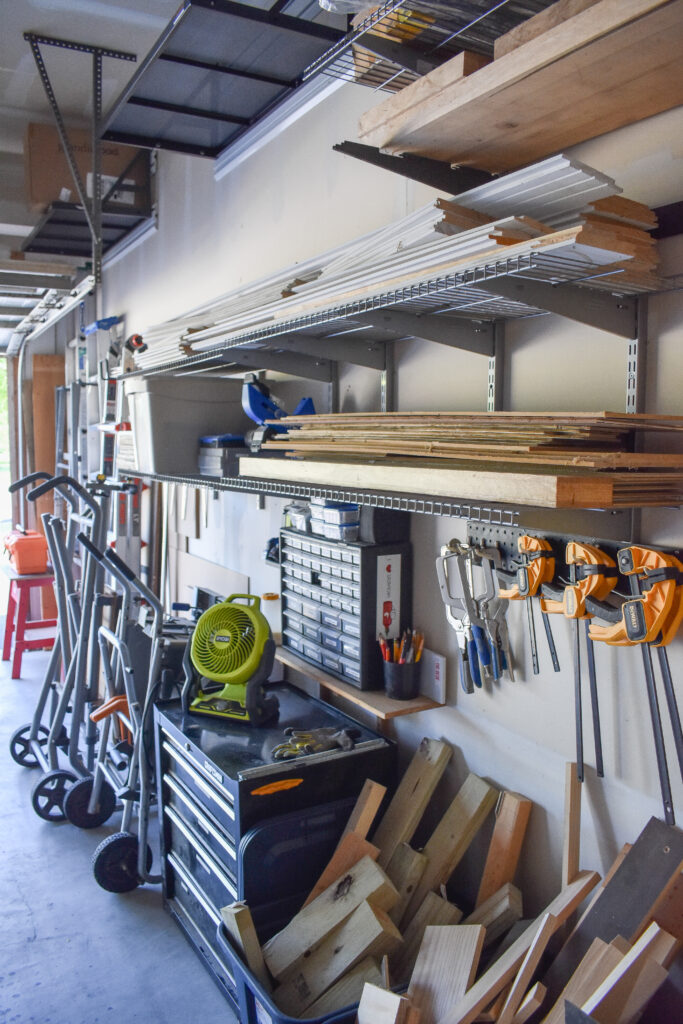
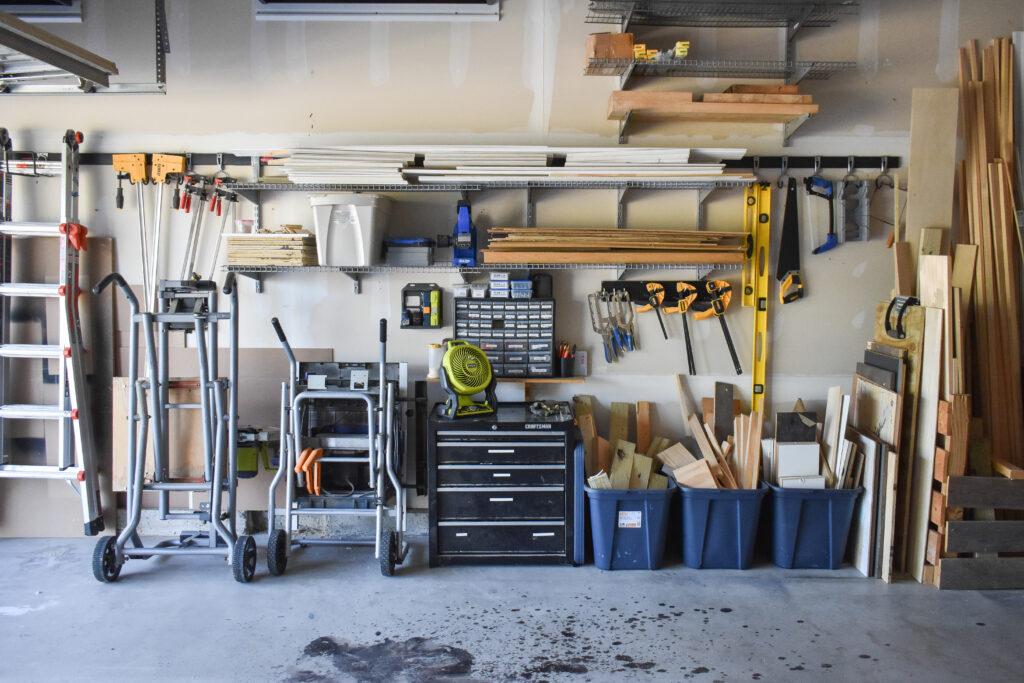
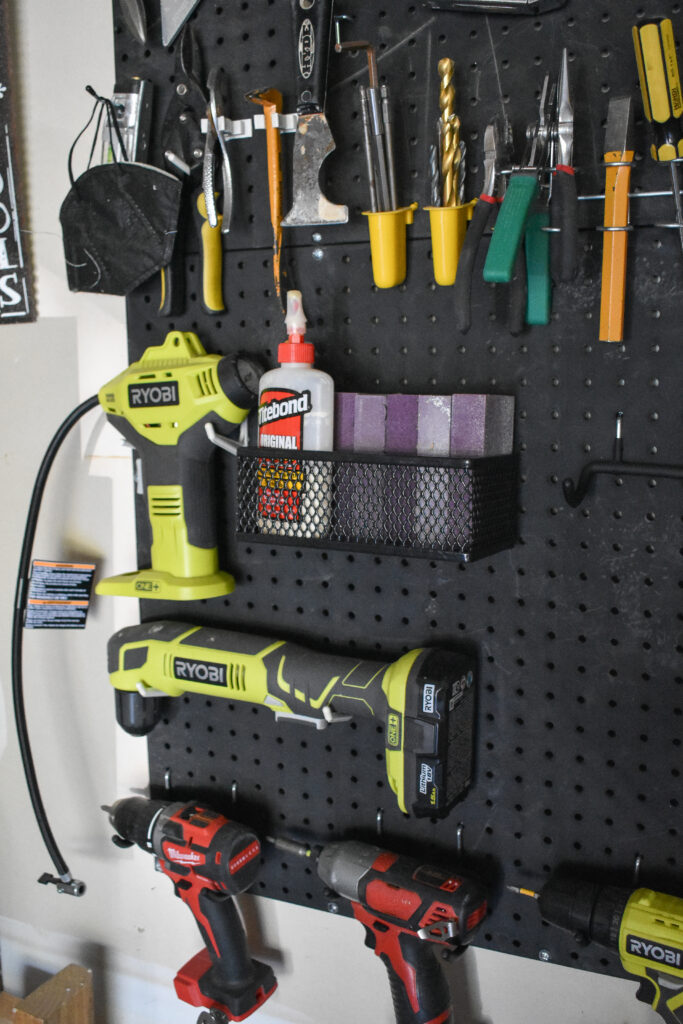
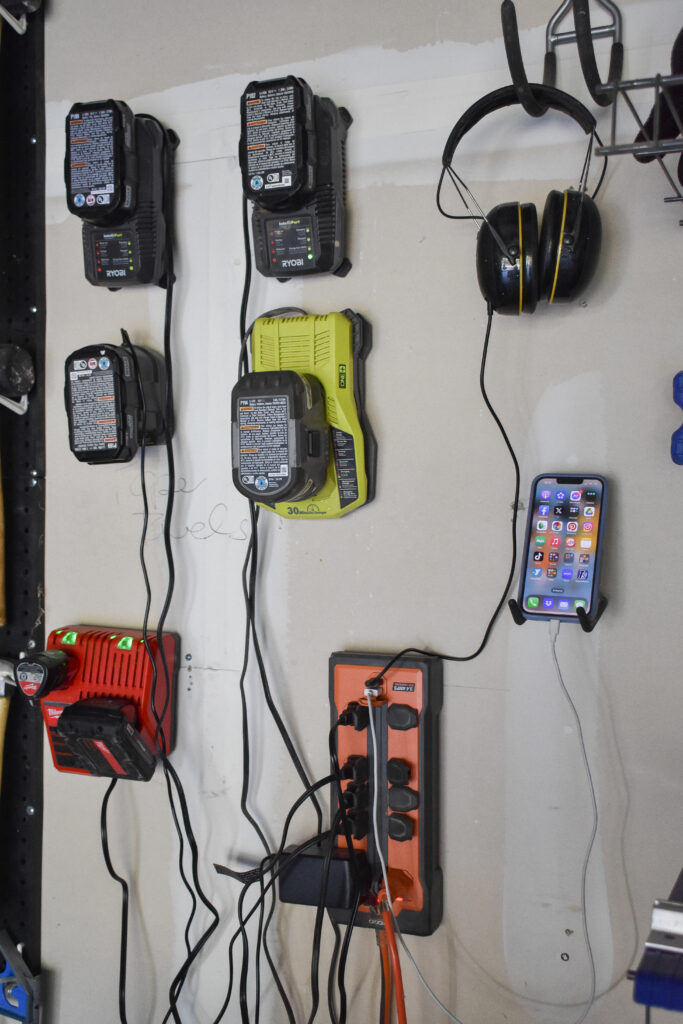
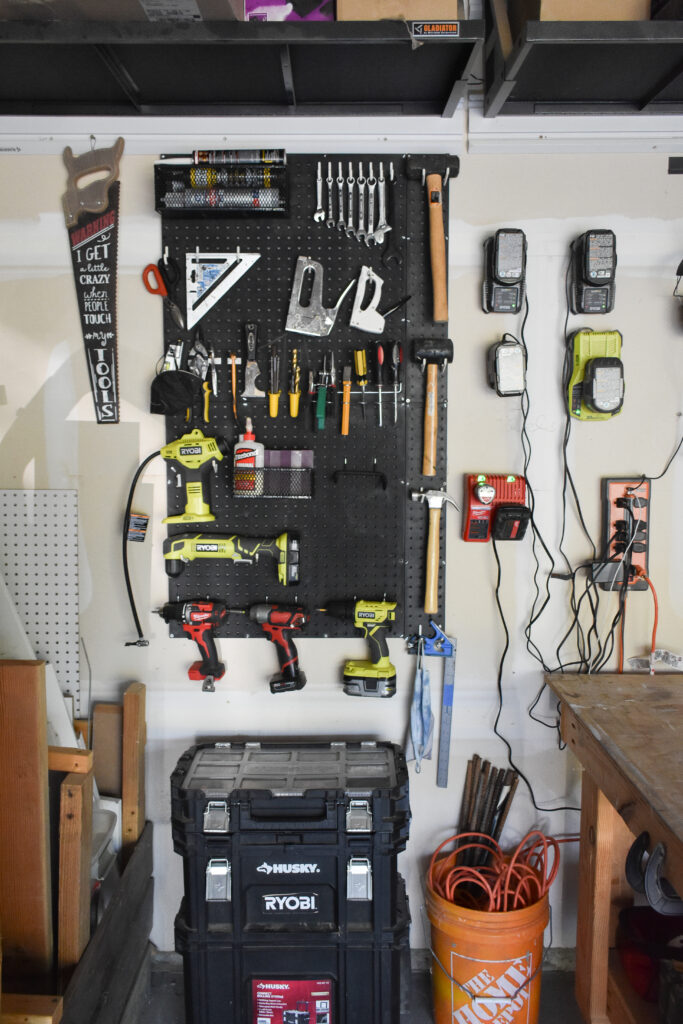
Last but not least — I had to find homes for all of my tools. One thing that has made a huge difference was moving our metal shelving system to the back wall to hold my infrequently used tools and shifting the pegboards to the walls that I can access regardless of where my workbench is. I also made sure that the random tools that the boys need from time to time (batteries, staples, tape) are in a non-precarious spot and clearly labeled.
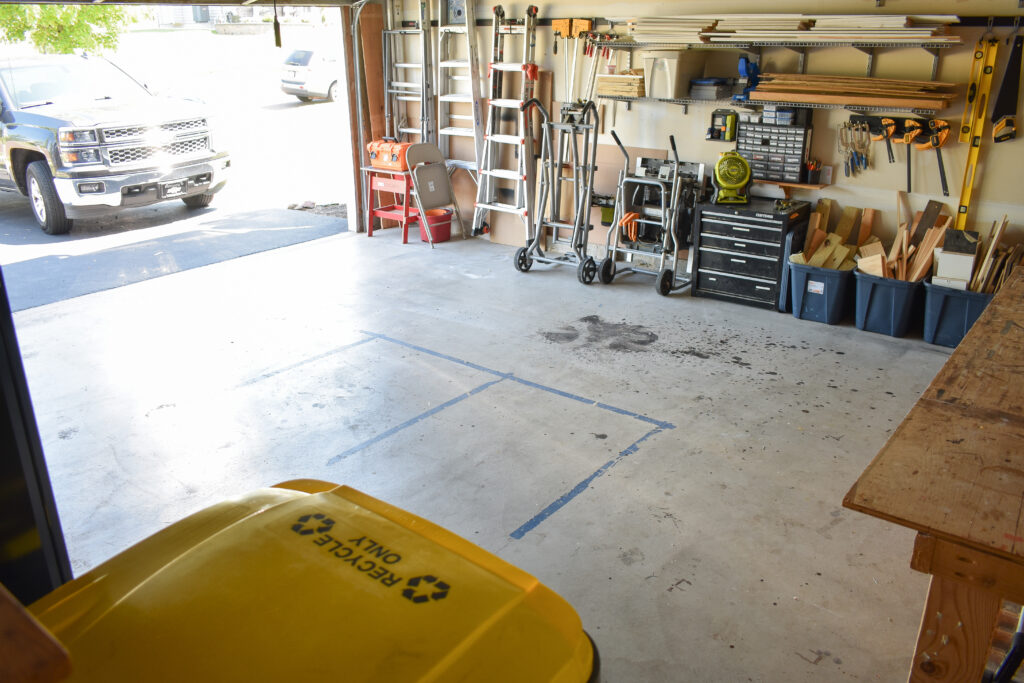
Would you believe that we can actually fit a car in our garage now!! It’s been close to a decade since that has happened! Honestly we still probably won’t put our car in here BUT the one thing that has been incredibly nice is having the space to get out all of our Halloween yard decorations out at one time and stage them in the garage prior to setting them up. It made the whole process so much smoother and I’m excited to do the same for Christmas. OH and of course coming out here to build is like a dream now! This year has been a little light in the project list – partly because I didn’t want to start anything until the garage was done – but next year just wait because I’m planning on really putting this space to the test.