I feel like I’ve been teasing this post for months and so I’m excited that FINALLY have had a chance to share it! Way back in February, I started giving the upper half of my kitchen a little makeover that I have been planning pretty much since we moved in to make my builder grade cabinets look much more custom. Along the way I ended up making a few small changes that I hadn’t originally planned on, but they all have taken this kitchen in a direction that feels more cohesive with the rest of the house than some of my earlier design decisions.
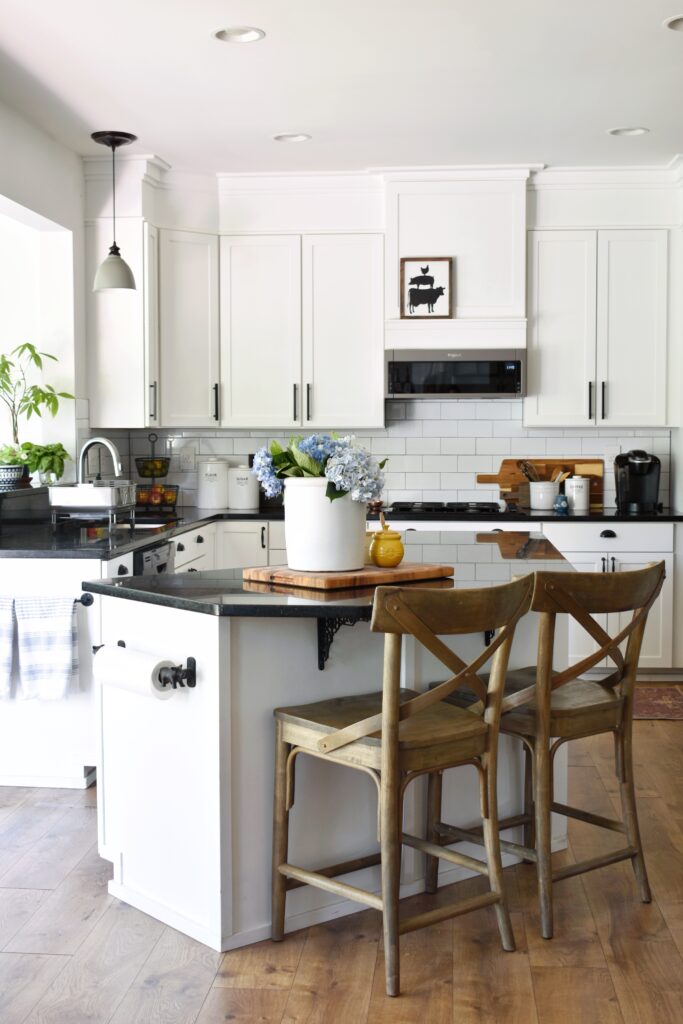
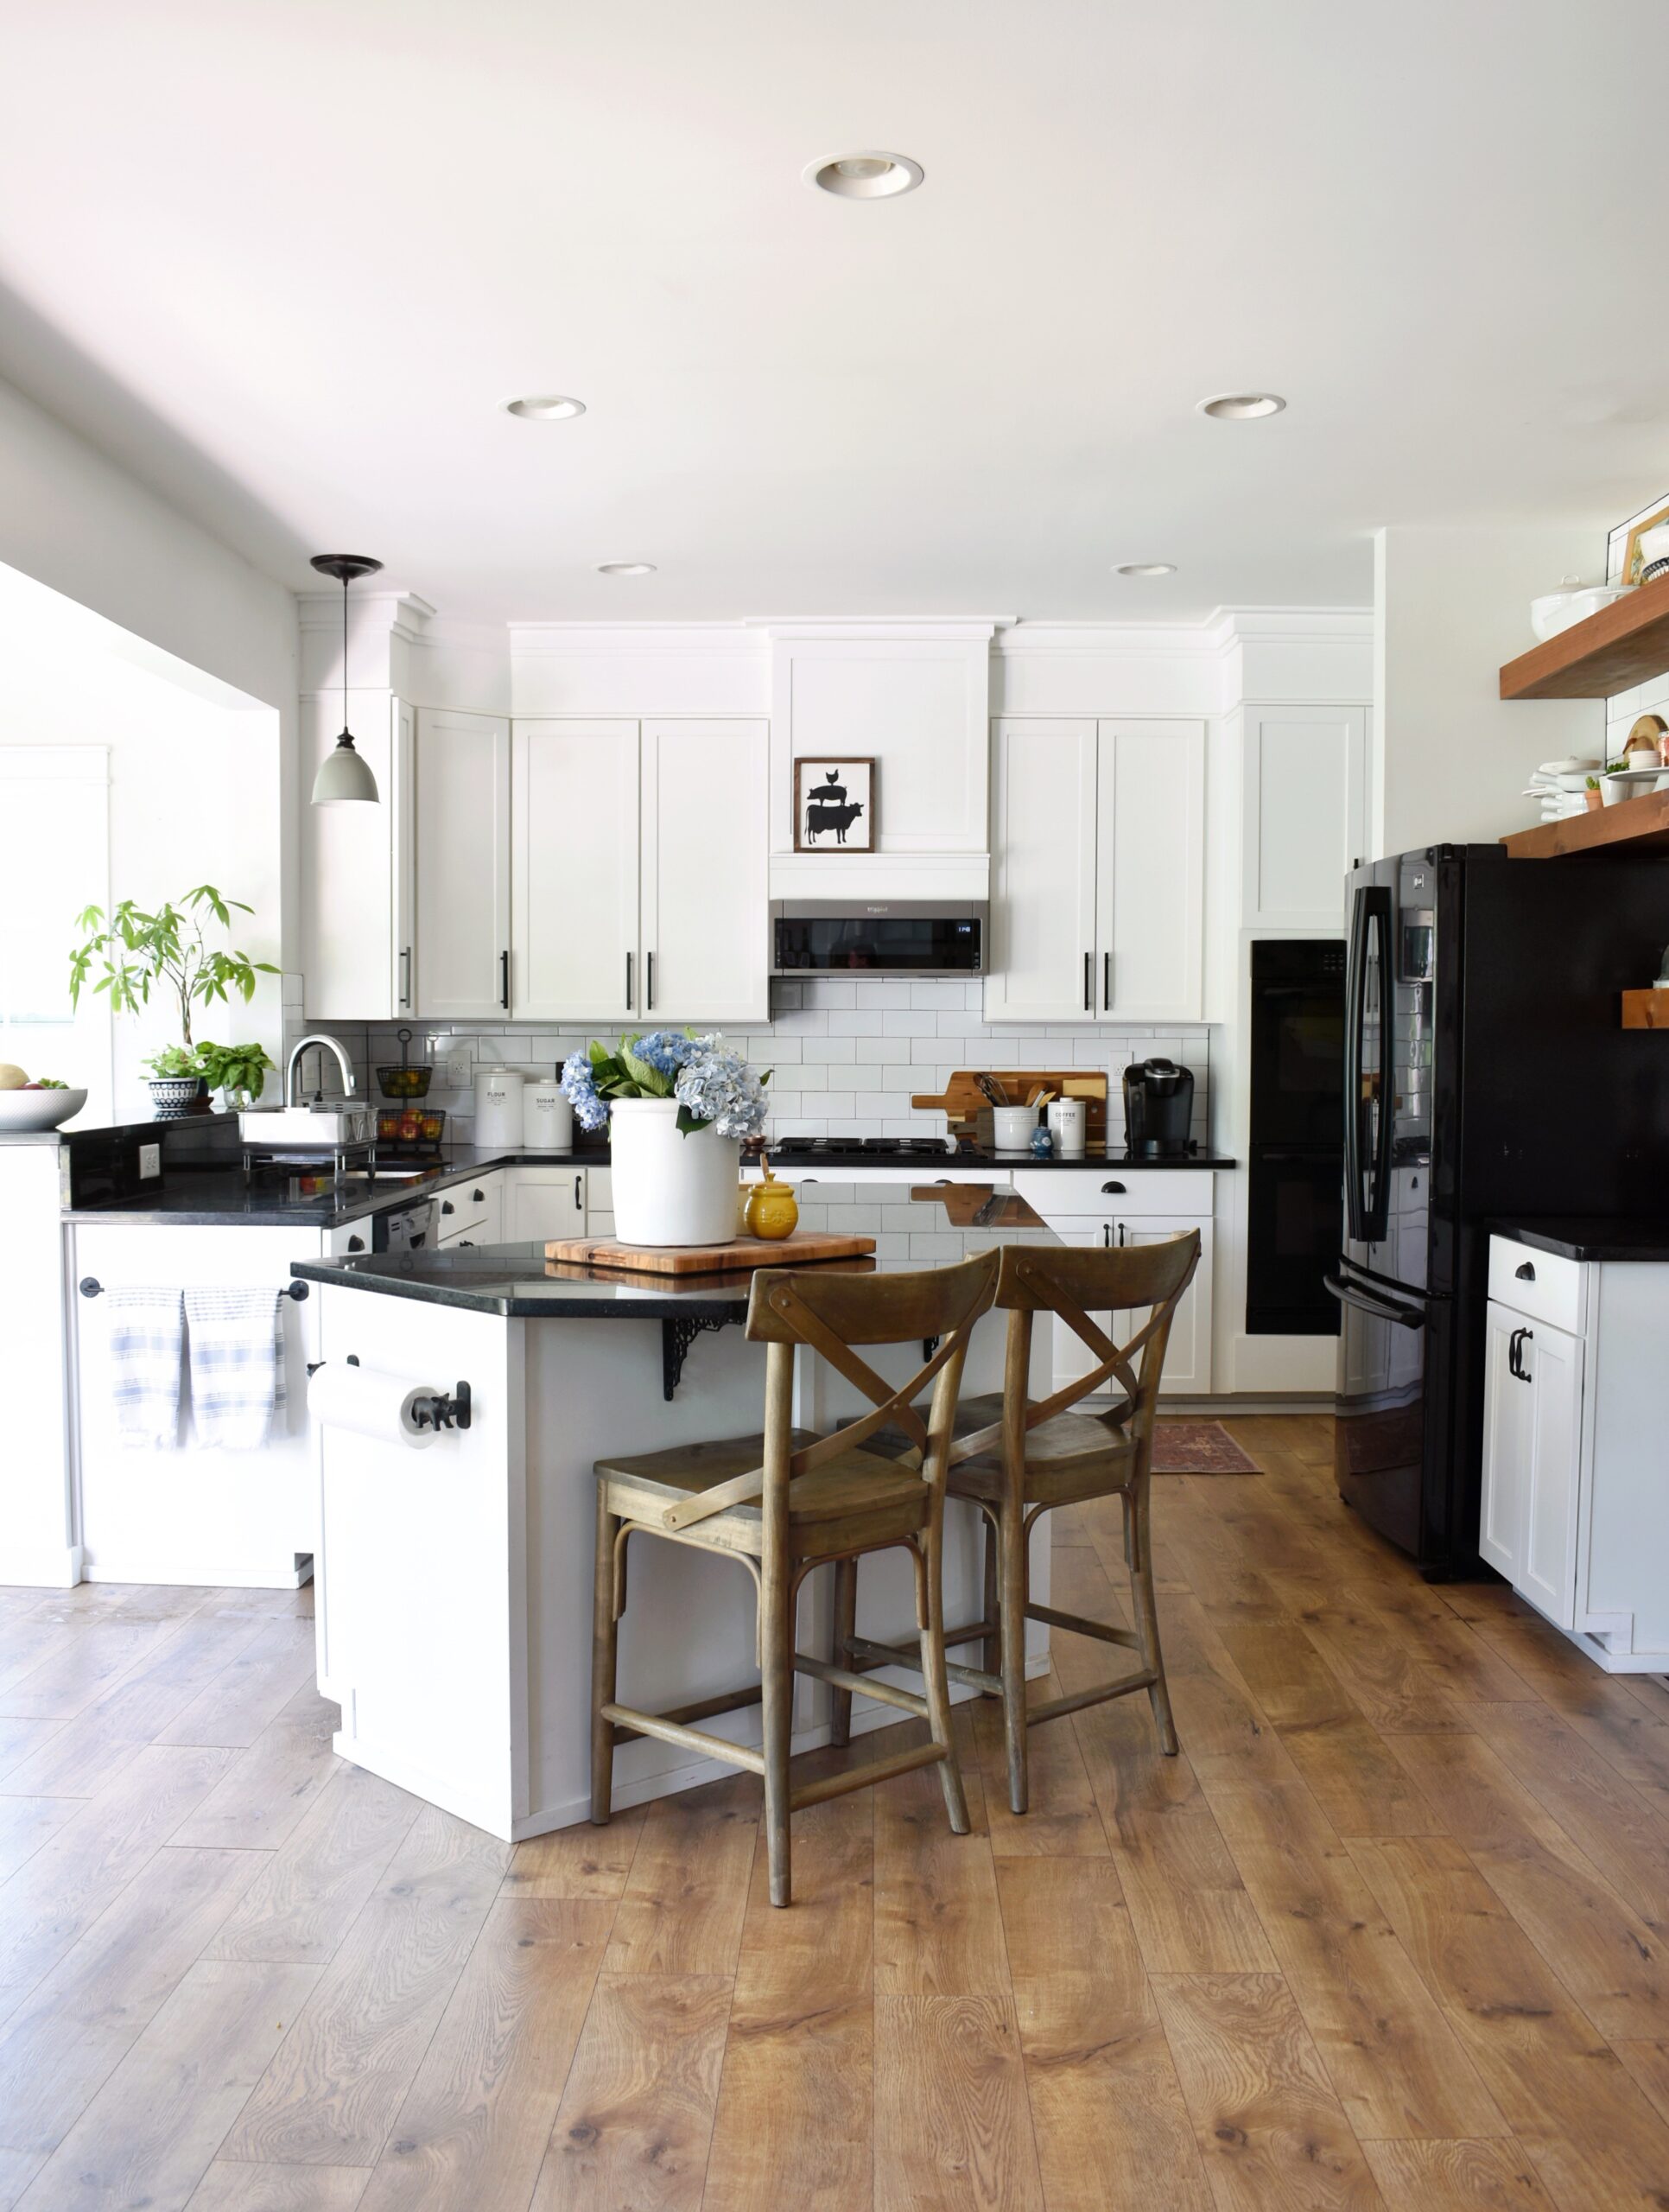
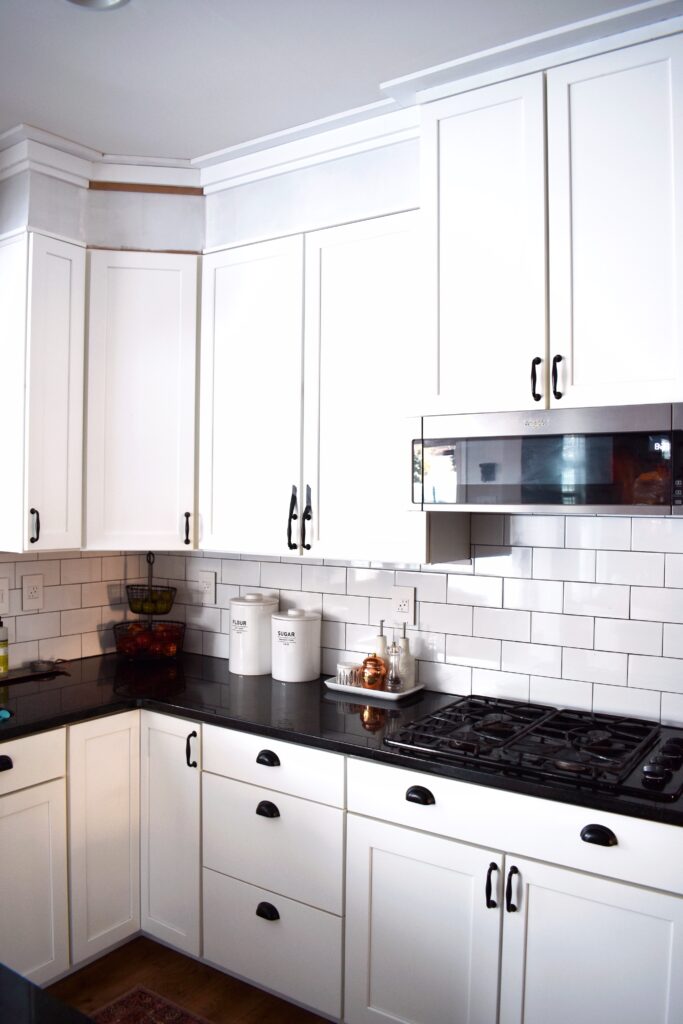
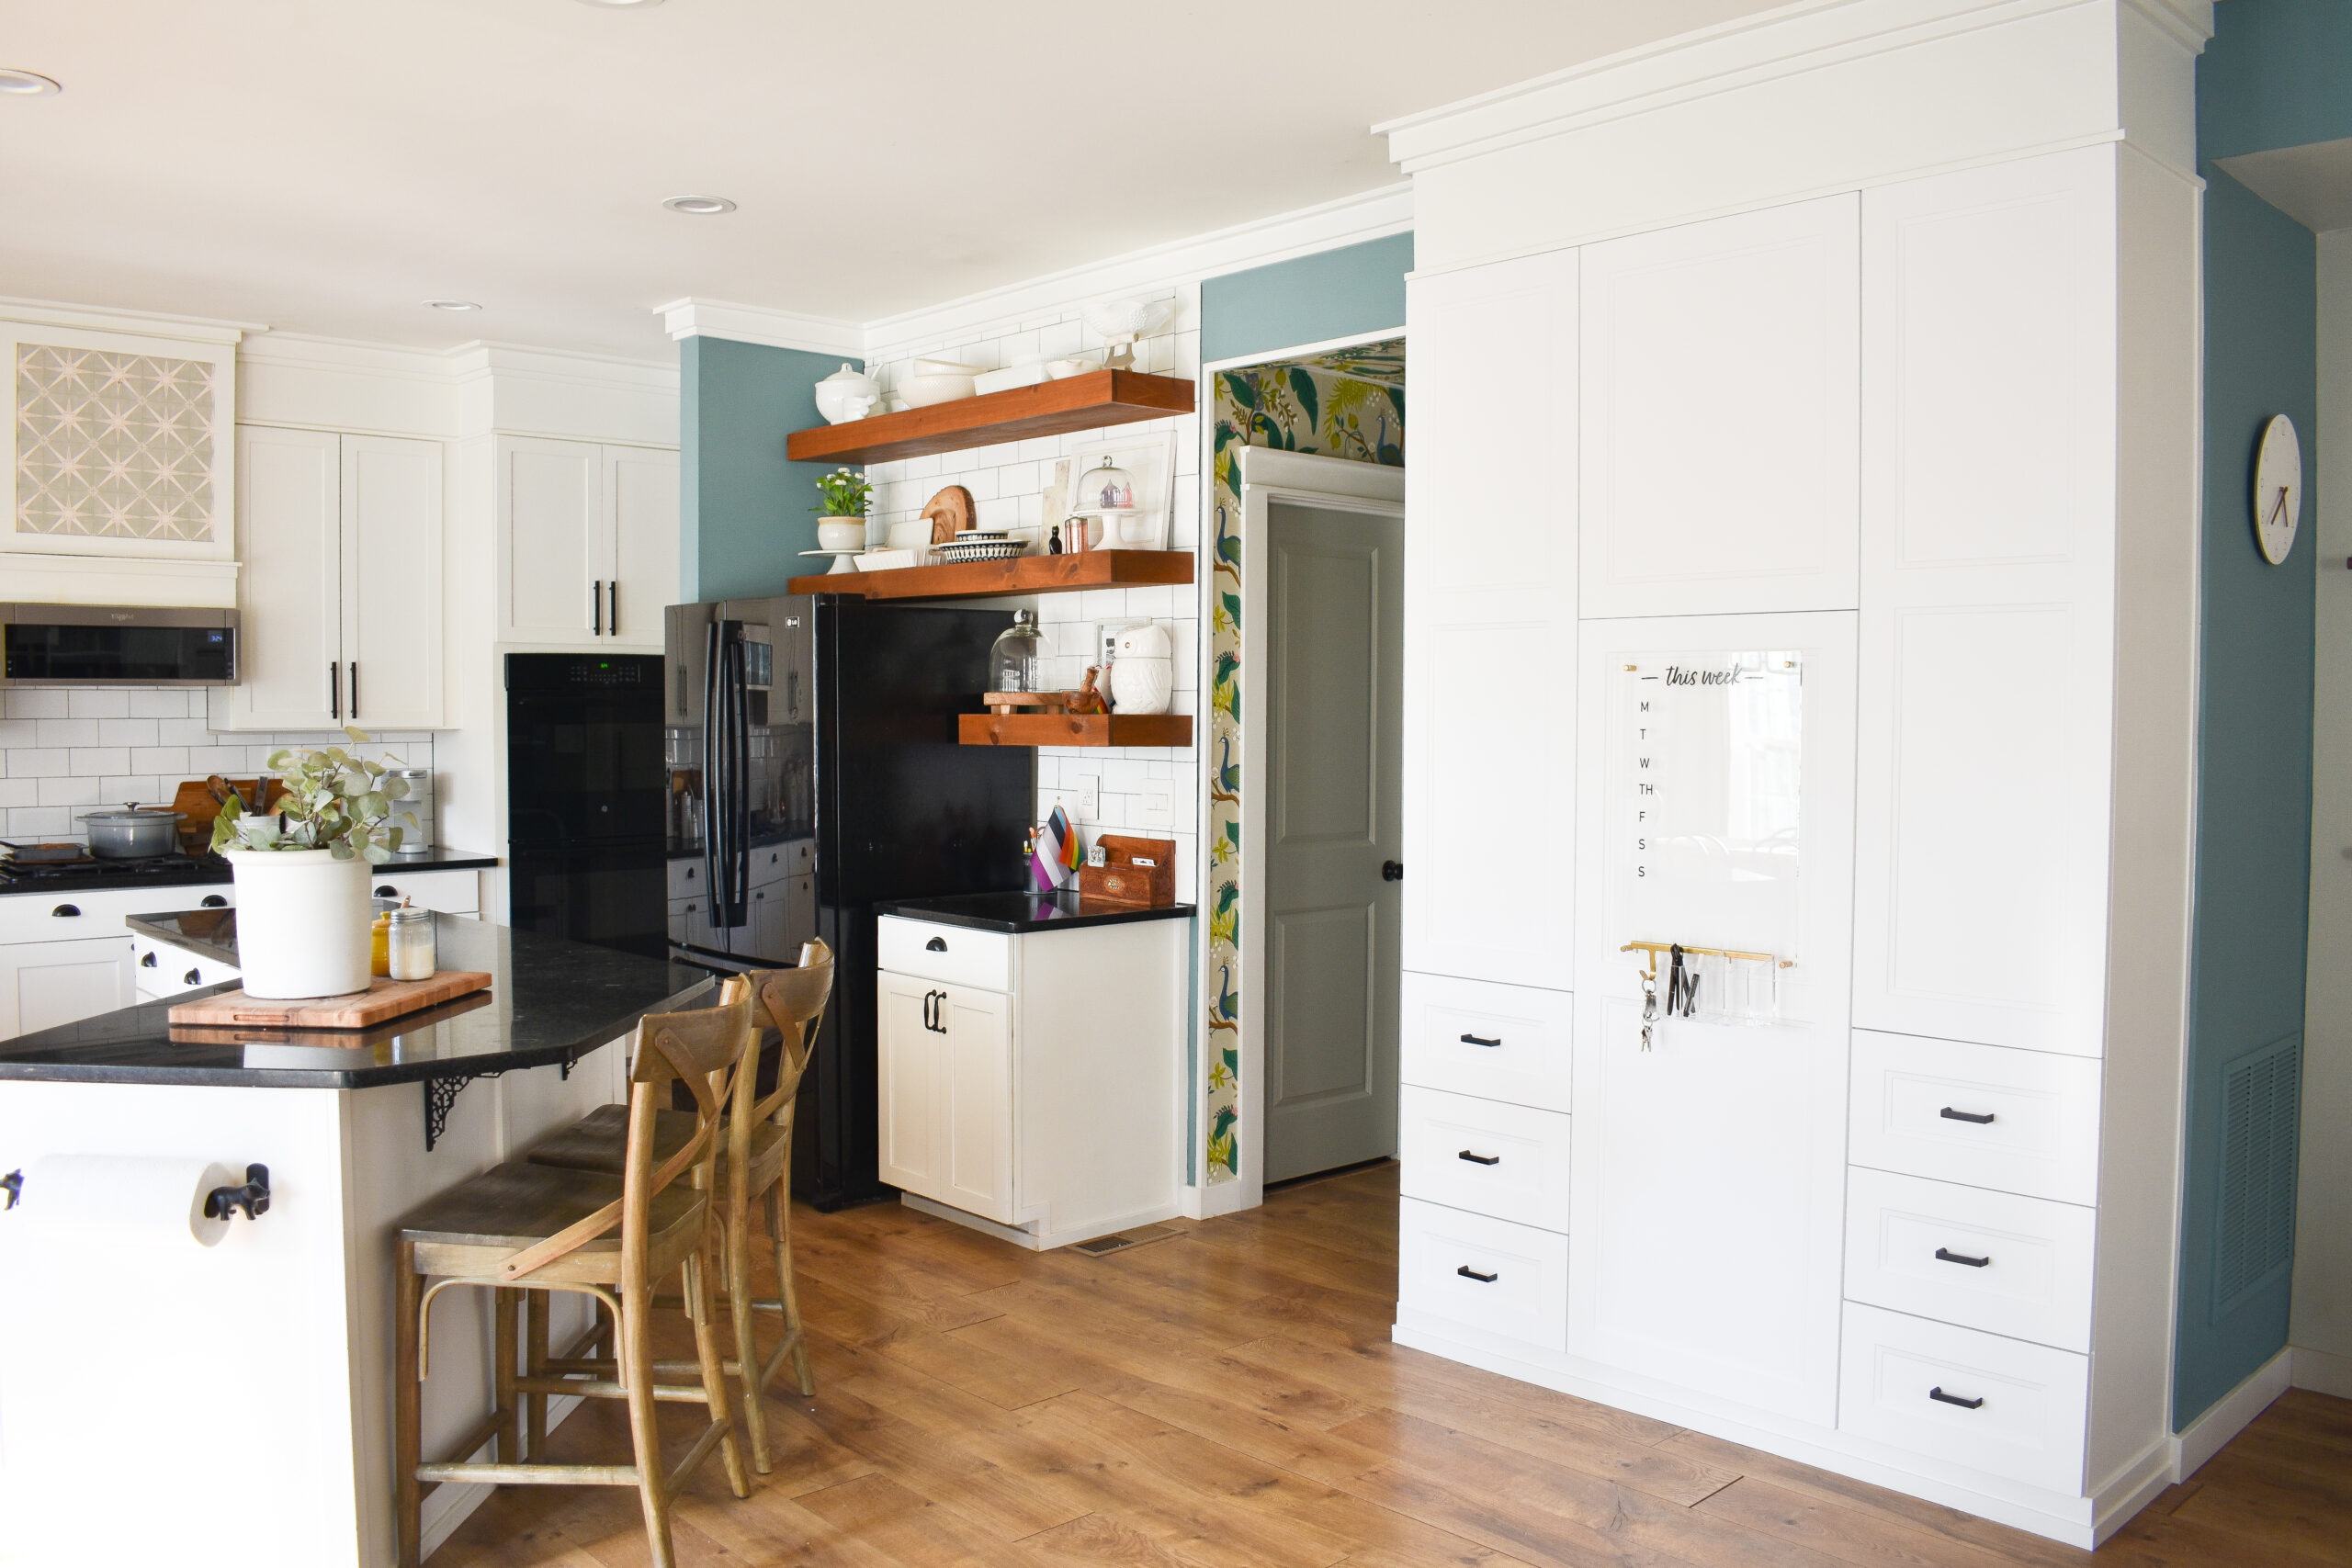
So before we jump into what’s new, let’s jump back to what the kitchen was looking like last year. Since we’ve moved in there’s been lots of good changes that I’ve made (upgrading the floors, replacing cabinets with floating shelves, installing a subway tile backsplash, adding the island trim) but there are two big things that I kept going back to every time I took a good look at the space – 1) the space above the cabinets, and 2) the giant microwave. I’ll get back to that void btw. the cabinets and the ceiling in a bit, but let’s start with that big black beast since I tackled that project fist.
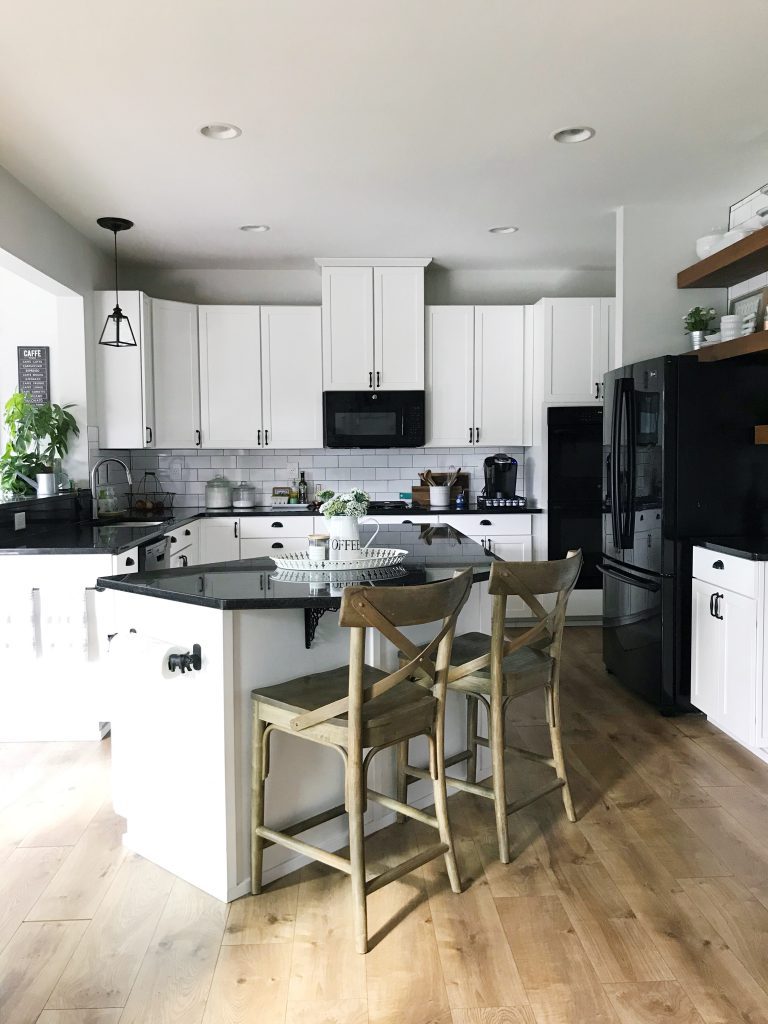
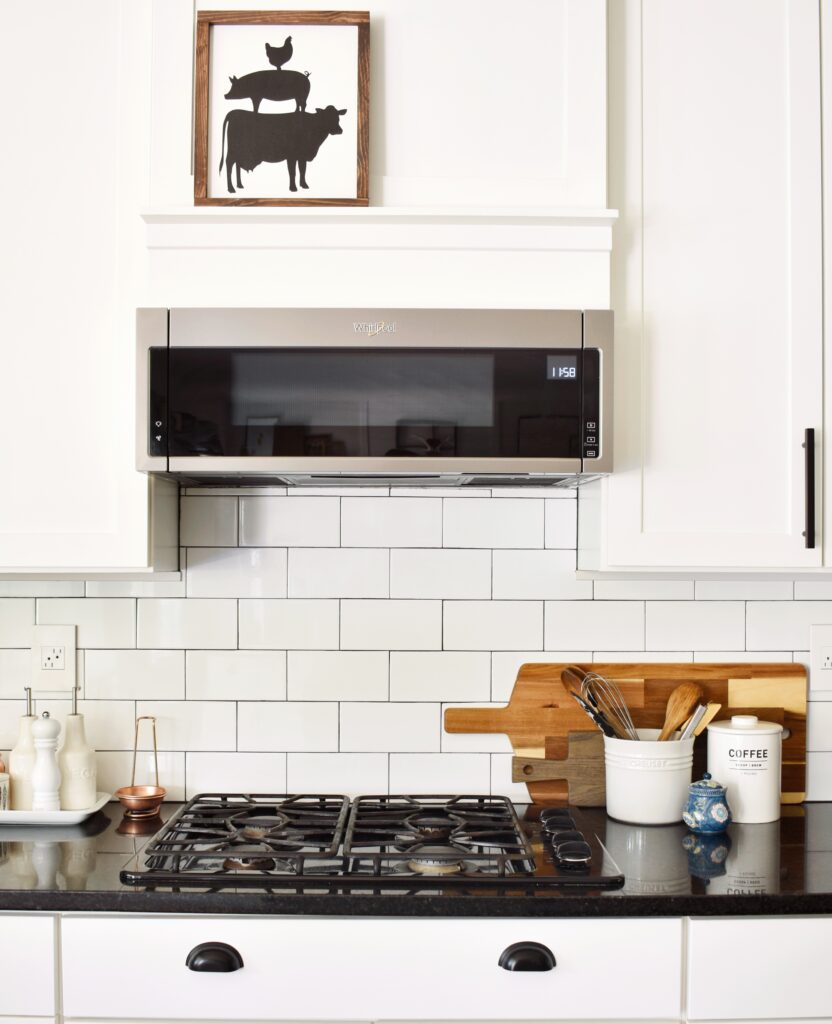
Can someone tell me why microwave’s are so big? I’ve never in my life used that upper rack and I’m most certainly not cooking a turkey in that thing. Our original microwave was right over our stove and it was so low that I could barely fit my big pasta pot underneath it, and I more than once knocked the back of my head on it. For the longest time I tried my best to figure out a way to install an under the counter microwave somewhere, but with our layout and our size cabinetry it just didn’t work without some major re-structuring. Additionally, when I looked into replacing the microwave with a vent hood I ended up running into the issue where the hoods that would work with our venting would be just as big as the microwave.
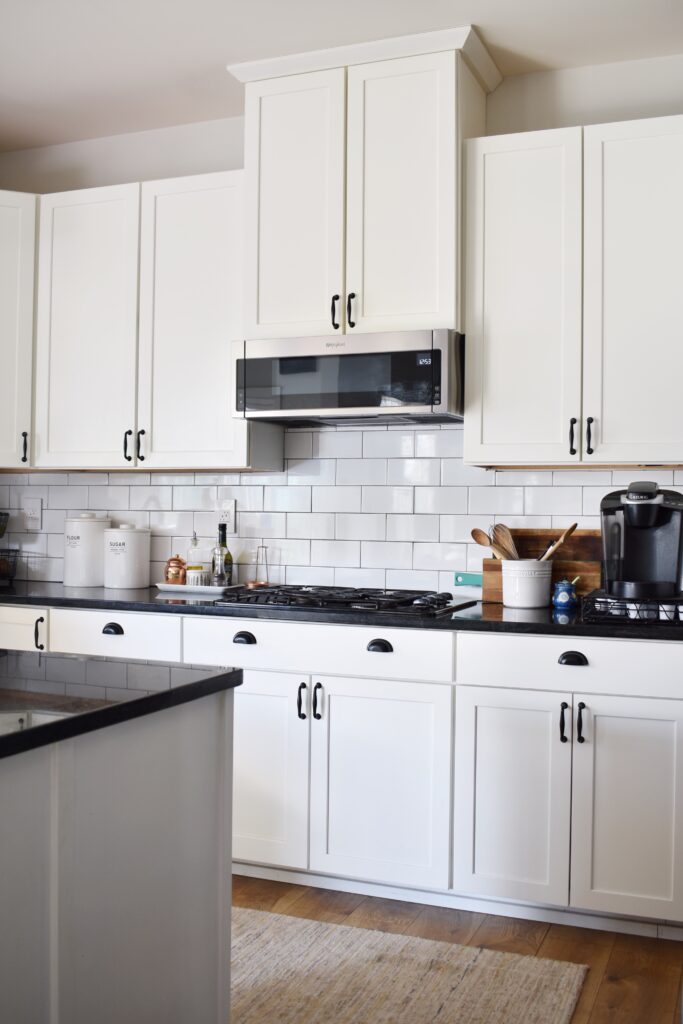
So I started looking around for another option – and one day the sky’s opened and I found the perfect solution….this low-profile microwave from Whirlpool! It’s about 2/3 the size of the original one and perfectly fit into the same space. At this point we’ve been using it for a few months and I can honestly say we love it. I love the sleek look, I love that most of the buttons are on the inside to reduce fingerprints, and I love how it cooks – I would definitely recommend it. The bonus to replacing the microwave was that I was able to take the subway tile up a few extra rows and visually break up that straight line of cabinetry along the back wall.
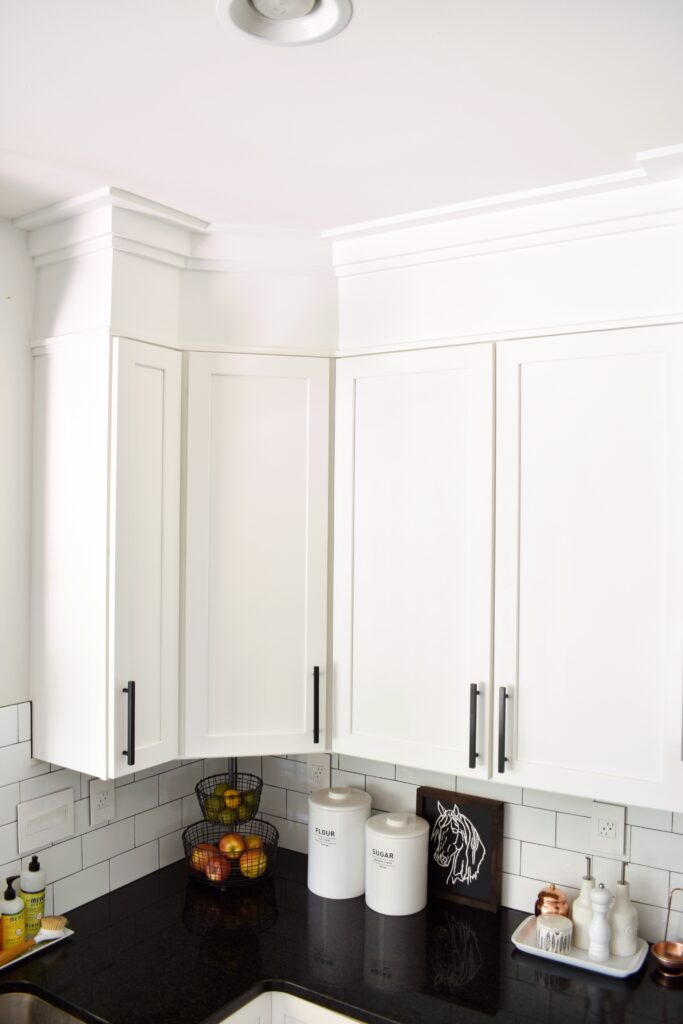
My next challenge was deciding what to do with the space between the cabinets and the ceiling. Builder grade kitchens will rarely take the cabinets all the way to the top of a 9ft ceiling because the standard upper cabinets are not tall enough, and I’ve always wondered how to utilize that space. I weighted a lot of options for a long time – should I just leave it and add some up-lighting, build some small cabinets with glass fronts, or take the backsplash all the way up the wall? In the end I decided to close up the space, add some chunky trim, and accentuate our tall ceilings…..and here’s how I did it.
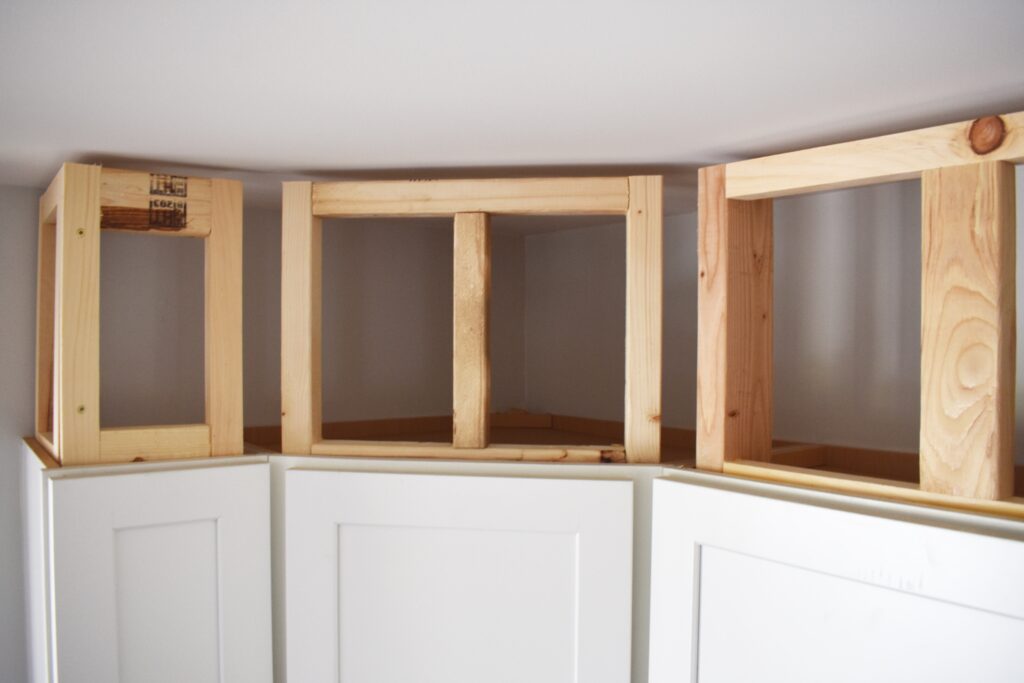
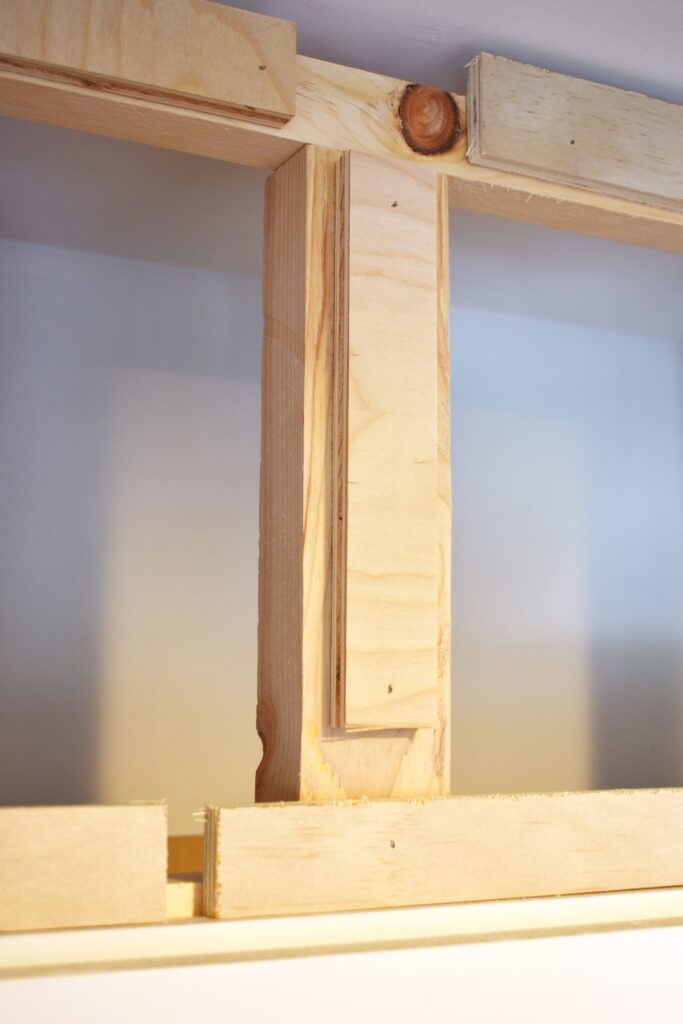
I started by building frames out of scrap wood (mostly 2x3s and 2x4s) to fit inside the top of the cabinets; a few brad nails through the top of the cabinets held these in place. Because I didn’t want to add more weight to the cabinets than I needed to, I just attached some scrap pieces of 1/2 inch plywood to the front to bring them forward more. Then I added 1/4 inch plywood to the front of each frame to bring everything even with the cabinets.
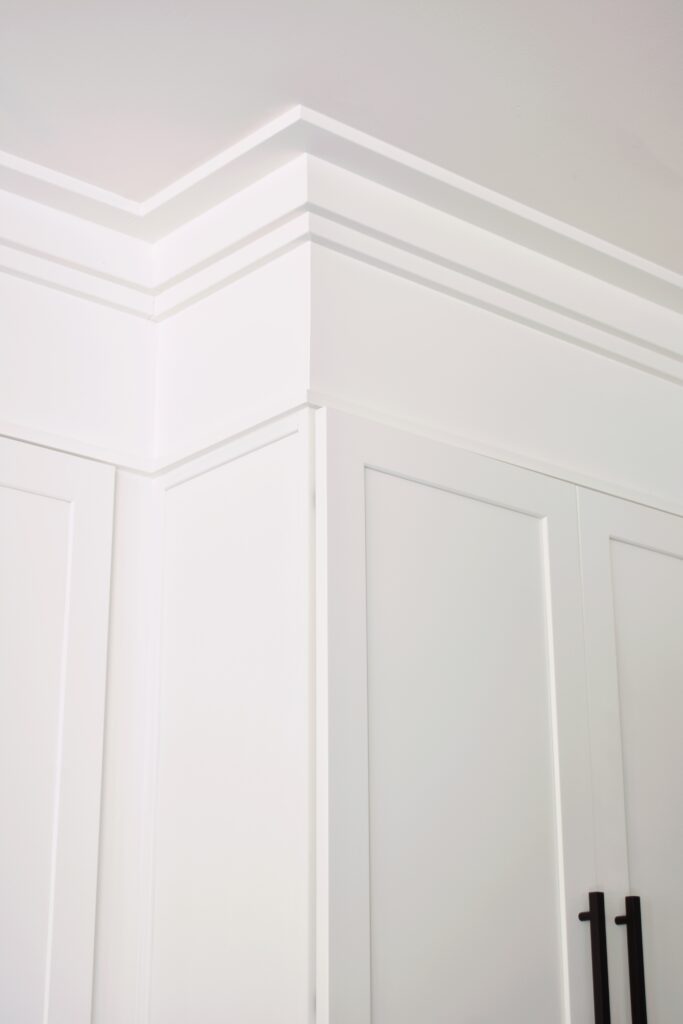
For the top trim I layered a lot of different widths of primed MDF that match the straight trim throughout our home – first a 1×4 to the front of the plywood, next a 1×3 on the ceiling, and finally a 1×3 on top of the 1×4. For a little more dimension I attached a small square strip of trim to the very top of the cabinets and also along the edges of the exposed cabinets. To get the paint color correct I took a drawer front to Sherwin Williams and had them match it; originally I didn’t intend to paint the cabinets too but after I decided to switch out the hardware (more on that in a sec but can you catch in the above pic my super technical way of trying out a larger size cabinet pull?) it made sense to give them a fresh coat of paint as well.
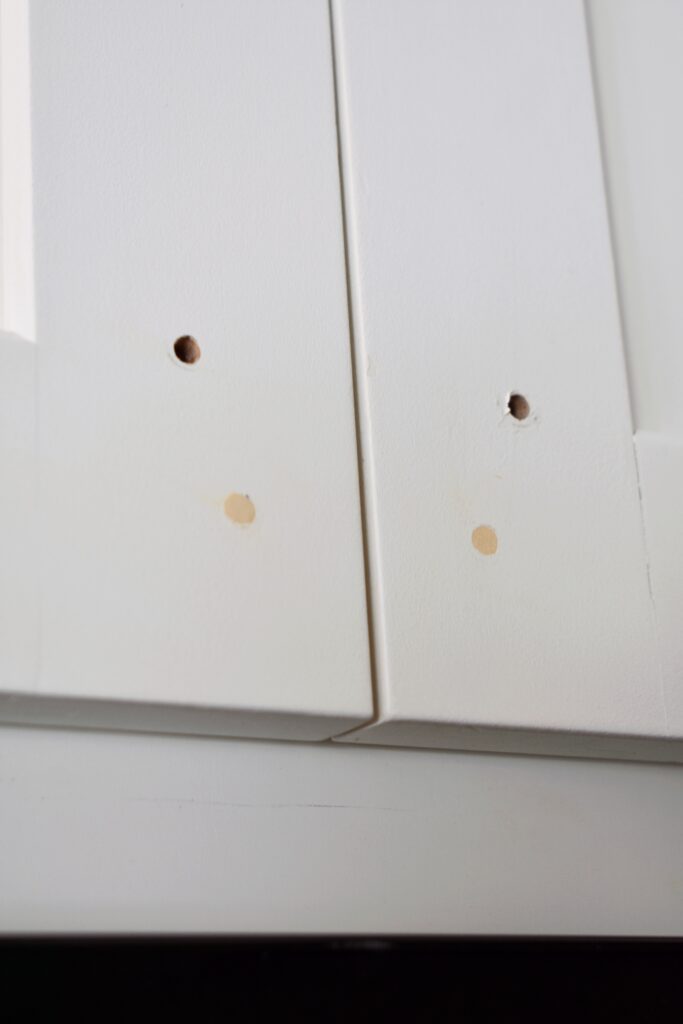
Going back to hardware – shortly after we moved in I installed black IKEA hardware throughout the kitchen, which is a really great and affordable option when you want to quickly finish off your space, but I always had in mind to eventually update the hardware to something more substantial so this seemed like the perfect time to tackle at least the upper half of the kitchen. I ended up going with these very modern matte black pulls from CB2 – these are the 6 in. option. Because I had to change the spacing I first had to plug the old holes – I just used some thin wooden dowels to fill the space and topped them with wood filler. Once they were primed and painted they became pretty unnoticeable.
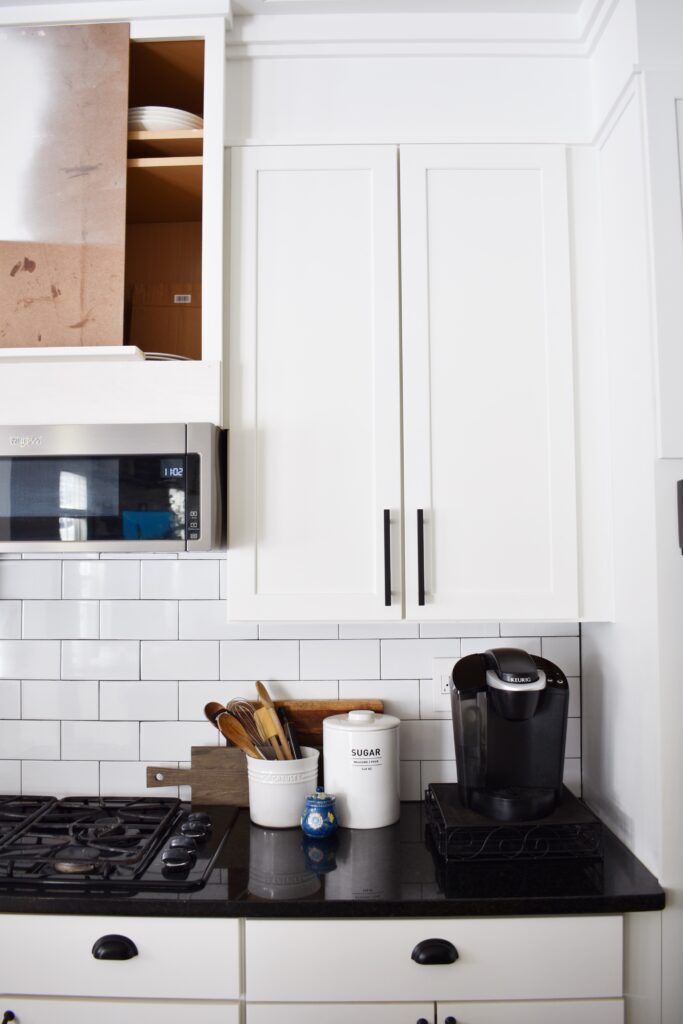
For one last twist – I decided not to put the cabinets over the microwave back on because I still had the look of a covered vent hood in my head and I didn’t want to let that go. Instead of having two small doors, I built a new larger door to cover the cabinet as well as a little shelf that I could use to add some artwork. Even though it looks like it’s just a flat panel, the door still swings open and I have access to the same storage that I had before. I forget to snap a good pic but you can see the start of the idea in the picture above.
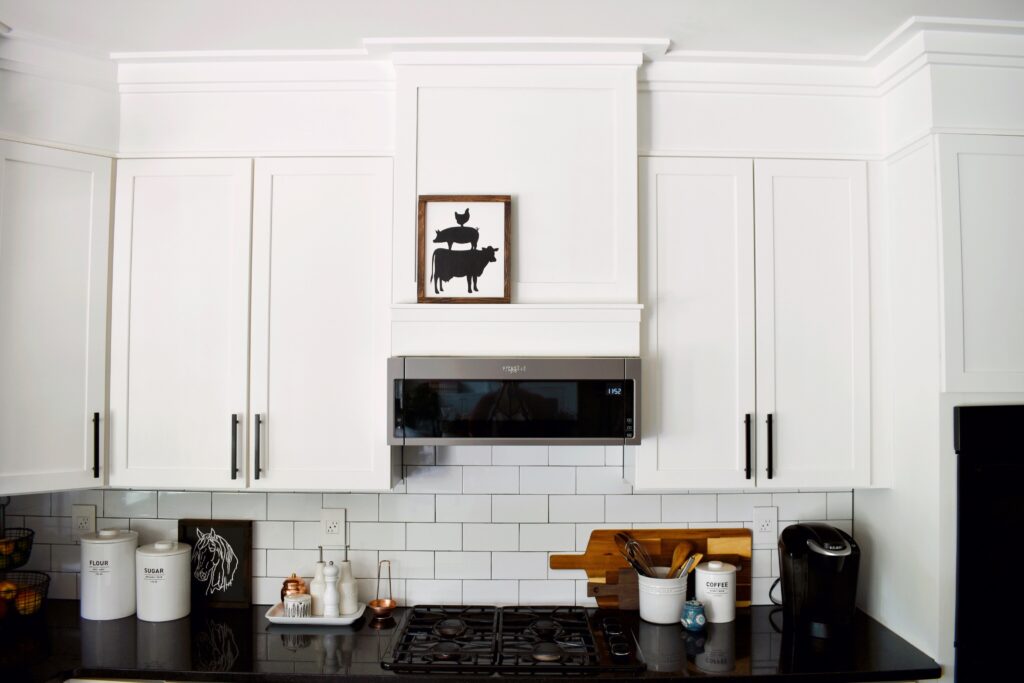
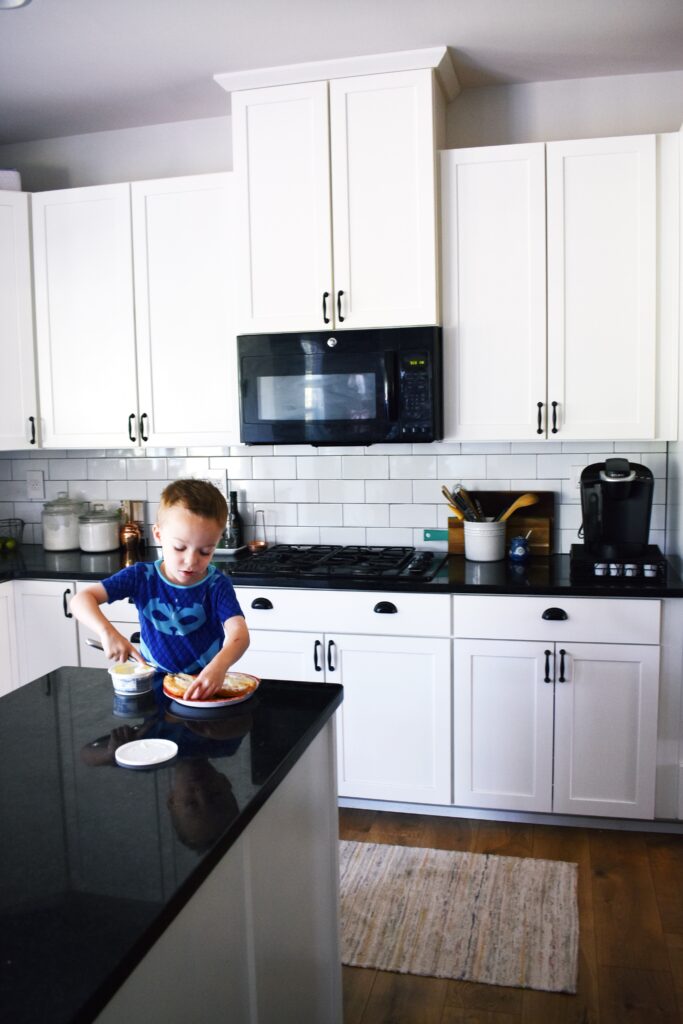
For now, the bottom of the kitchen is staying as is until next year. I’m still trying to decide on the exact combo of hardware I want for the drawers and doors, and I’m also toying with the idea of making new drawer fronts which would be a pretty big undertaking. But as I’m still basking in the latest updates I’m not in that much of a hurry. I knew that closing in that top gap would make the kitchen seem bigger, but what I didn’t expect was for it to feel so much brighter!

And of course it can’t be all work and no play, so getting some fun new accessories like this deep rust runner and a new pendant light for over the stove have made the whole kitchen feel like it works with the attached living room more, which is something I constantly struggle with.
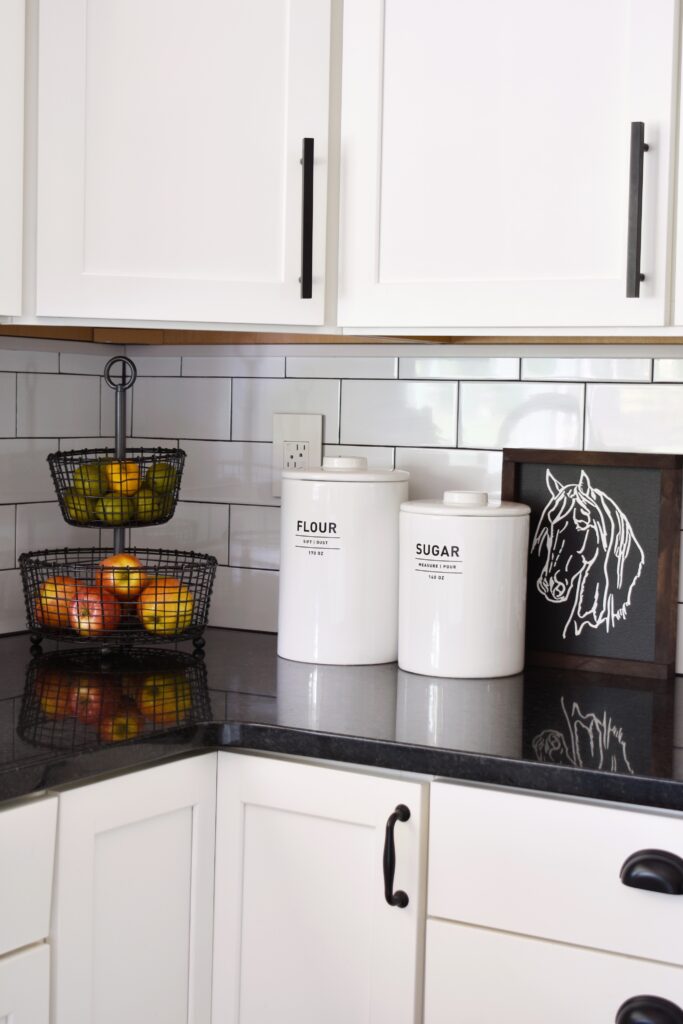
Black and White Canisters | Tiered Fruit Bowl | Horse Sign | Cow Animal Sign | Large Cutting Board | Kitchen Stools
I added some links below to some of the other kitchen goodies above, but if you’re looking to get a similar look be sure to also check out my Amazon Board where I’ve collected some of my favorite accessories for both outside and inside the cabinets! And because we all love a good before/after, here’s a side by side of last year and now. Just goes to show that a little DIY can do wonders for a builder grade kitchen.

Amazing effects for minimal costs of material
It is amazing what you can do without having to take on a full re-model!