Halfway point and somehow I ended up just about where I was hoping to be despite a few days being down with a sickness, an unexpectedly busy work schedule, and more than a few DIY obstacles that I was not expecting. My goal was to frontload this ORC with all of the heavy lifting so the second half I could play around with the details and with the biggest project checked off my list this week I’m very close to making that happen.
Week 1 / Week 2 / Week 3 / Week 4 / Week 5 / Week 6 / Week 7 / Week 8
NOTE: The products described in this post were provided by TOJA GRID. All opinions and experiences are my own.
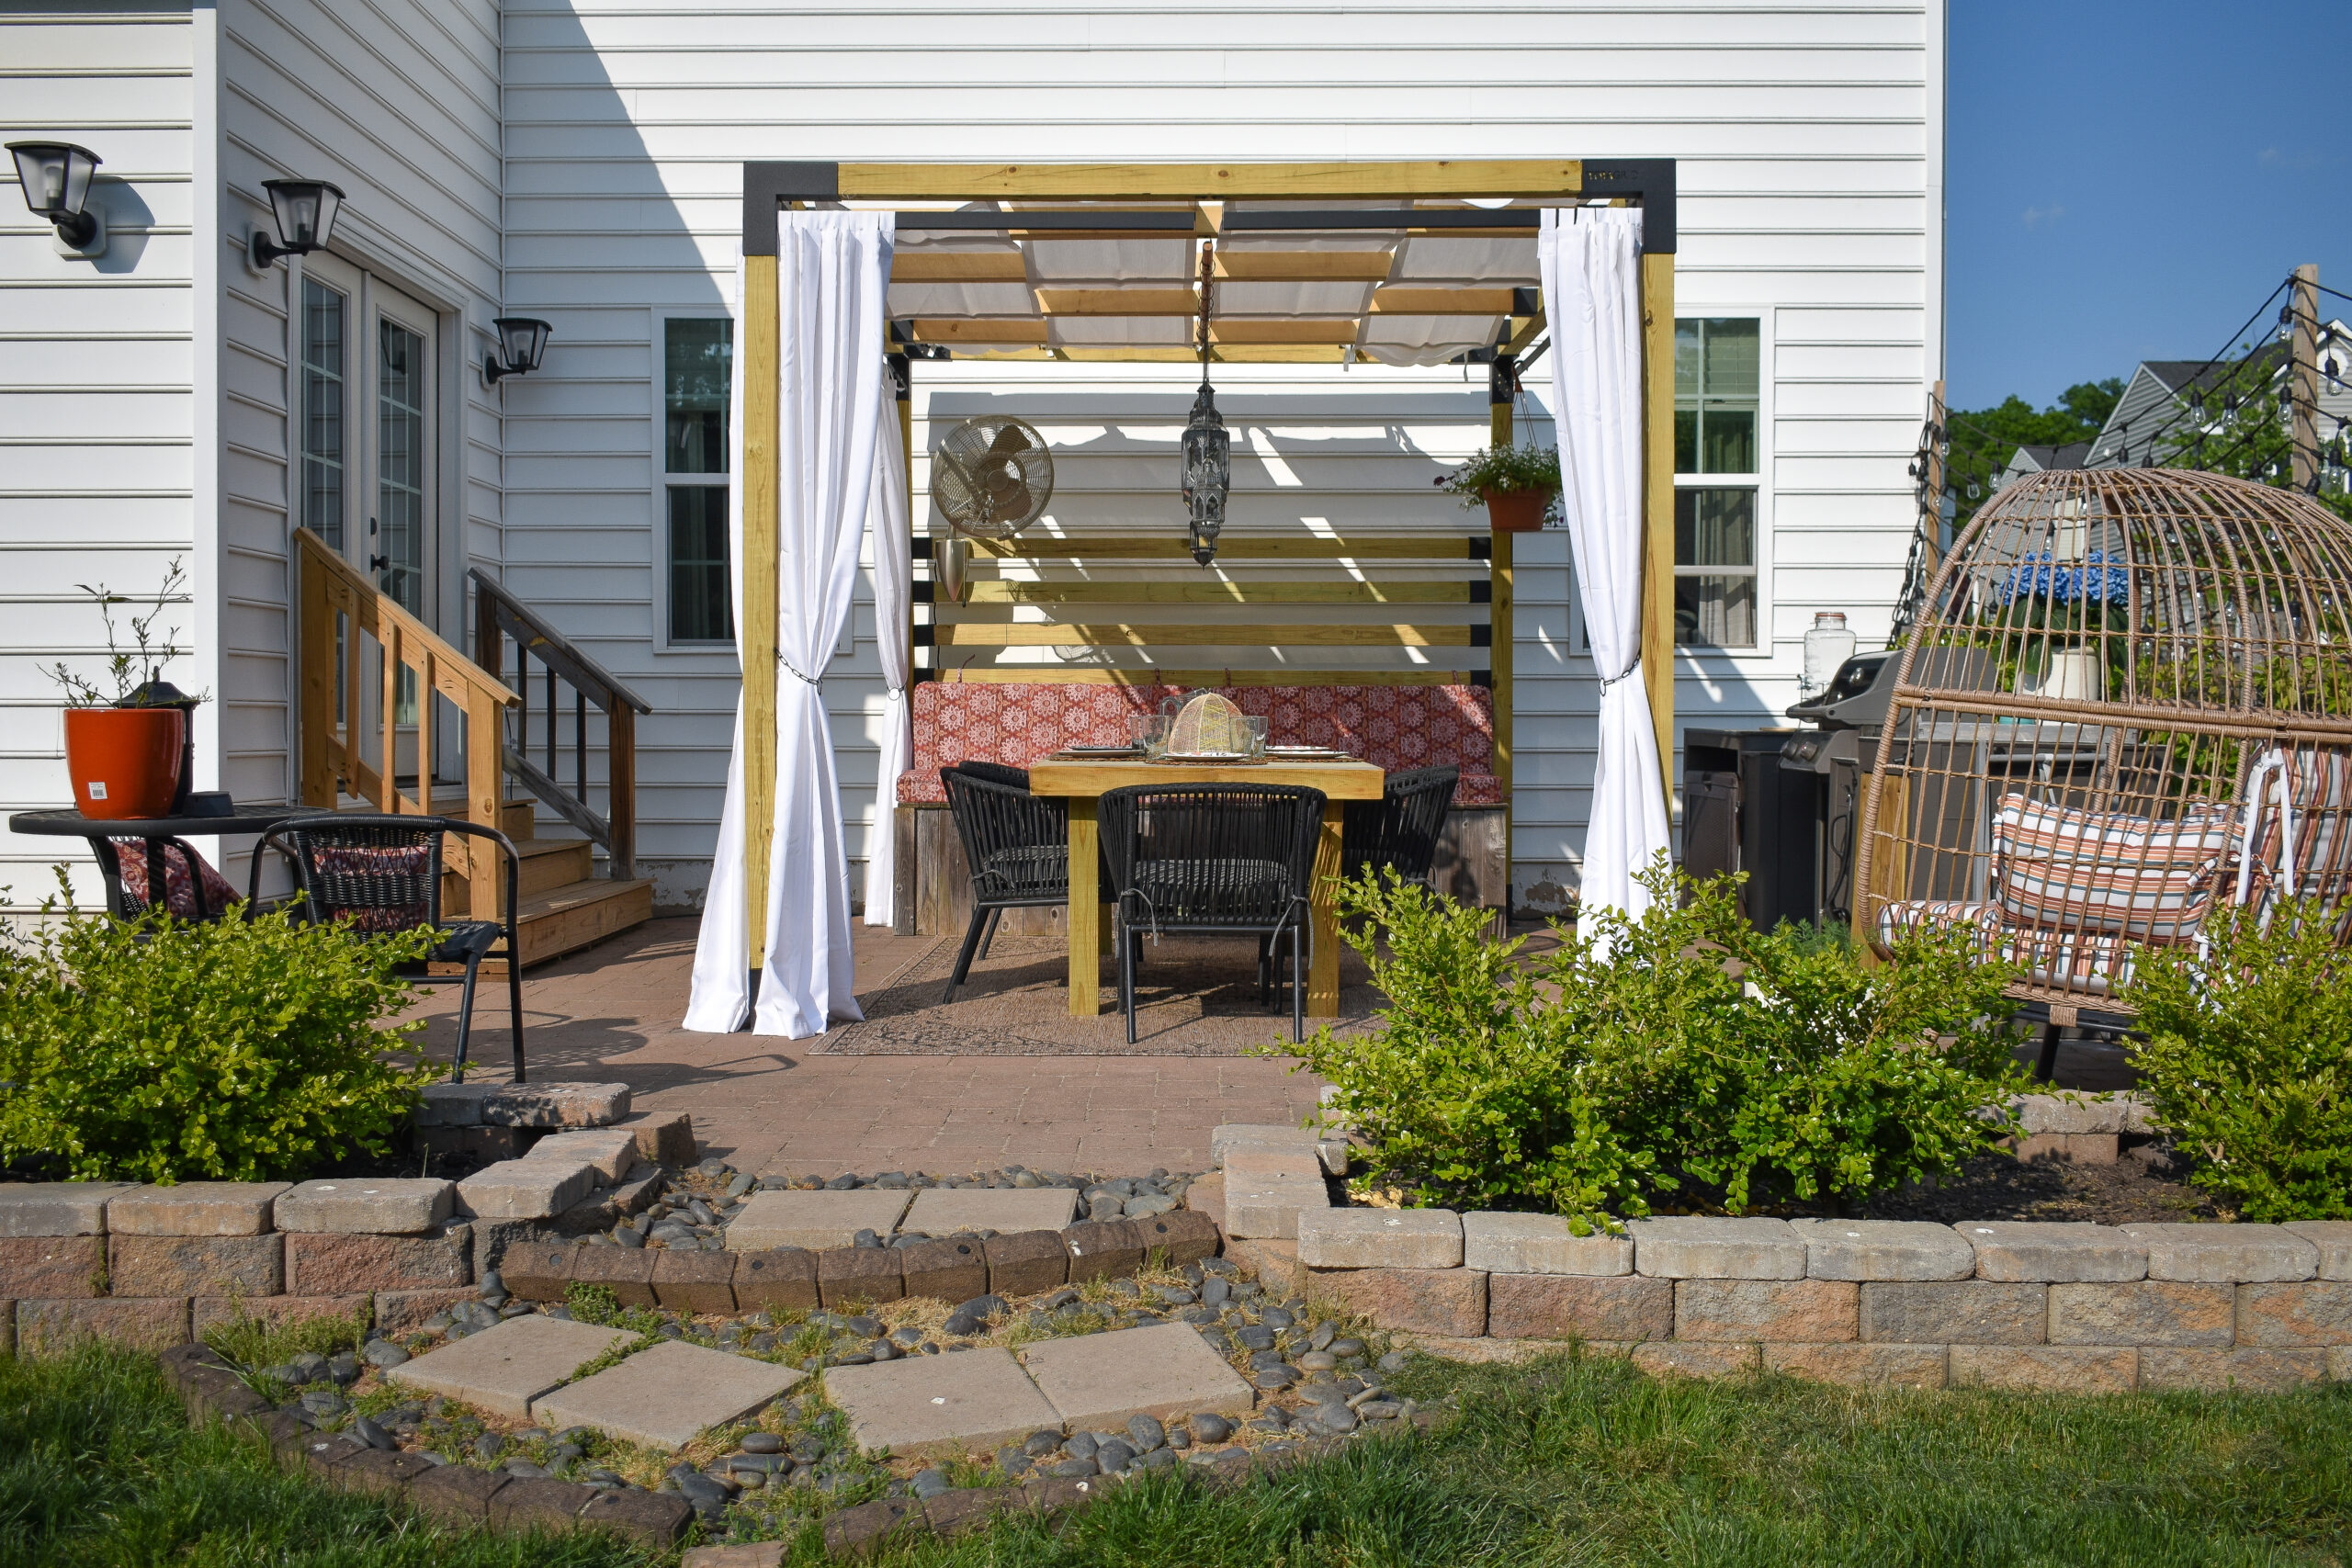
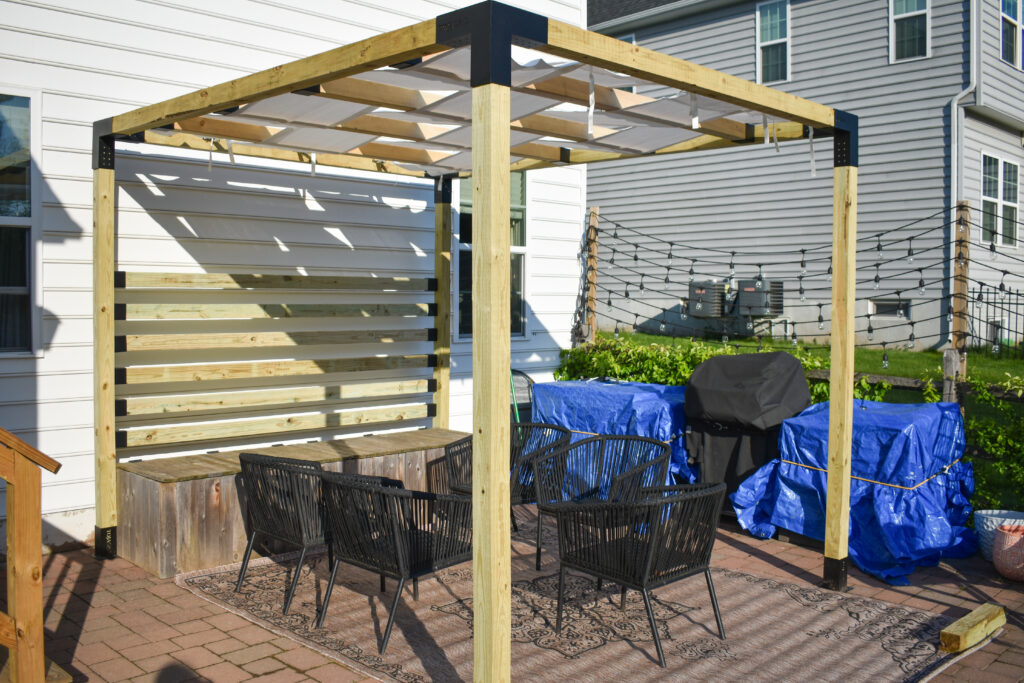
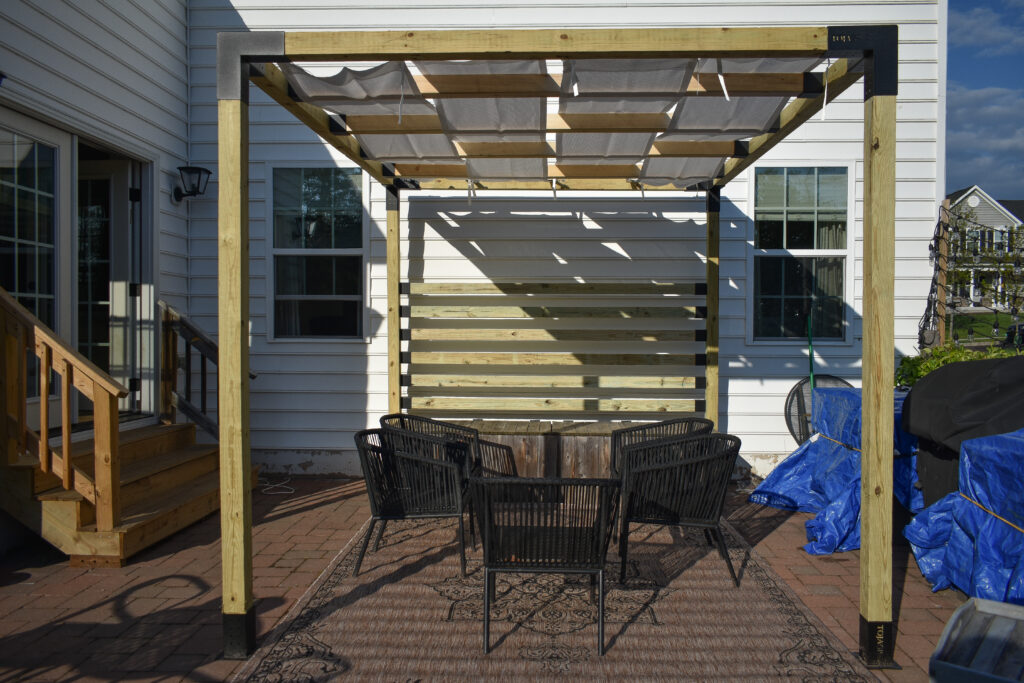
I’ve been anxiously waiting to start working on this pergola ever since TOJA GRID reached out to me earlier this year and luckily it was just as easy to put together as I was hoping it would be. What really drew me to giving one of their pergola kits a try was the customization capabilities. Their kits include all of the hardware that you need and you just supply the wood in whatever size you need for your space.
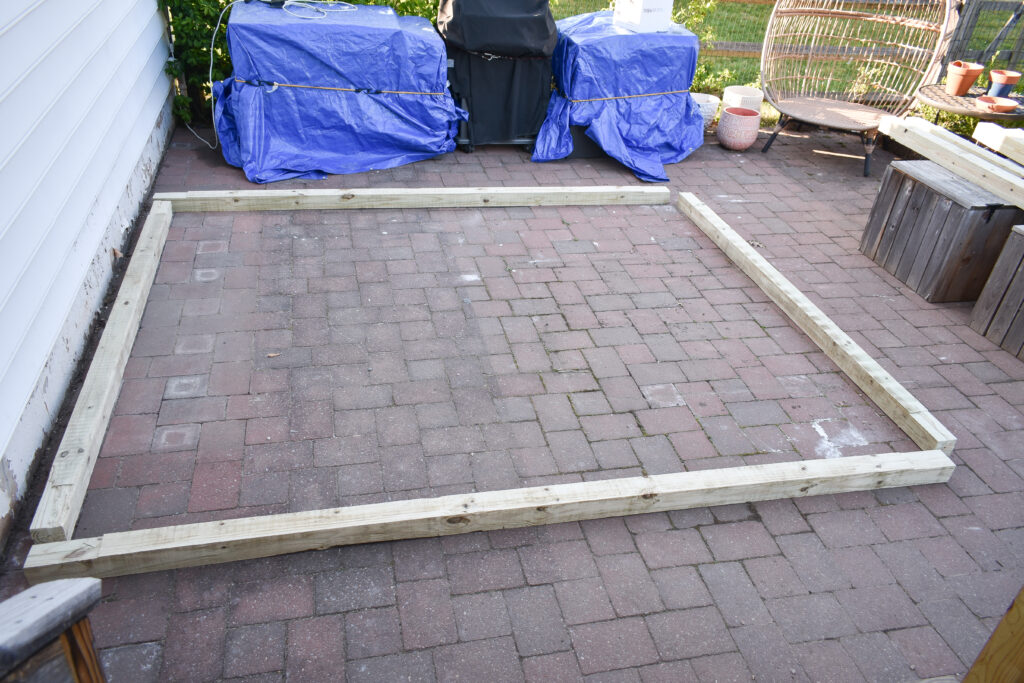
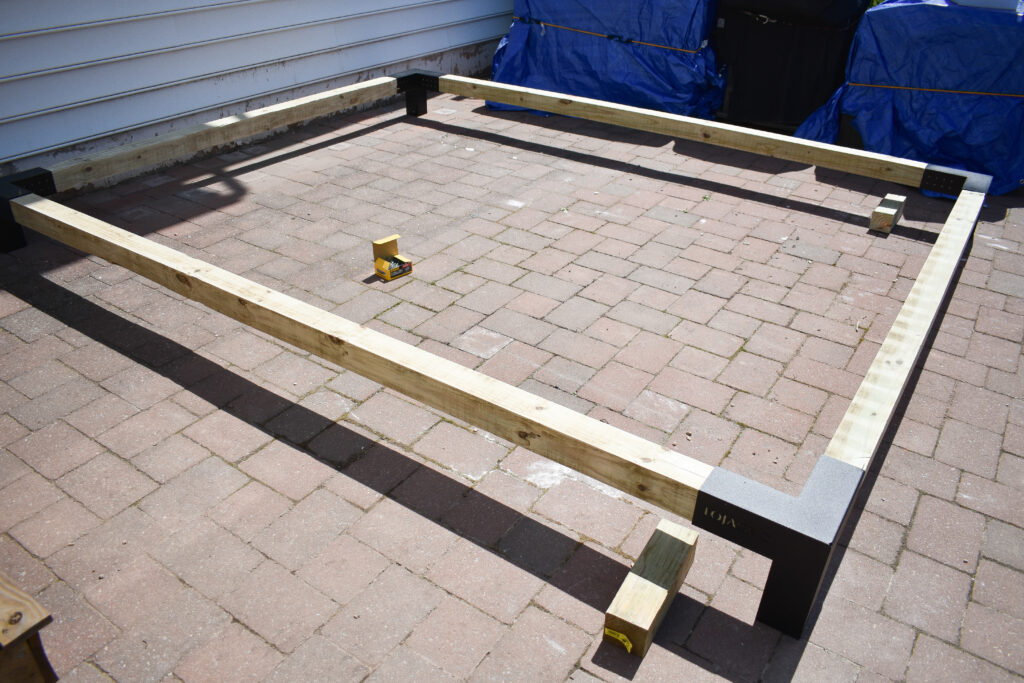
I went with the 4×4 Post Kit and drew up a design to fit the small footprint of my patio and fit snuggly around my existing storage benches, which will eventually have cushions and act as a banquette for the patio table. The basic structure went together in under an hour – first with me building the top and then enlisting help from my husband and brother to add the legs and anchor it into the ground. The metal brackets have already proved to be extremely durable, which I know because…….
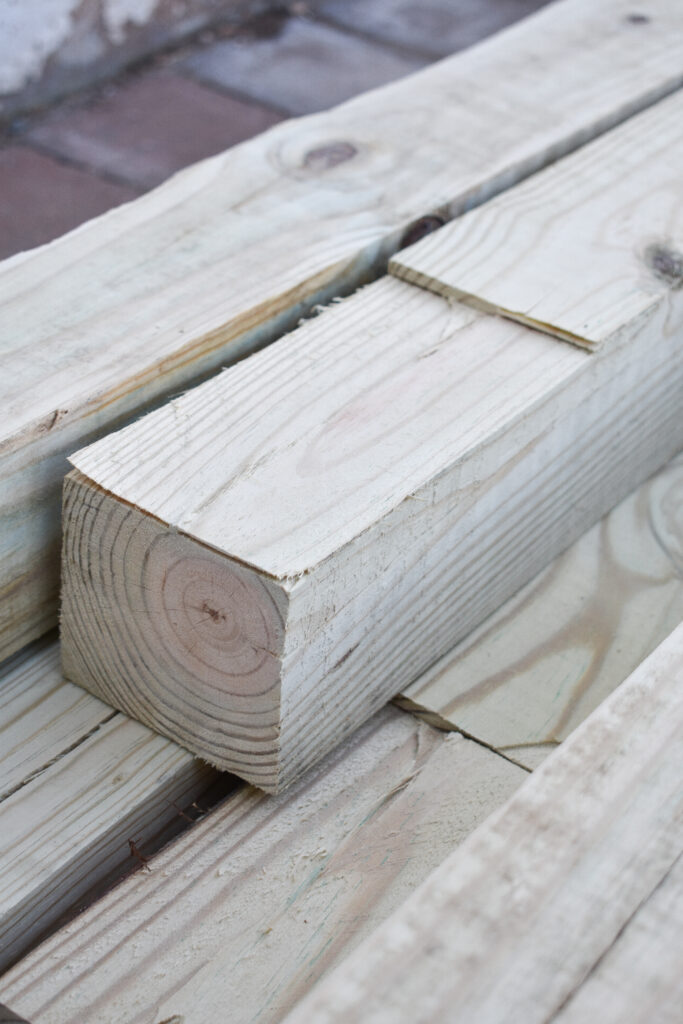
…..the one big roadblock that I encountered was that the 4x4s I had delivered from Home Depot were not exactly 3.5″ x 3.5″ so I had to use my circular saw to create notches in both ends of the posts so that the TOJA GRID brackets would fit — and when they wouldn’t I had to whack them more than once with my rubber mallet, but thankfully they show zero dents. Honestly, I was pretty unhappy about the extra steps especially since I was not feeling well, but once I saw how easily the rest of the pergola came together I quickly moved on.
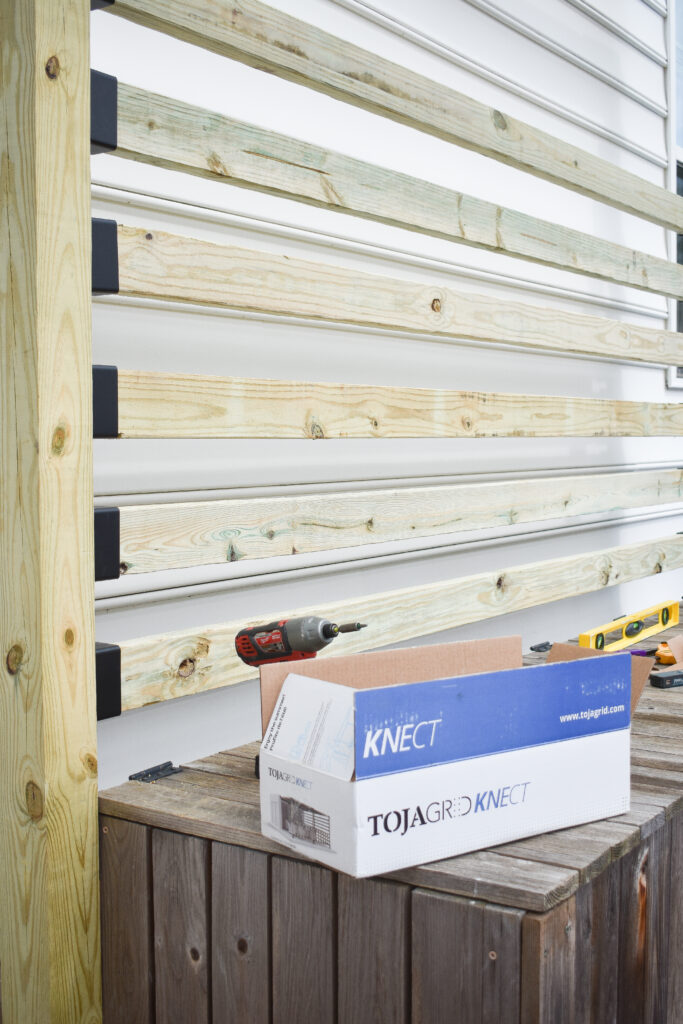
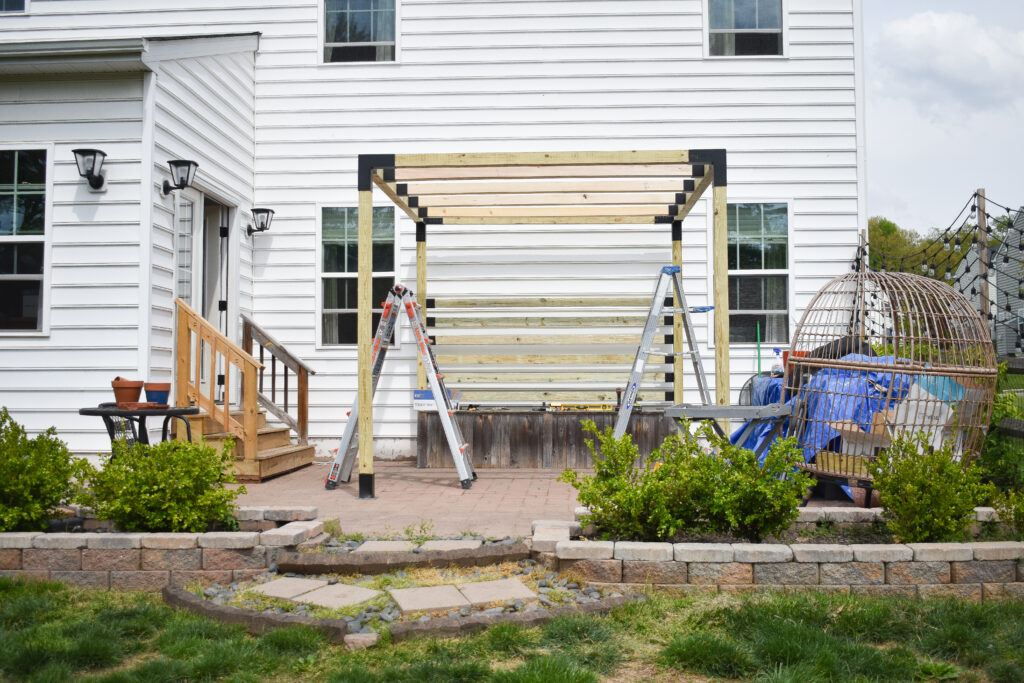
Once the frame was up and anchored, I started to work on the other customized options I chose to add – first being a modified privacy wall using the TOJA GRID KNECT system (check out their webpage for some really cool ideas of what else you can do with these brackets). Using 2×4’s, I added a back for the banquette seating but purposely left some room at the top because I have some ideas of how to use this space to add some more color.
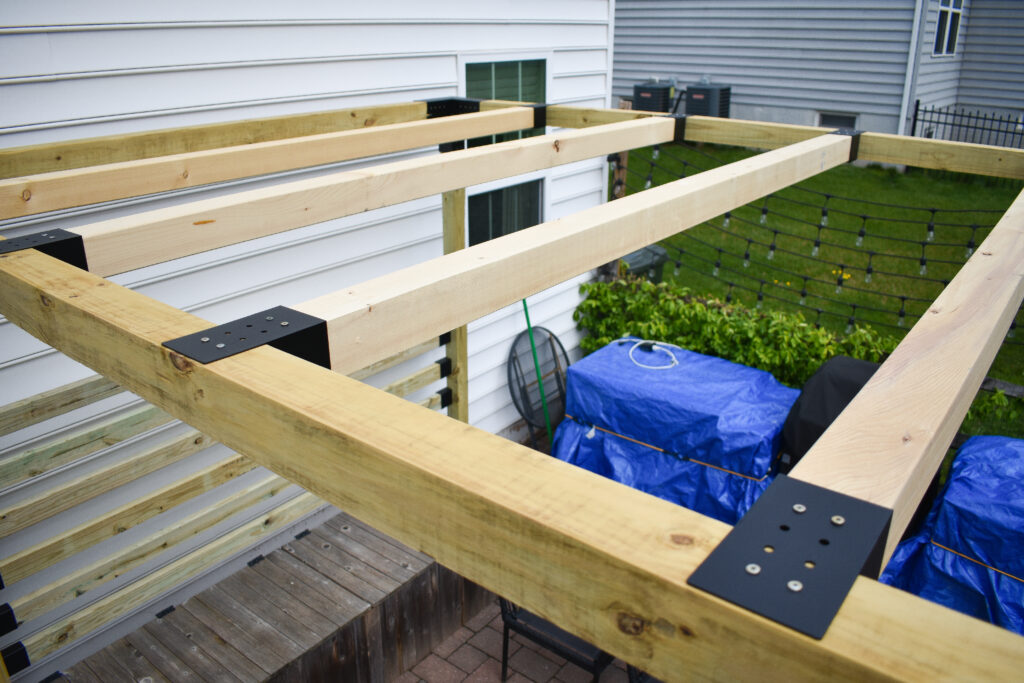
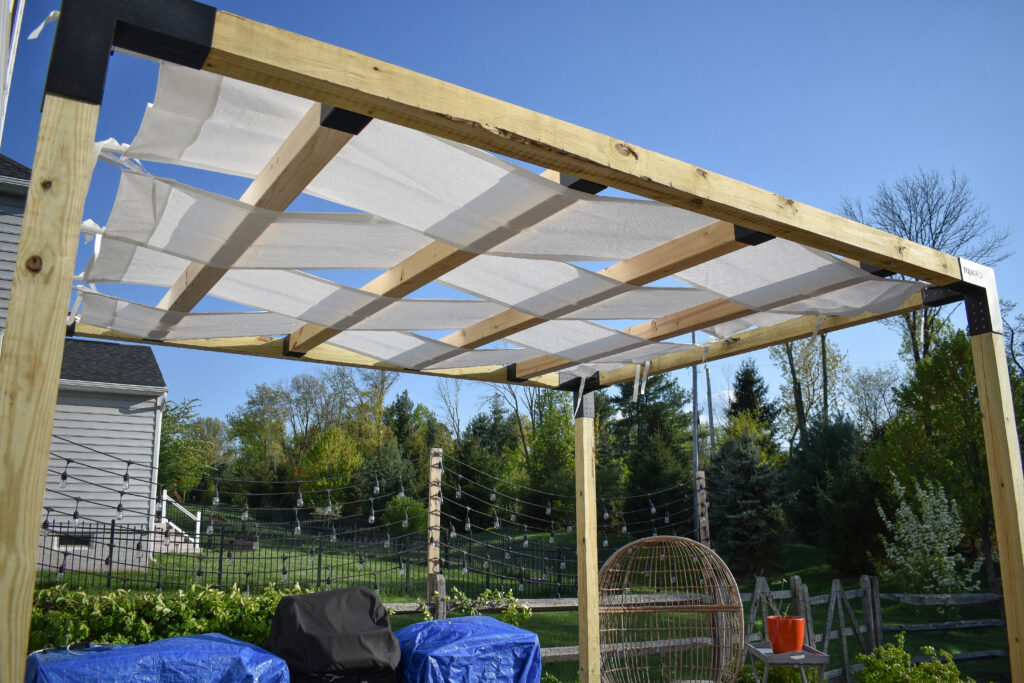
The other customized option that I’m really excited about is the Wave Shade Top Kit which I’m really hoping will make the summer heat more bearable. Again, it was super quick to put together using the TOJA GRID KNECT system which made it possible for me and my husband to lift and install this system of 4x4s all on our own.
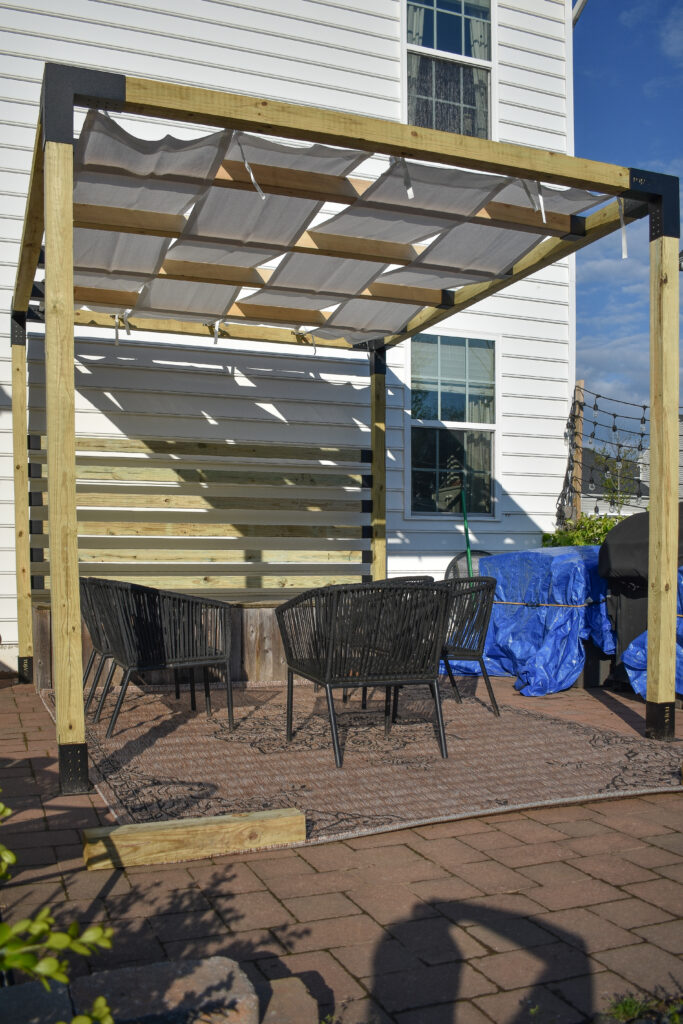
There’s still a few details I’m going to be adding, including the curtains and lighting, but before that I want to get the last messy part of this patio done — rebuilding the dining room table. After that I’m so looking forward to start having some fun with the design of this space!
If you’ve been thinking about adding your own DIY Pergola make sure you check out all of the options from TOJA GRID and use my code HILLTOWN to get 10% off. Not only do they have Pergola kits, they also have furniture, tons of cool accessories for your backyard and patio, and some really fun options like hammocks and ice skating rinks!
A big thank you to my sponsors this ORC – Kichler Lighting and Toja Grid.

And don’t forget to check out what all the other featured and guest participants are up to each week on the One Room Challenge blog!